Welcome to Day 2 of Stripping my Mazda MX-5. This post is an overview of what we did and the approach we took with stripping the vehicle. It is not intended to be a step-by-step guide of how to go about it. There are already plenty of good resources which provide this detail as I covered in a previous post.
What I do cover here is some of the things to watch out for and areas where the approach we took deviated from the YouTube videos and why. I have included a time-lapse video below to give you an impression of how it went on Day 2. Hopefully, this is a more custom guide for MK Indy RX-5 builders. So here goes.
Work Completed on Day 2
Today was building on the success of Day 1 and finishing the removal of the wiring harness. The main focus was on the engine bay to remove the complete engine harness from the multitude of connectors. We also started to delink cables and pipes from the shell ready for shell removal on Day 3. Here is the order in that things got removed:
Dashboard
We actually finished off the removal of the dashboard at the start of Day 2, but the write-up for it is covered in the Day 1 post and video to keep it all together.
Front Brakes
Now before you do anything to the braking system make sure you follow my advice in my Day 1 post. Remember to remove each wheel and crack/ undo the hub nuts. This will save you a lot of time later on if you forget as we did…
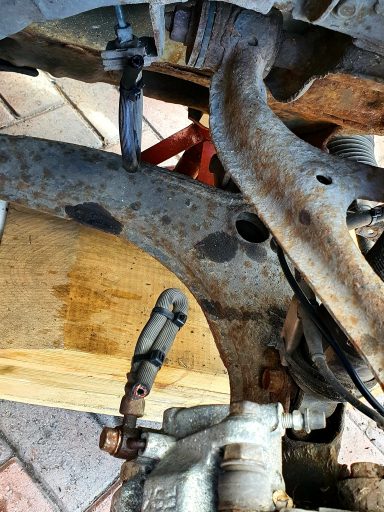
We then simply cut the 2x front brake lines at the flexible hose, as this is the point it goes from shell to Sub-frame. Make sure you catch any brake fluid as you do this. We pumped the brake pedal a few times to drain as much fluid from the system as we could after the first cut. We then simply cable-tied back the flexible pipe to keep it out the way and to stop further fluid from coming out.
Handbrake
The handbrake cable was removed from the handbrake lever and the handbrake unbolted and removed from the car. At the rear the handbrake cable was removed from each of the hubs. On one side we had to cut the cable as the fixing was stuck. I’m going to replace the cable anyway so this wasn’t an issue.
Drain Coolant
We then drained the engine coolant by simply removing the bottom connection on the radiator. Make sure you drain the coolant into a container and dispose of it correctly, don’t just pour it down the drain. If you spill any, clean it up well with lots of water as animals are attracted to the sweet smell of the water but it is harmful to them.
Radiator
We then removed the radiator once the coolant was drained. This was straightforward with a couple of fixings at the top and disconnecting of the hoses.
Immobiliser
I had an optional extra immobiliser on the car. It looks like it was factory installed but as an add-on optional kit with the way, the loom for it was installed. I want to preserve this for the MK Indy RX-5 as it will help with the IVA and give me better overall security. Also in many respects, it will probably give me more issues to remove it than to leave it in the loom. The immobiliser wiring loom goes from the engine bay, through the firewall, and into the cabin where the control box is. To remove the wiring loom the immobiliser horn/ speaker needs to be disconnected in the engine bay by removing a couple of screws in the back of the speaker unit and disconnect the plug.
Engine Wiring Harness
The key to the engine harness is to be methodical. Start at one side of the engine and start unplugging all of the connectors and label them as you go. It’s a good test of your knowledge of the engine, knowing your MAF sensor from your throttle position sensor. If you don’t already know what’s what then it’s a great time to learn! The diagram below is a good overview.
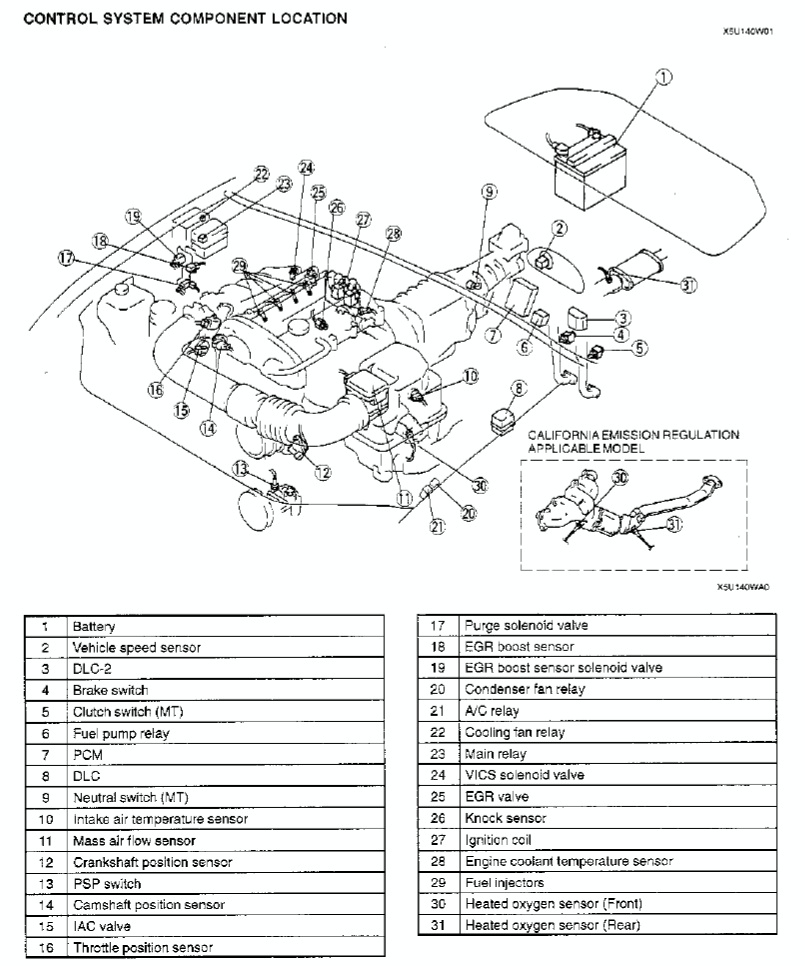
The one good thing, as I have said in previous posts, is that each connector is unique on the MX-5, so if you are using the standard loom in your build it shouldn’t be an issue when it comes to plugging it all back together again.
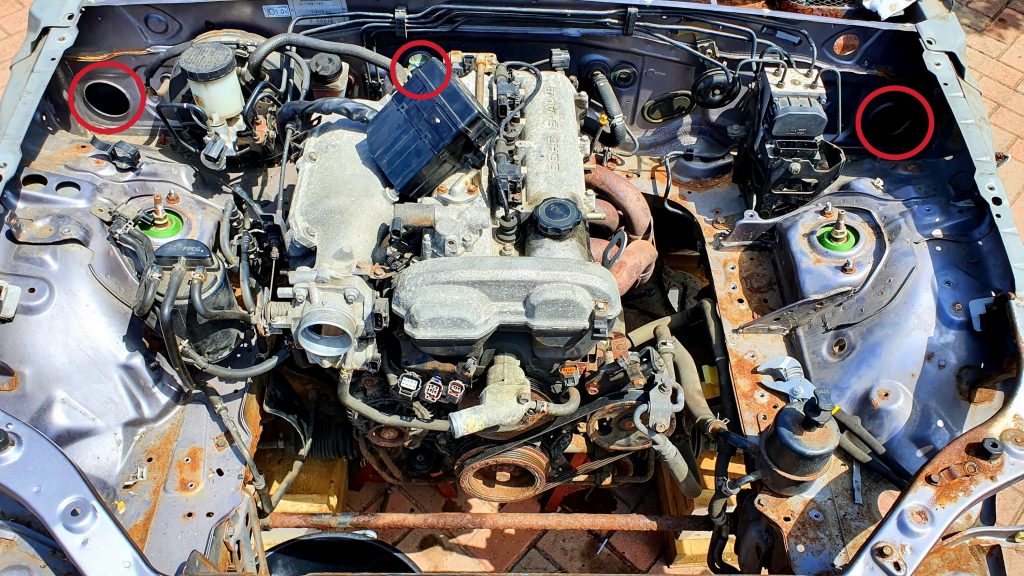
There are 3 main points the wiring harness passes from the engine bay through the bulkhead and into the cabin. These are shown circled in red in the image below. Once all the connections from the engine and ancillaries are removed you need to feed each part of the loom into the main cabin area through these pass-throughs. Push the large rubber seals through first. This is where a pair of hands inside the cabin to help pull through the loom really helps.
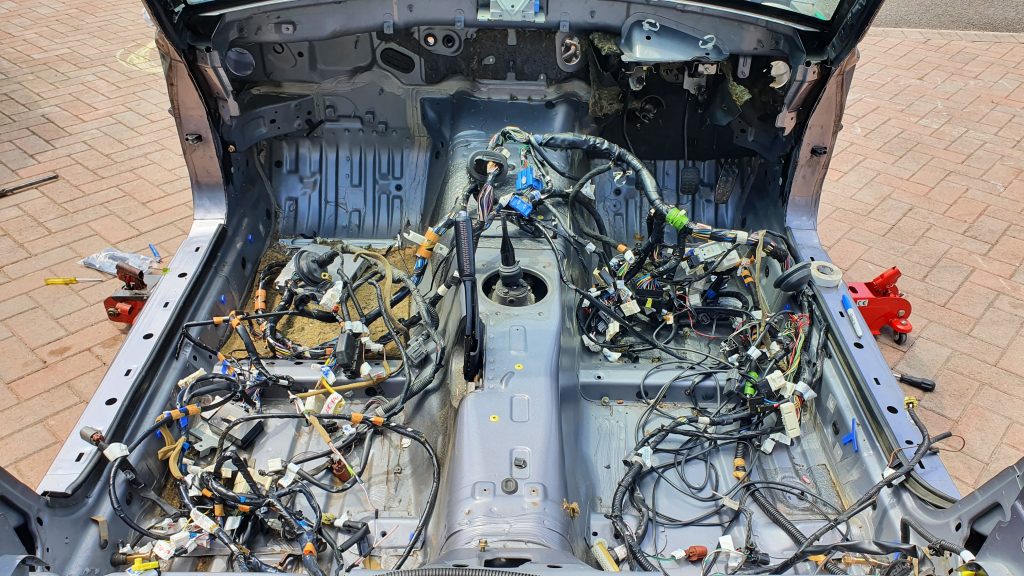
Once you have done this you should end up with a large pile of wires something like the photo below. At this point, if you have also successfully detached everything from the rear of the vehicle, you can lift the loom from the vehicle and marvel at your achievement for a few moments!
Fuse Box
The only wiring that should be left is the main fuse box you can see perched on top of the engine in the image above.
Now, this is where we deviated to both of the YouTube series videos that we used as a guide. The videos we watched in preparation for stripping my Mazda MX-5 showed a lot of effort to remove this fuse box and the associated cabling from the vehicle, before separating the shell. There is no need to do this. This fuse box only has 2 main power cables remaining that run the length of the vehicle to where the battery was in the boot. So if you temporarily strap the fuse box to the top of the engine then the wiring harness from the fuse box to the rear of the vehicle is attached only to the rollerskate parts and not the shell.
All you have to do at the rear, where it goes to the battery compartment, is push the cables down through the shell to under the vehicle and we wrapped them up and strapped them out of the way to the roller skate frame. See image below. The blue circle is the fuse box, the red circle is the coiled-up cable. You can see it connected to the rollerskate frame all the way down from front to back.
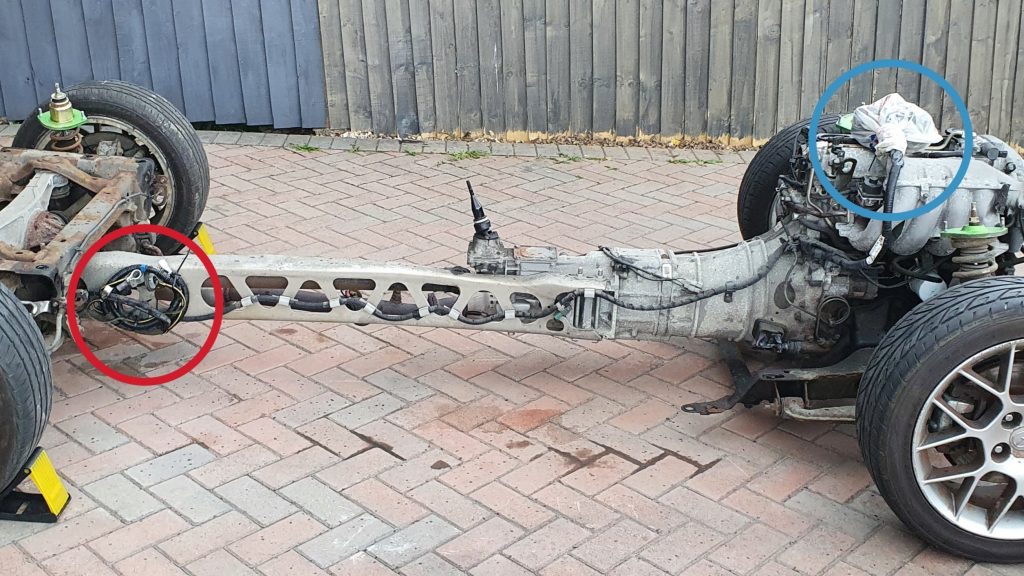
So by leaving this in place it saves time as it is not required to separate the shell. It also means that you then get easier access to remove it once the shell is off.
Pedals
We then removed the pedals, which is pretty straightforward by removing all the fixings. This allows the remaining insulation to be removed from the bulkhead and gives you better access to the fixings for the steering column.
Steering Column
Now it was easy to undo the steering column fixings at the shell and easy to undo the bolt at the spline end, but the spline was not going to budge to separate the column. A heavy dose of penetrating oil and a 10-minute wait didn’t help.
Luckily my Dad had brought his slide hammer with him that he made himself many years before. He also happened to have the correct fitment to attach to the steering column inside the cabin. After a few energetic bashes later by Dave with the slide hammer, the spline finally give up grip and came loose. Having the right tool for the job makes a big difference!
Miscellaneous Parts
Throughout the day of stripping my Mazda MX-5, we also removed lots of different smaller parts that may have sale value or might come in handy later. This was also to help clean the shell up for it being scrapped the following day. This included:
- Bonnet stay;
- Bonnet catch;
- Horns (of which there are 3 would you believe!);
- Wipers and motor;
- Bonnet hinges.
Jacking the Car Up
We then jacked the car up to be able to get right underneath the car for the next stage. Now, this is not quite so straightforward to do safely on my slightly sloping drive. So we put the front wheels back on and placed the front wheels on ramps so we weren’t reliant on axle stands both at the front and back. We then jacked up the rear and used axle stands to raise the entire vehicle high enough to get underneath.
Under Body Bracing
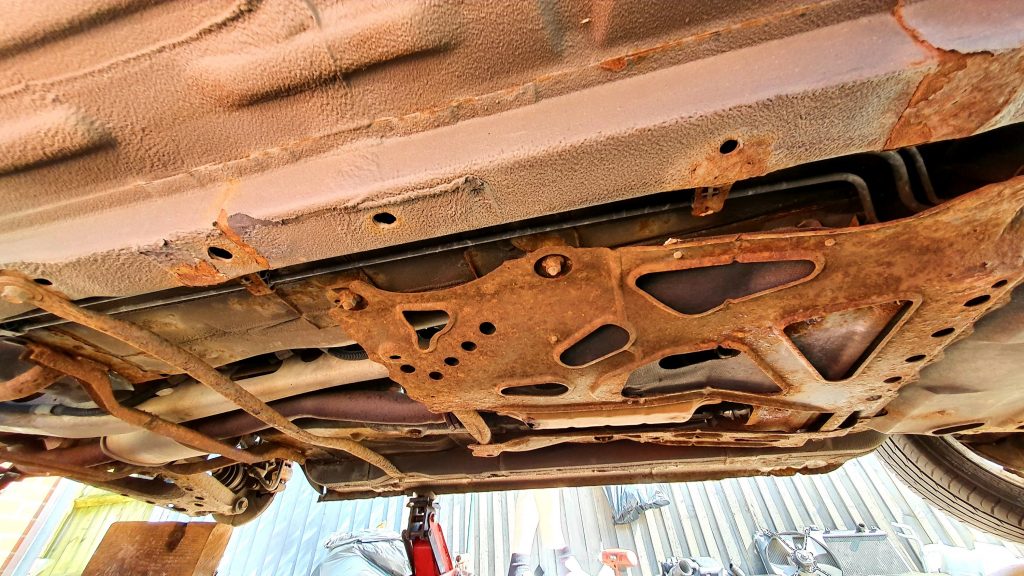
We were then able to get to the underbody bracing with ease. We had preempted this moment by spraying all of the bolts with penetrating oil in the morning to give us a fighting chance.
This is where you need a good breaker bar as some of these bolts are rather tight and have been exposed to the elements so could be quite rusty and difficult to get off.
As luck had it all the underbody brace bolts came undone with ease and allowed us to remove all bracing without any issues.
End of Day 2 Summary
Now that was pretty much it for Day 2 of stripping my Mazda MX-5. We were once again pretty pleased with the progress and it looks like we are on track for the removal of the shell on Day 3!
Time-lapse Video
Here is a time-lapse video of us stripping my Mazda MX-5 donor vehicle to provide a view of what we did.
Gallery from Day 2
Summary of Build Costs and Hours
Here is a summary of the costs and person hours (total number of hours for every person that has helped) for the build so far. This should hopefully help others with the planning of their builds, by providing cost and time actually incurred for this build. A more detailed breakdown of all the costs and hours worked on the build to date can be viewed here.
| Person Hours Worked This Post | |
|---|---|
| Donor Strip Day 2 (3 people) - Remove Dashboard, Wiring Harness, Radiator, Air Ducting | 31 hrs |
| Totals | This Post | To Date | All Posts |
|---|---|---|---|
| Person Hours Worked | 31 hrs | 63 hrs | 404 hrs |
| Car Build | £0 | £765 | £13,202 |
| Tools / Consumables | £0 | £168 | £470 |
| Total Cost | £0 | £933 | £13,672 |


