
So this is finally it, the formal start of my kit car dream! I bought the donor vehicle for the build back in November 2020. Now it is time for stripping my Mazda MX-5 apart for the donor parts to build an MK Indy RX-5. I spent plenty of time preparing for this moment so now it was time to take the plunge and get on with it.
This post is an overview of what we did and the approach we took with stripping the vehicle. It is not intended to be a step-by-step guide of how to go about it. There are already plenty of good resources which provide this detail as I covered in my previous post.
What I do cover is some of the things to watch out for and areas where the approach we took deviated from the YouTube videos and why. I have included time-lapse videos of each stage to give you an impression of how it went. Hopefully, this is a more custom guide for MK Indy RX-5 builders. So here goes.
Night before Preparation
The night before we started stripping my Mazda MX-5 we moved the car into position and took some obligatory last complete car photos…
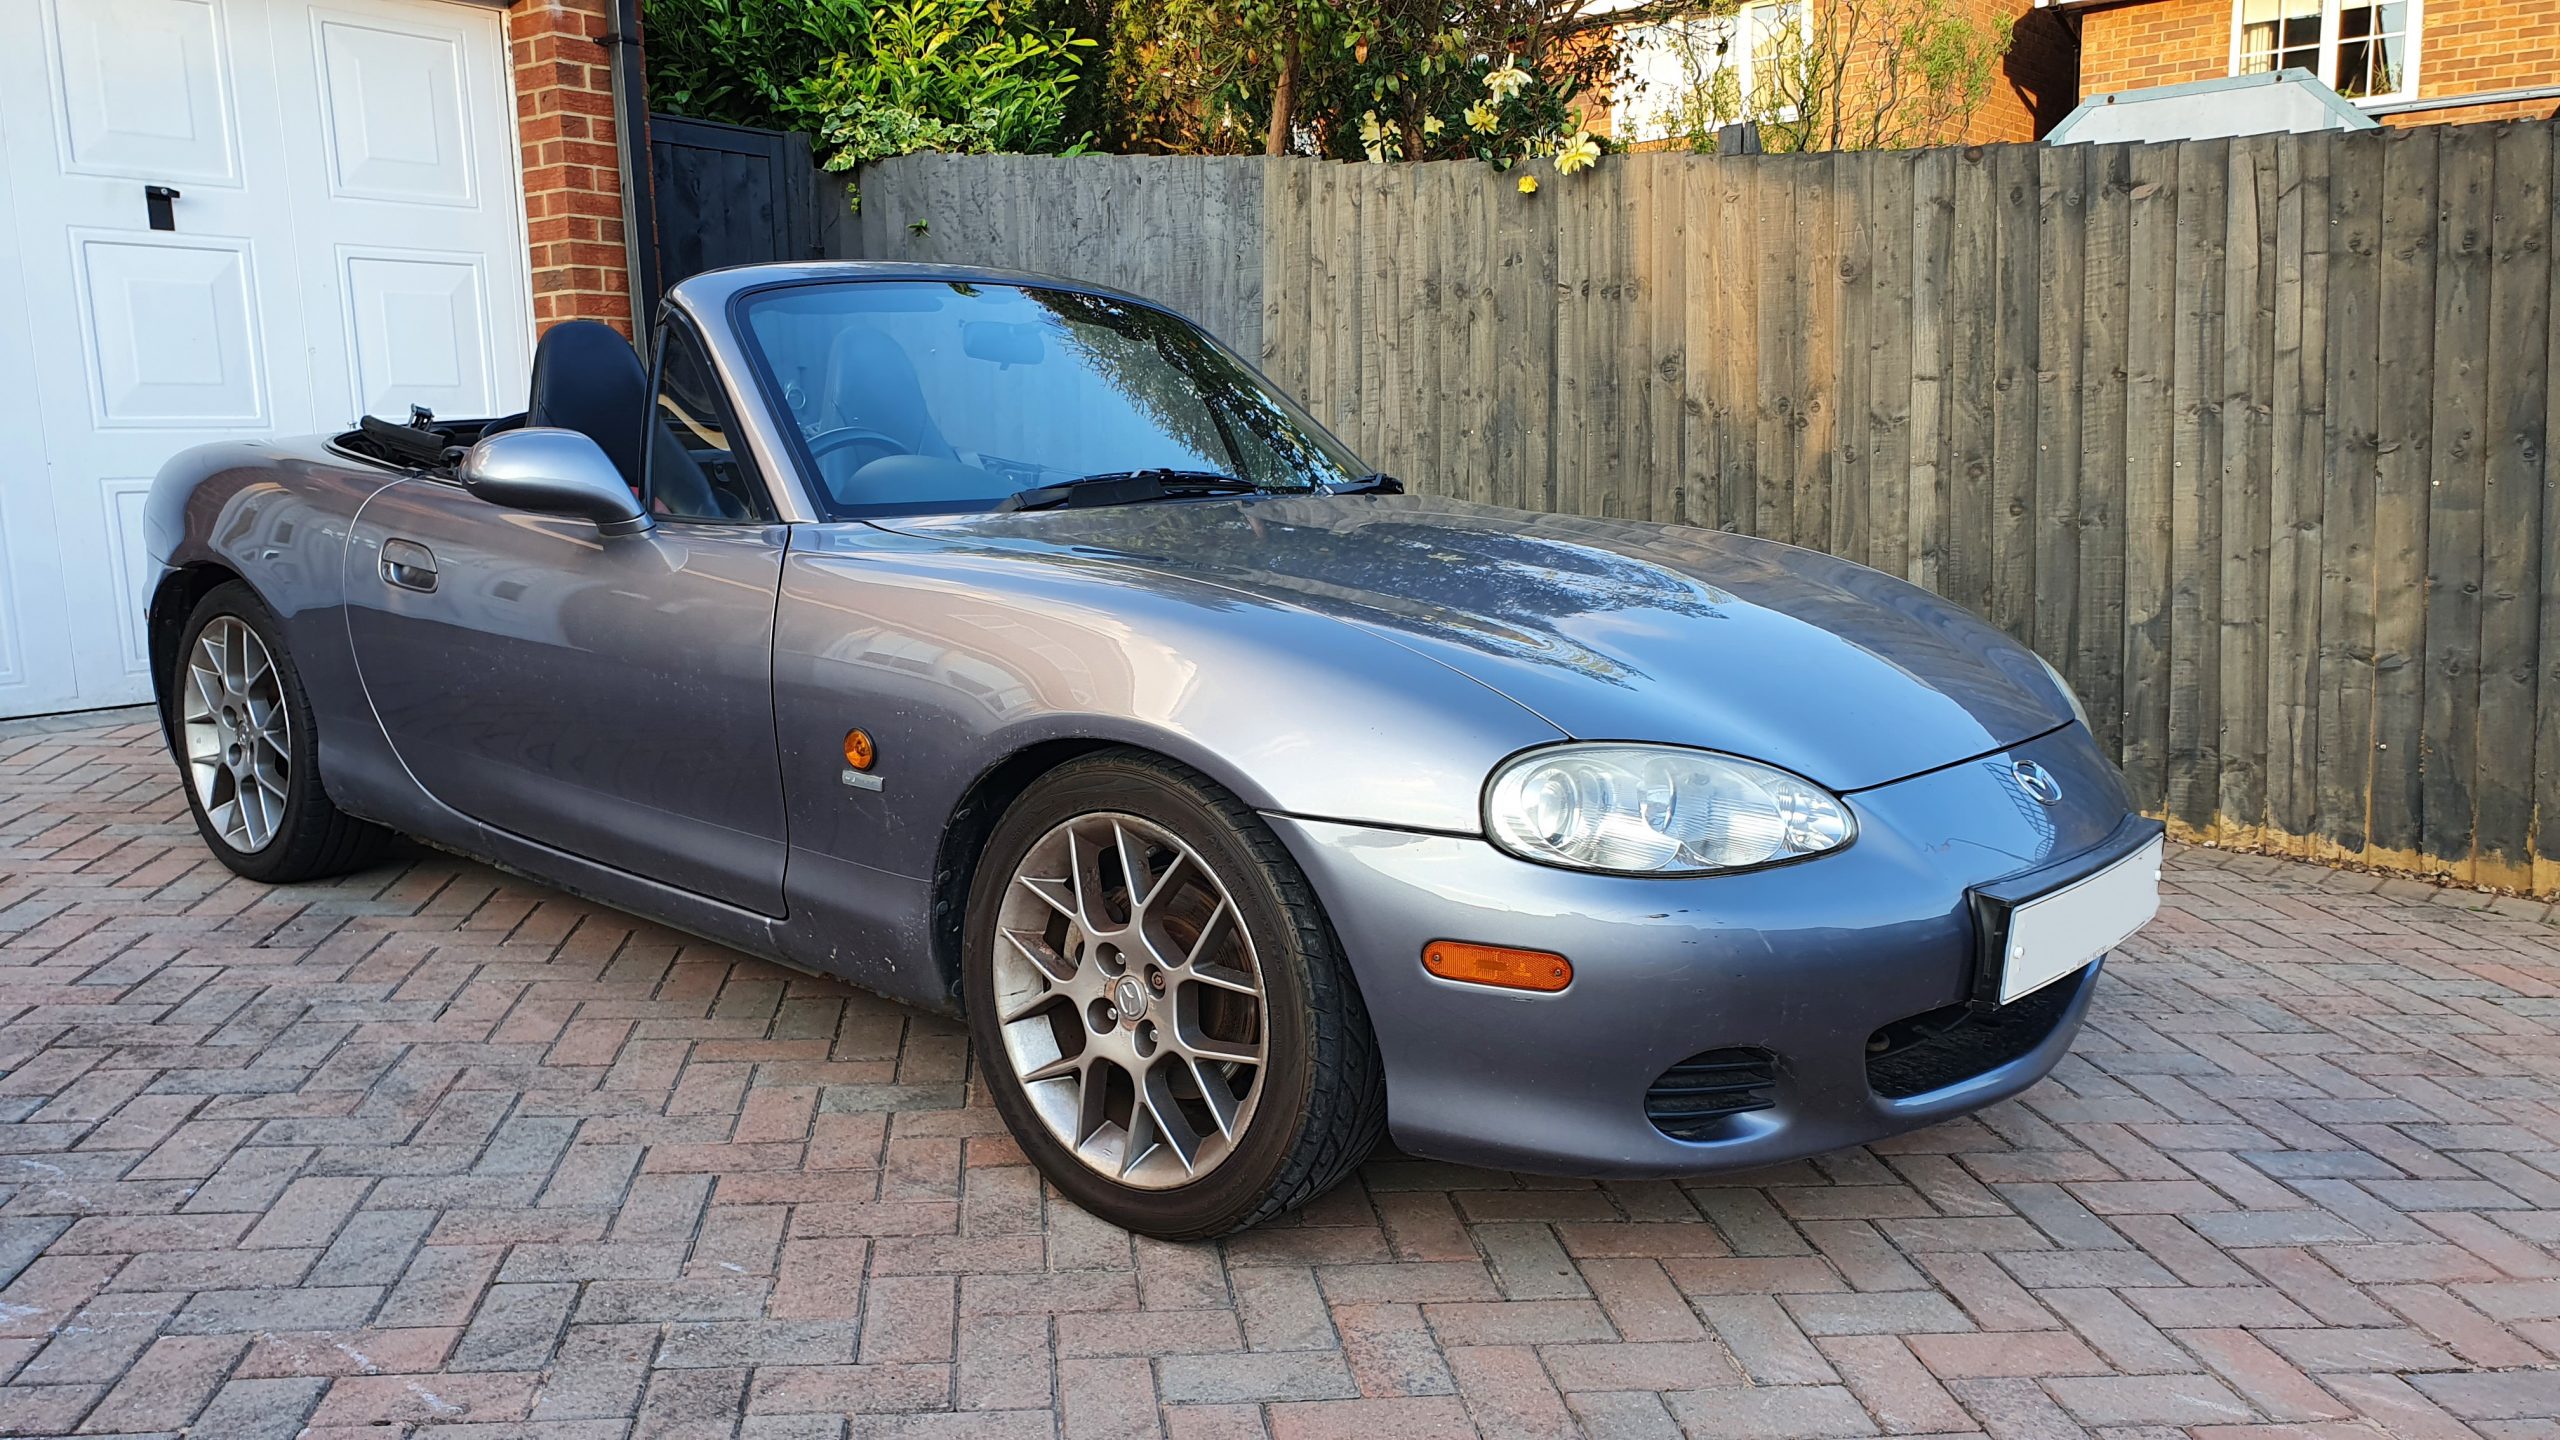

This meant the car engine would be cool to work on the following day. We also sprayed Plus Gas Penetrating Oil on all the key bolts around the car that we could get at to allow it to soak overnight.
Work Completed on Day 1
Our approach was to remove all of the main components at the start to get them out of the way. Here is the order in that things got removed:
Battery Removal
this is important to do first for safety, to make sure there is no power to anything as you start unplugging things. Particularly important when you get to the airbags. Just remember to remove any CDs from the radio (we nearly left an Oasis CD in there!) before you remove the battery. I would also suggest you wind down the windows to keep them protected once they get removed before battery removal.
Seats
Remember the connection under the seat if you have heated seats.
Rear Speaker/ Windbreak
A quick and simple unbolt in a few minutes as per Pixel Armory Episode 1;
Centre Console
A couple of fixings inside the armrest and in a Mk2.5 don’t forget the additional fixing underneath the window switch. Simply prise the switch out with a fine flat screwdriver and remove the screw. A couple more fixings down the front and it lifts straight out. Don’t forget to disconnect the cable underneath.
Seatbelts
A quick and simple unbolt in a few minutes as per Pixel Armory Episode 1.
Interior Carpet
This is the carpet behind the seats, for the moment we left the floor carpet intact to give us a bit more comfort and to protect all the cables underneath.
Roof
Straight forward as per Pixel Armory Episode 1. One benefit of being outside was that we didn’t need a torch like they did!
Rear Parcel Tray
Simply remove multiple fixings and the metal lid removes to expose cable runs to boot.
Boot Lid
My Dad and my boys found the remaining boot hinges were good as mini catapults for launching random bits of vacuum pipe down the drive!
Bonnet
Remember to disconnect the washer pipe first!
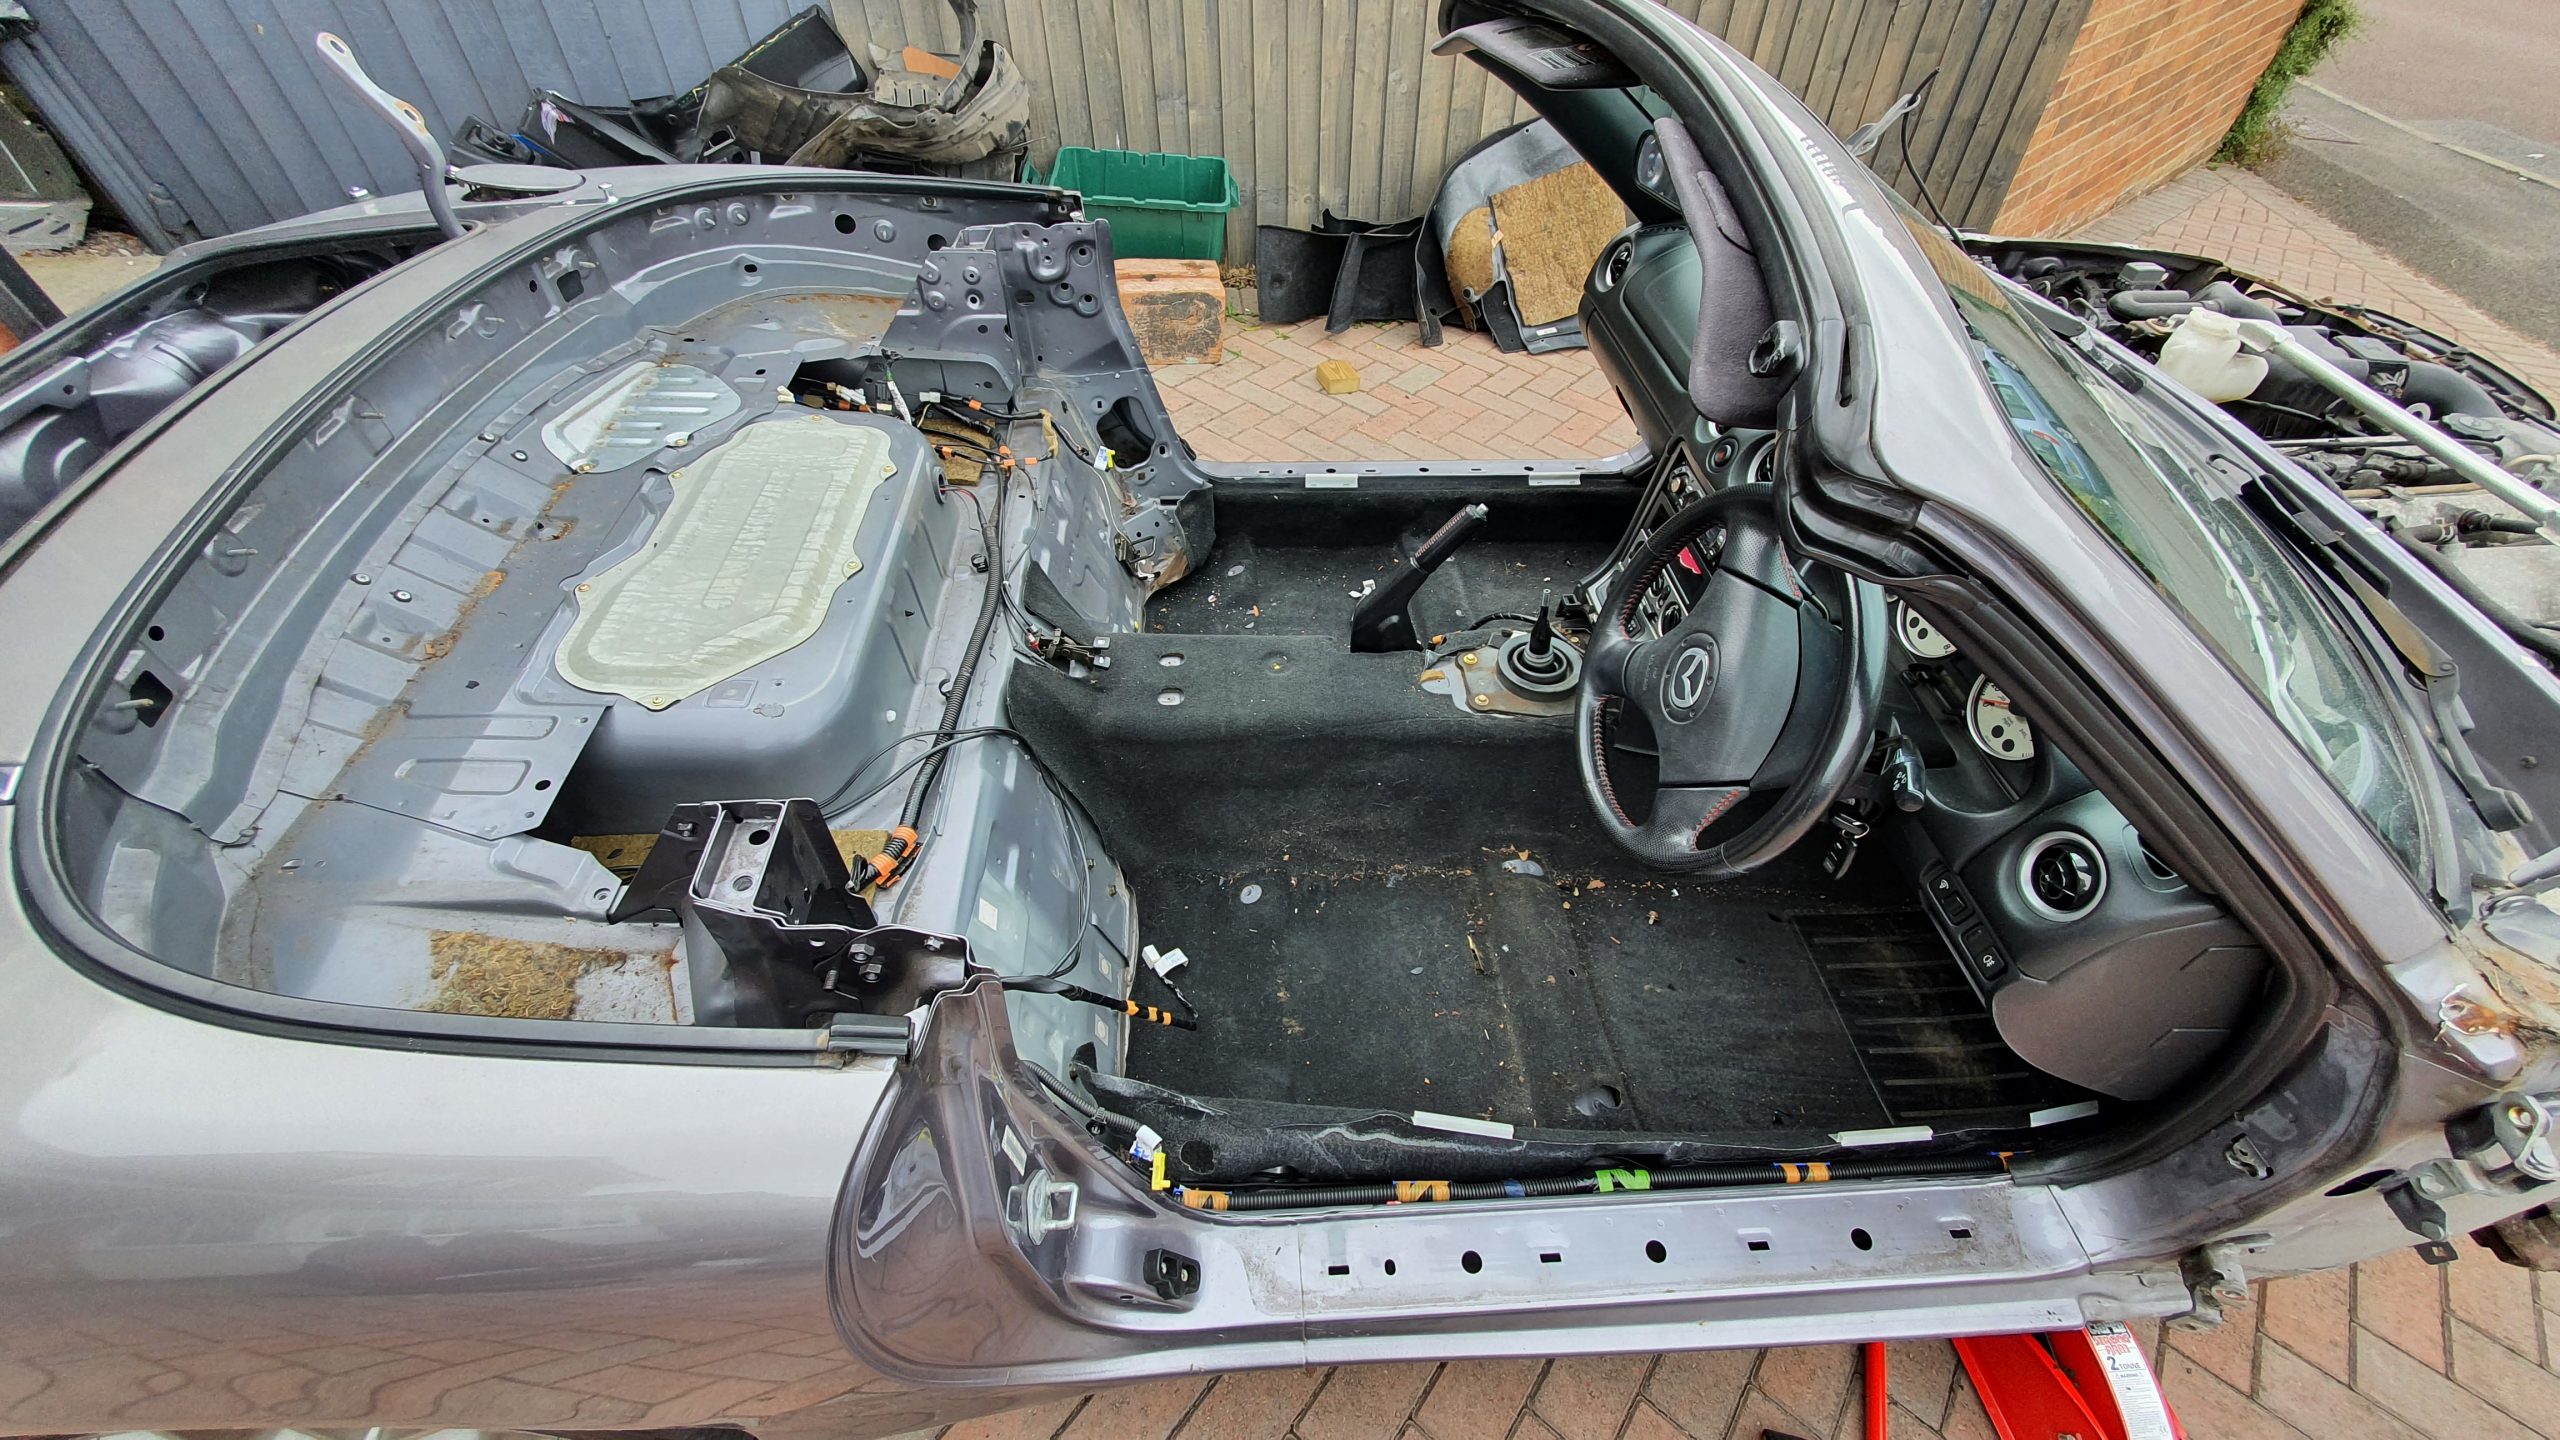
Doors
Remove the connector boot at the shell and disconnect the cable. Get some wooden blocks underneath for support as they are surprisingly heavy when they come off! As mentioned above, remember to wind down the windows before you remove the doors to protect the glass and before you disconnect the battery…
Front Bumpers
The towing eyes were a pain to remove due to rust. Get penetrating oil on these bolts early.
Front Wings
Lots of bolts to undo, just when you think you have them all… You need the wheels off and inner arches removed to get to all the fixings. Don’t forget the one difficult-to-reach fixing inside the arch by the door hinge which needs a long extension to reach.
Interior Floor Carpet
We went bold with this and used a Stanley knife to cut away most where fixings prevented it from easily coming out. Just be careful not to cut any cables while you do so. This made it easier to see everything that was left.
Rear Bumper
Quite a few fixings here but straightforward. This can be removed without jacking the rear up.
Front and Rear Lights
Remember to label up all of the connectors well here as this is one bit of the loom you will be reusing.
Glove Box
Remove this early to get it out of the way.
Heating Blower
A bit fiddly to get this out as some of the fixings are difficult to reach. Remove the cross brace under the glove box for ease of access.
Dashboard
We started by removing the centre controls and radio. This is where you search through all your drawers for that 1990’s radio removal tool you kept just in case! The heating controls are the trickiest part here. There are some hard mechanical wires for the movement of vents that are attached to the back of the control unit that we could not work out how to disconnect. So we ended up just cutting them with a wire cutter to save time. Make sure you don’t cut any electrical cables – there are lots!
Just work your way methodically around all of the connectors and cable ties behind the dash and you will get there eventually! Warning: make sure you have disconnected the battery before you disconnect the AirBag connector, you do not want this going off in your face! The main bolts are at the sides of the dash (2x per side) and there is one right in the middle of the dash right by the windscreen which you get to by just removing the small cover from the top.
Steering Wheel
We decided to remove the steering wheel before getting the dash out as it provides much more room to get to the vast array of connectors. This was straightforward with various bolts and connectors. Warning: make sure you have disconnected the battery before you disconnect the AirBag connector, you do not want this going off in your face! We left the Airbag connected to the steering wheel, there is no need to separate it to remove the wheel from the vehicle. Store this safely out of the way.
Important Note Before Disconnecting the Braking System
Now before you go any further and start disconnecting the brakes, I would like to recommend you do one thing first, which we forgot to do at this stage.
You need to remove each wheel and crack/ undo the hub nuts.
This is much easier to do with a working braking system. You can then get someone to sit in the car with their foot on the brake which allows you to get the torque you need with a breaker bar to crack the nuts (remember to unbend the tabbed-in nut first). We remembered that we needed to do this at the point we were disassembling the sub-frames – 3 days after disconnecting the braking system. Luckily we made up a jig, consisting of a long piece of box section metal with a couple of holes through it connecting to the hub nuts, to hold the hub and stop it from spinning to get them undone.
End of Day 1 Summary
Now that was pretty much it for Day 1 of stripping my Mazda MX-5. We managed to remain disciplined with labeling all connectors and putting bolts in bags with items that came off to keep things organised. We were pretty pleased with the progress. Removing all the large items was quite rewarding as it looks like you have made lots of progress quite quickly!
Time-lapse Video
Here is a time-lapse video of us stripping my Mazda MX-5 donor vehicle to provide a view of what we did.
Gallery from Day 1


Summary of Build Costs and Hours
Here is a summary of the costs and person hours (total number of hours for every person that has helped) for the build so far. This should hopefully help others with the planning of their builds, by providing cost and time actually incurred for this build. A more detailed breakdown of all the costs and hours worked on the build to date can be viewed here.
| Person Hours Worked This Post | |
|---|---|
| Donor Strip Day 1 (3 people) - Remove All Body Work and Lights | 32 hrs |
| Totals | This Post | To Date | All Posts |
|---|---|---|---|
| Person Hours Worked | 32 hrs | 32 hrs | 516 hrs |
| Car Build | £0 | £765 | £14,083 |
| Tools / Consumables | £0 | £168 | £470 |
| Total Cost | £0 | £933 | £14,553 |