
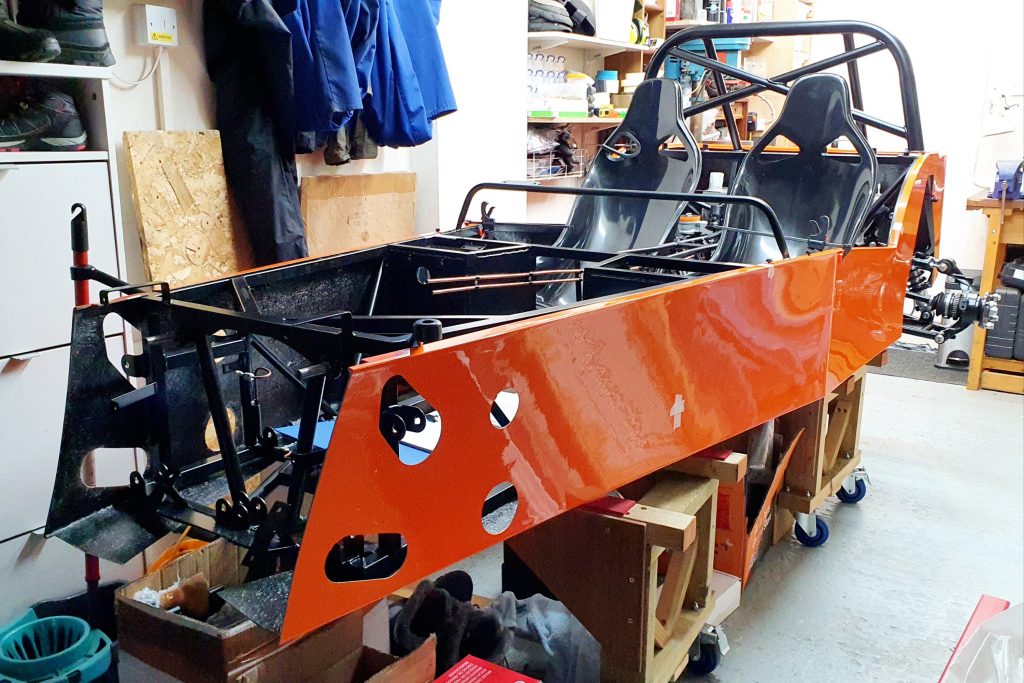
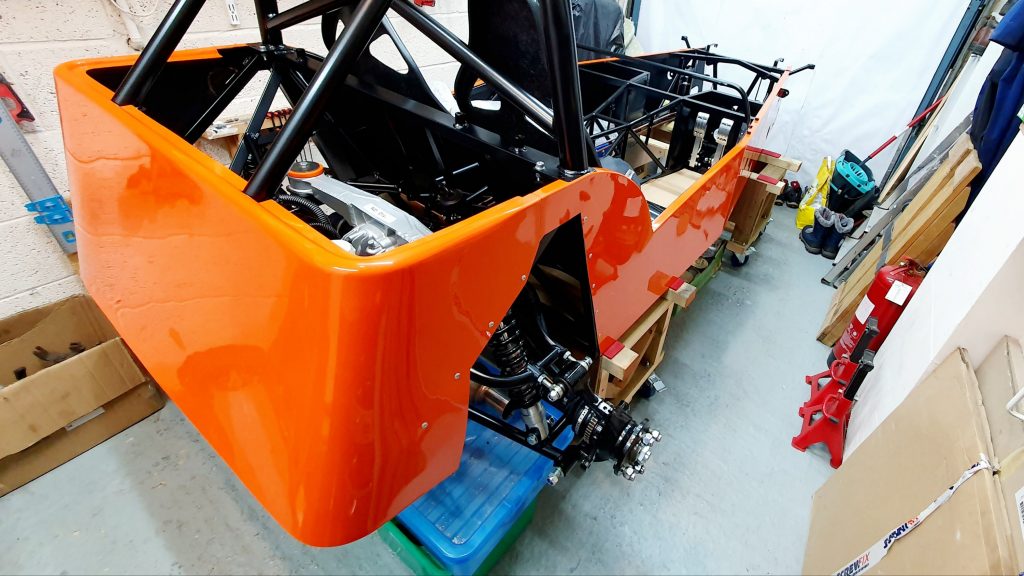
So, after fitting the rear suspension it was finally time to fit the first pieces of bodywork with the MK Indy Side Panels Fitting and Rear Tub.
What Bodywork?
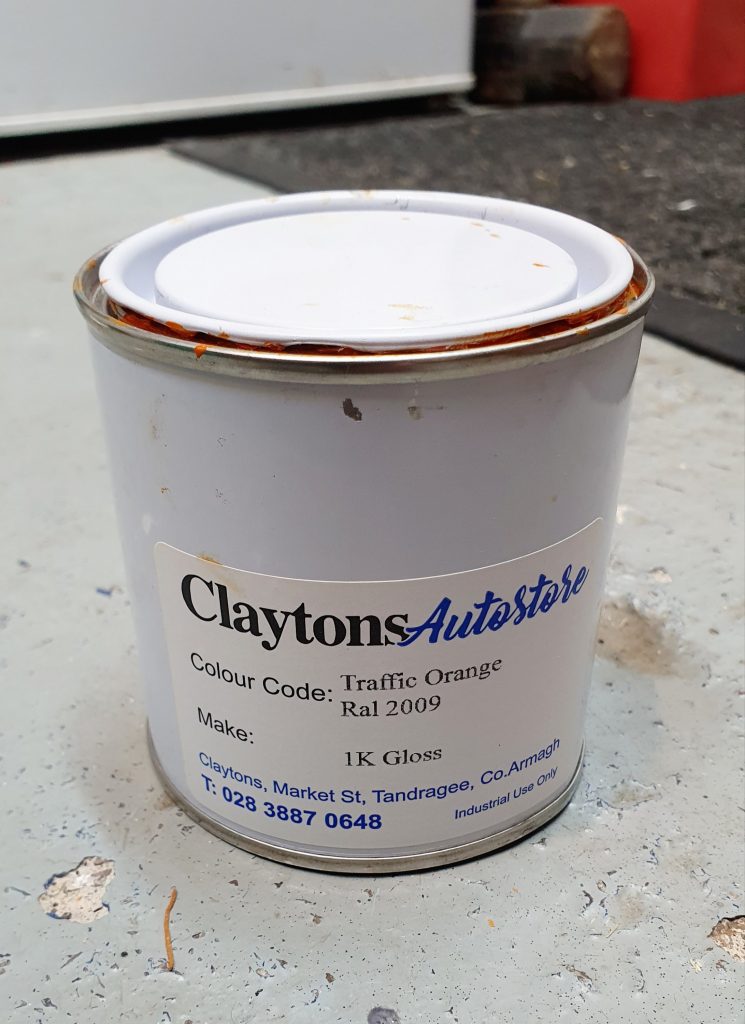
I have a mixture of classic and newer SX bodywork all in Orange. Now a quick note on the actual colour Orange. It is actually ‘RAL 2009 – Traffic Orange’ which is the same orange as the KTM motorbikes. So if you need colour-matching paint for panels or calipers etc the RAL 2009 is the one to go for to avoid 50 shades of Orange in your build…
- The rear Tub is classic.
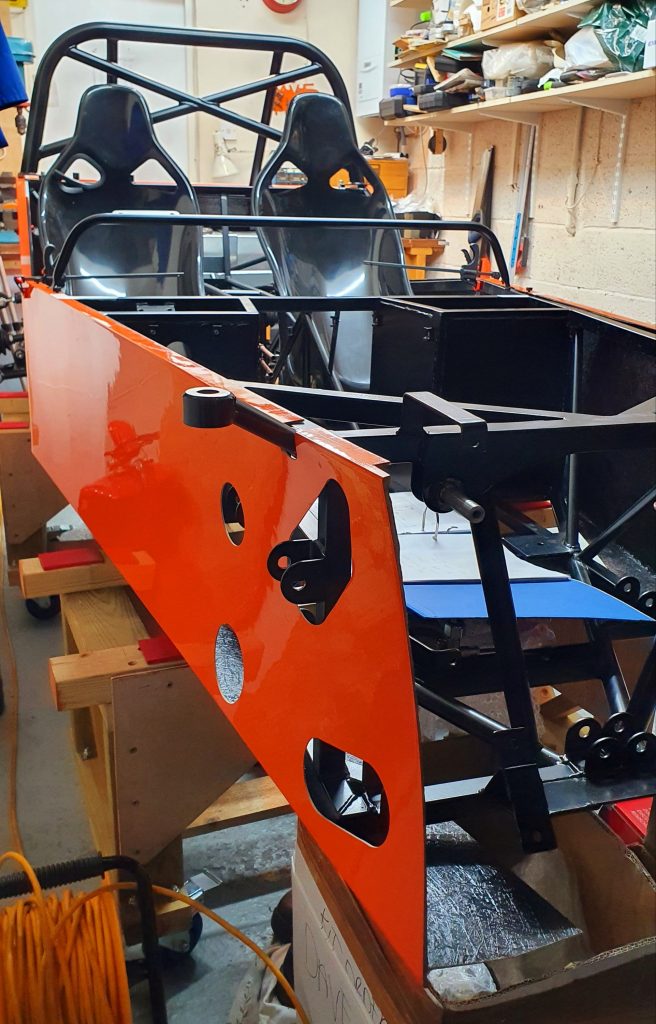
- Side panels are classic therefore they require the cutting of the holes for the suspension and steering rack to go through. While extra work I like this look as it neatens up the front end IMO.
- The bonnet is SX with a larger scoop. This is needed for my VVT engine due to the VVT mechanism on top of the engine. Plus I prefer the look to the classic.
- The nose cone is SX which is narrower at the front and doesn’t have the classic bulges. This also only takes the honeycomb-style grill which I actually prefer anyway.
- Rear wheel arches are classic in Orange but with carbon stone guards.
- Front Cycle wings are pre-peg carbon.
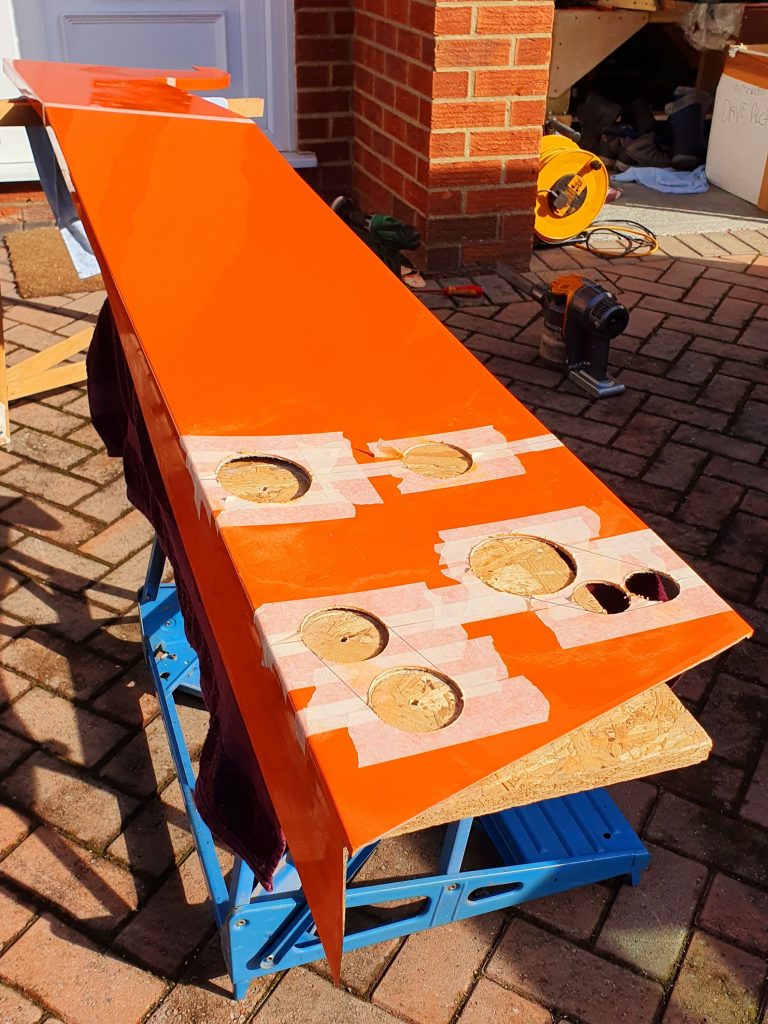
Preparing the Side Panels for Cutting
Opening the brown paper wrapping of the bodywork was like Christmas! Seeing the colour of the car for the first time properly was great!
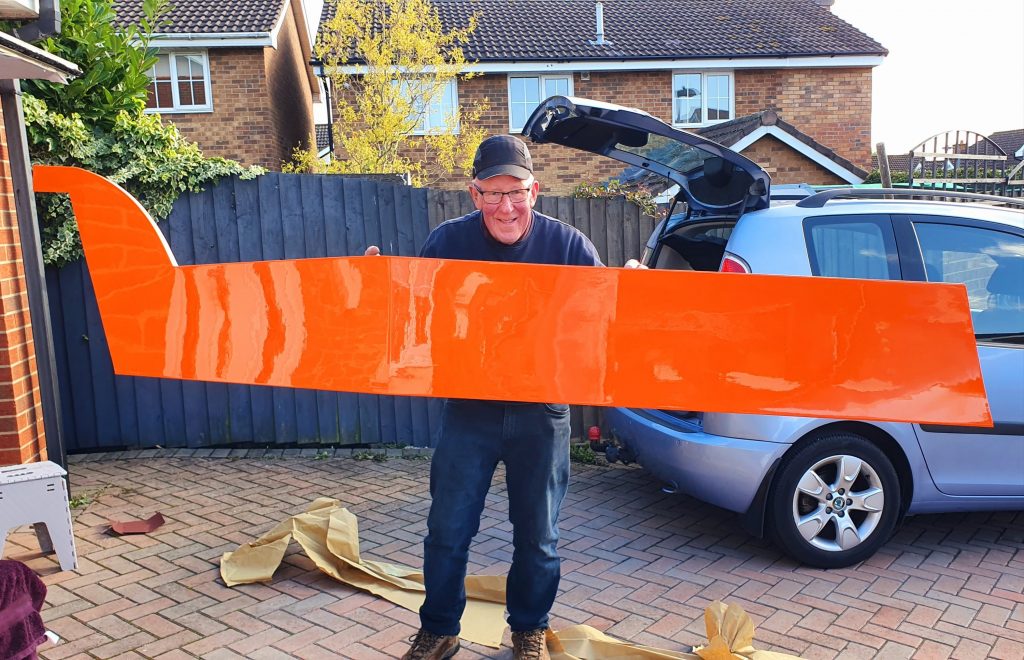
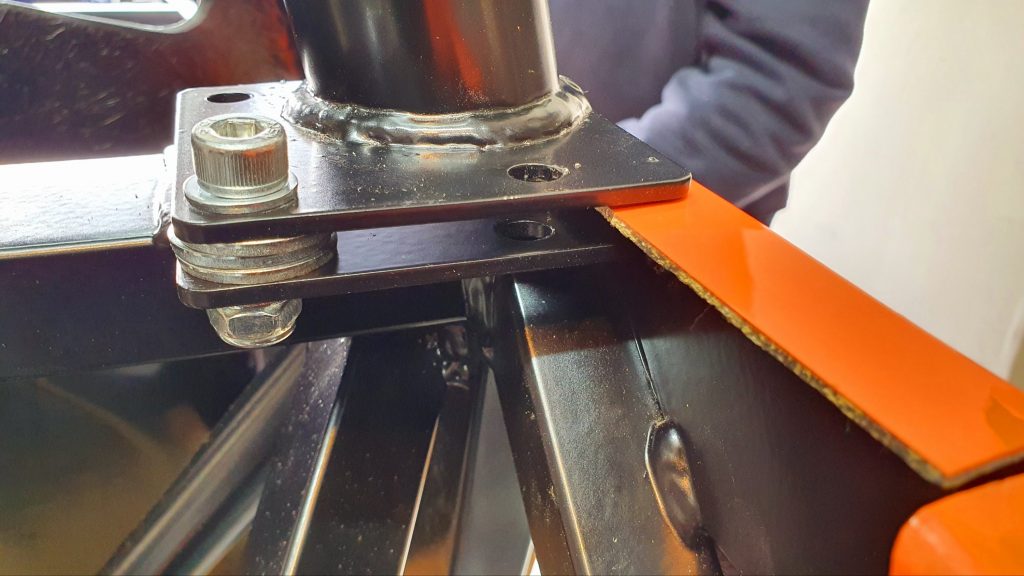
Before marking out the holes we tried a dry fit of the MK Indy side panels to see how tight they were and to make sure there were no obvious issues. The panels fit OK, but we’re a bit tight in a few areas mainly in the distance between the top rail and the floor.
We found the best tool for adjusting the GRP was a Dremel with a small stone bit and used it to just take off some of the depth of the moulding from the inside edges in various places until the panel fitted easily and sat flush against the chassis in all areas.
Marking Out Holes
Once the panels were fitting reasonably well, the next job was to measure up and mark out the holes for the MK Indy side panels. This is where the manual is very clear and gives you the exact measurements and sizes for each hole.
This is a classic case of measuring 50x cut once. We covered the cutting area with decent-quality M3 masking tape and marked up the centre of each hole with a pencil. We did this with the panels clamped to the chassis to help us assess if the marks were also in the right location.
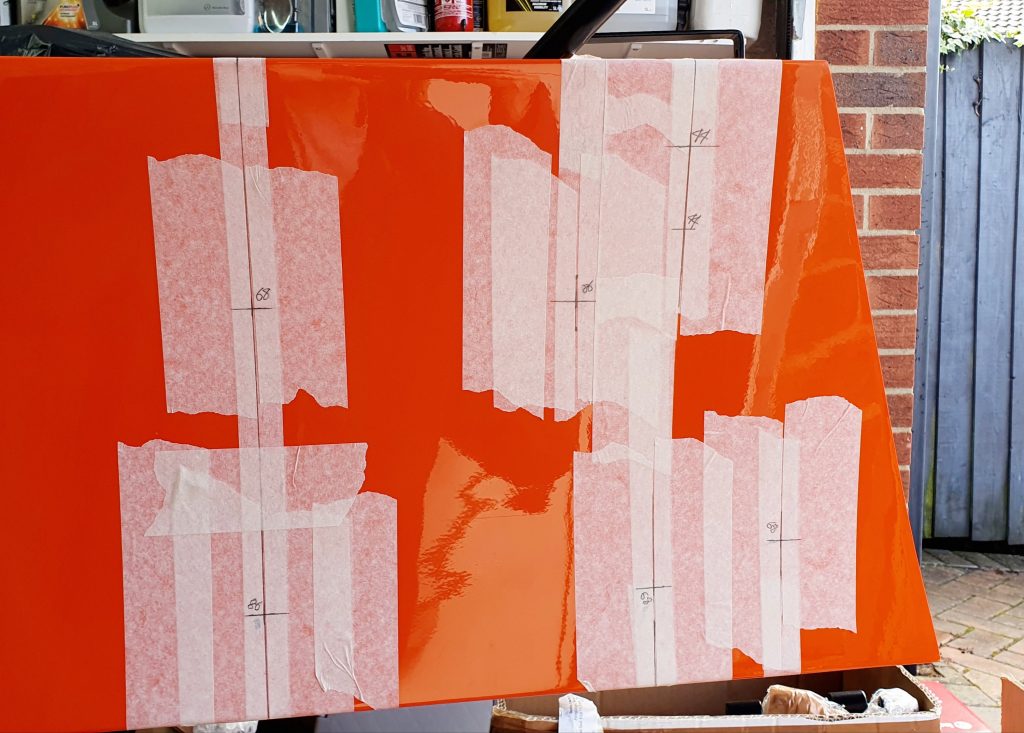
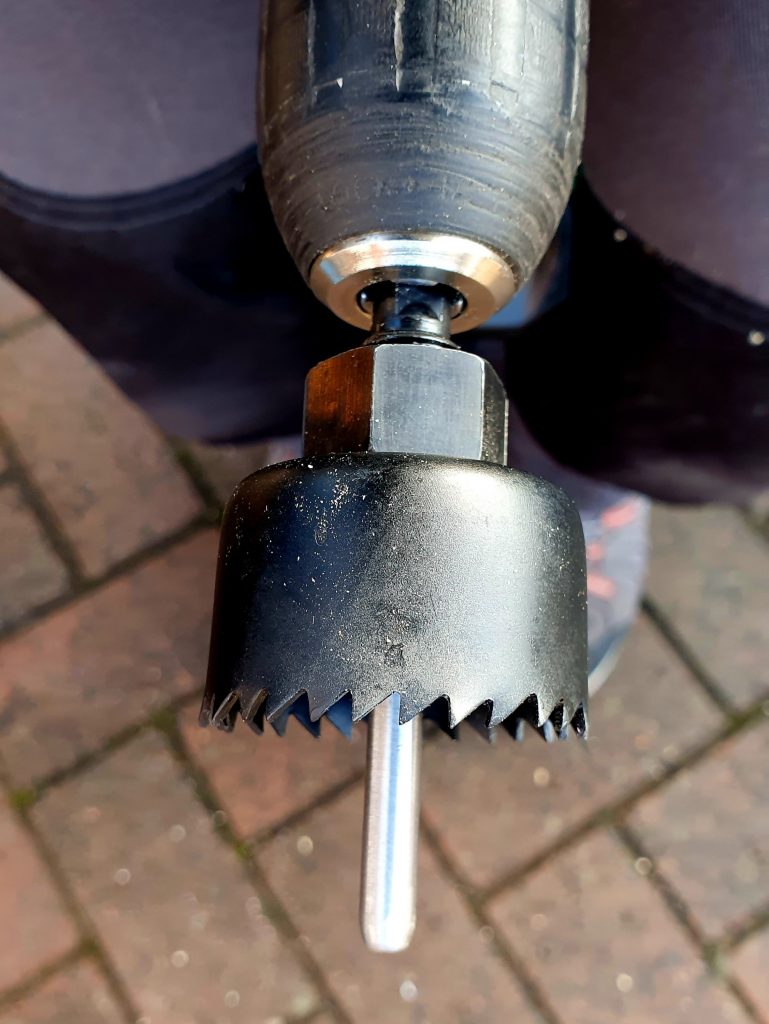
Once we were happy the holes were in the right place we set about the cutting of the holes. I bought the hole cutter set recommended by MK in the manual from Screwfix as I didn’t have any of the correct size cutters.
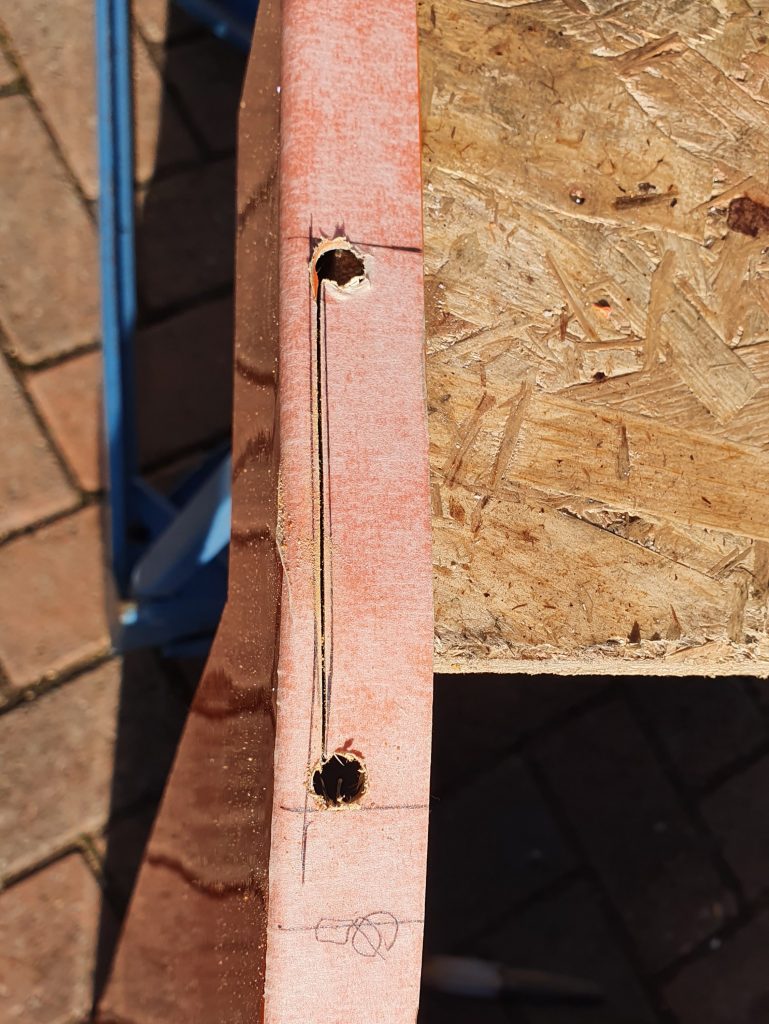
A top tip was we drilled a 6mm hole with a normal drill first where the centre should be for each hole. This makes it easier to get the hole location accurate as once the hole saw is on it is more difficult to see where you are drilling. We then used a 6mm piece of round steel rod instead of the 6mm drill in the hole saw. This was then simply a guide in the existing hole without the risk of drilling the hole slightly off-centre. This worked very well.
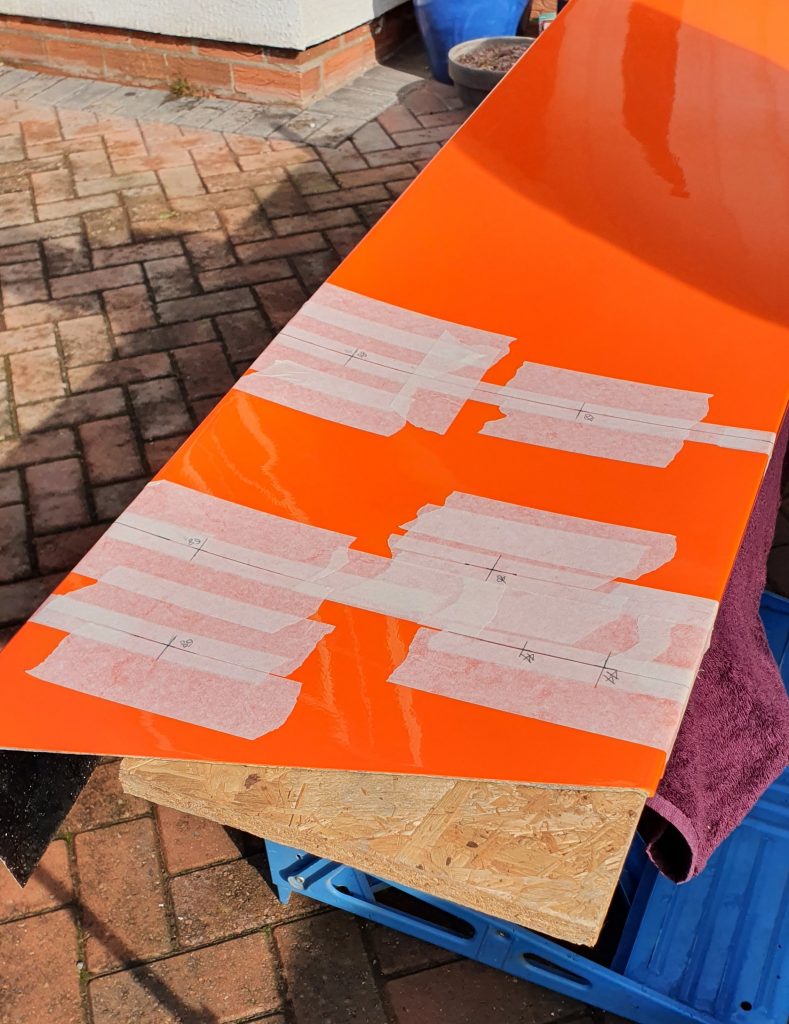
We took the panel outside and used a workmate and a piece of OBS board to cut the holes on. We propped up the other end of the panel on a Tressel and a towel to make sure it was supported.

Cutting the Side Panels
So, we had deliberated enough, and it was time to get on and finally cut the holes in the MK Indy Side Panels. Another top tip I had read was to start cutting the holes with the Drill in reverse to start. This help to make a nice initial start in the GRP without digging in too quickly. Then put the Drill in normal forward mode and drill through the GRP. This seemed to work very well with brand-new sharp drills and hole saws.
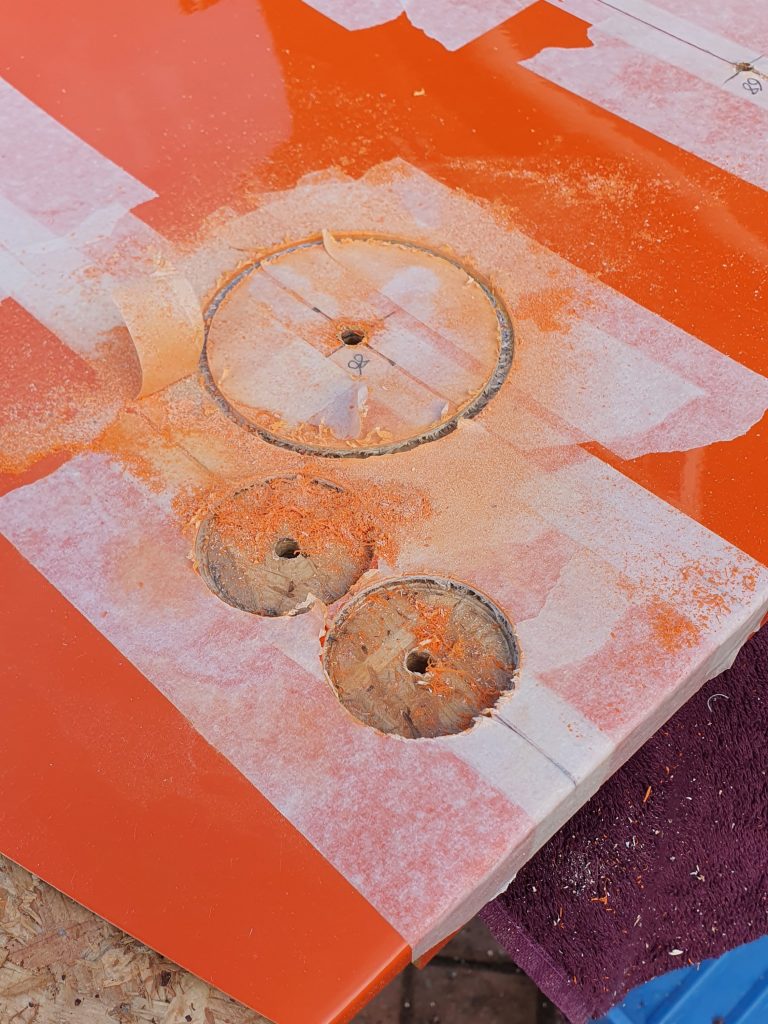
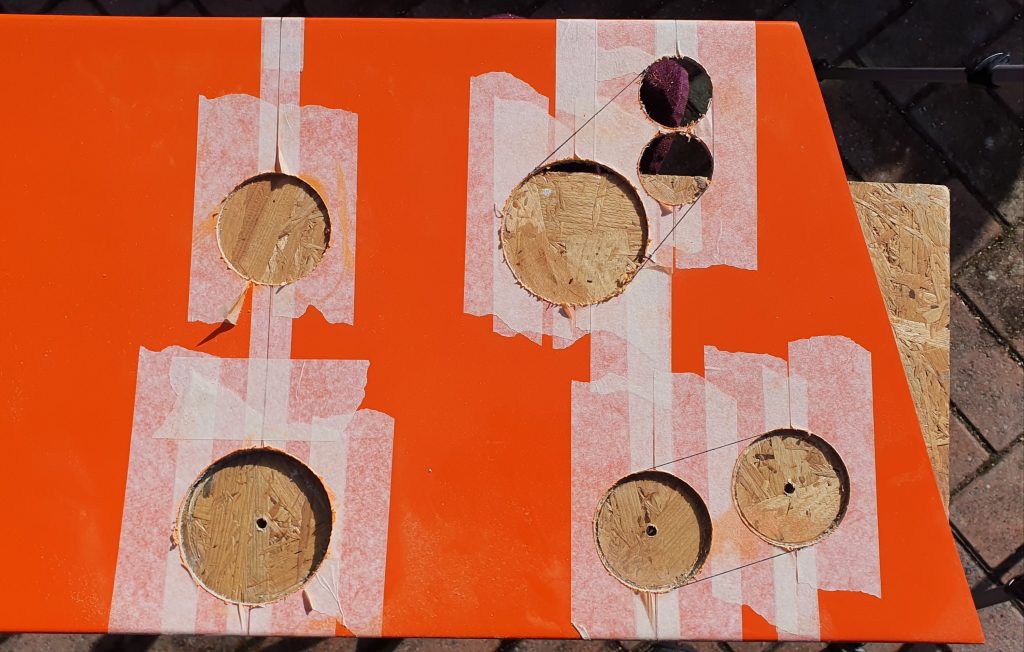
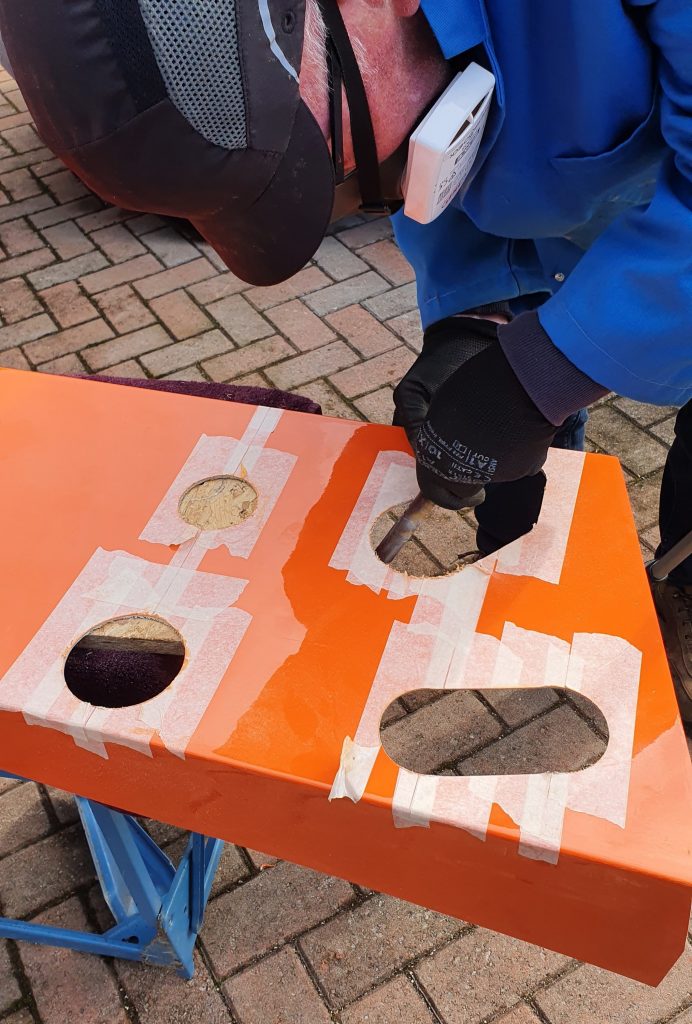
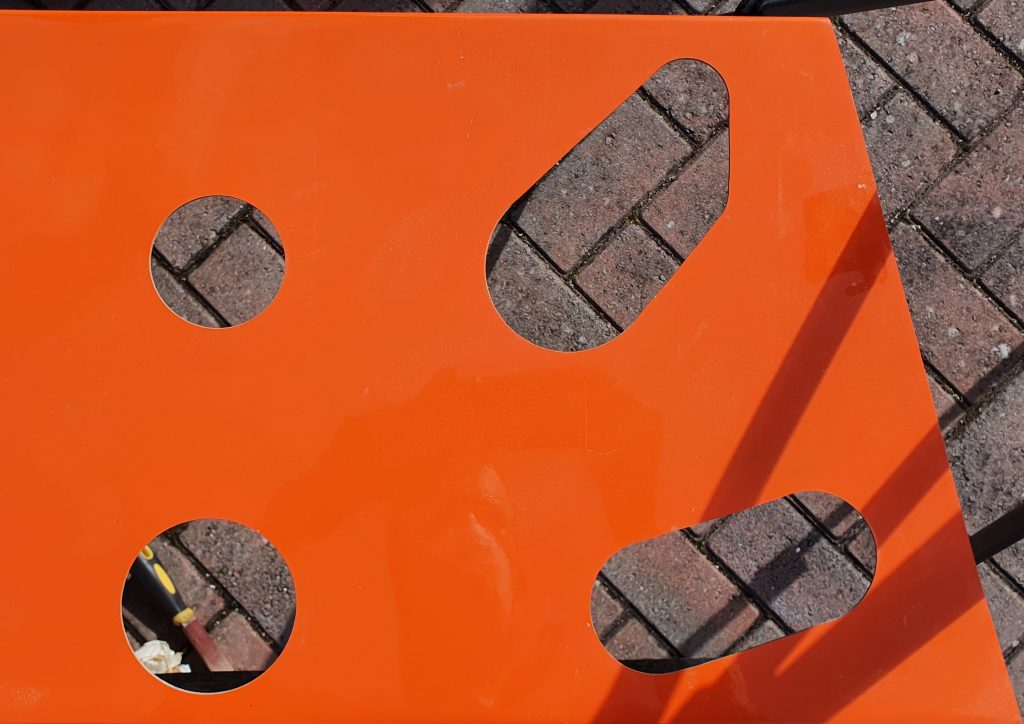
In no time at all we had all the hole cut and then carefully needed to join some of the holes together with additional cuts to make elongated holes. We did this with a hacksaw blade not mounted in a saw by hand. This worked well. Then used a file and wet and dry sandpaper to clean up the edges of the holes. We were very pleased with the finished product.
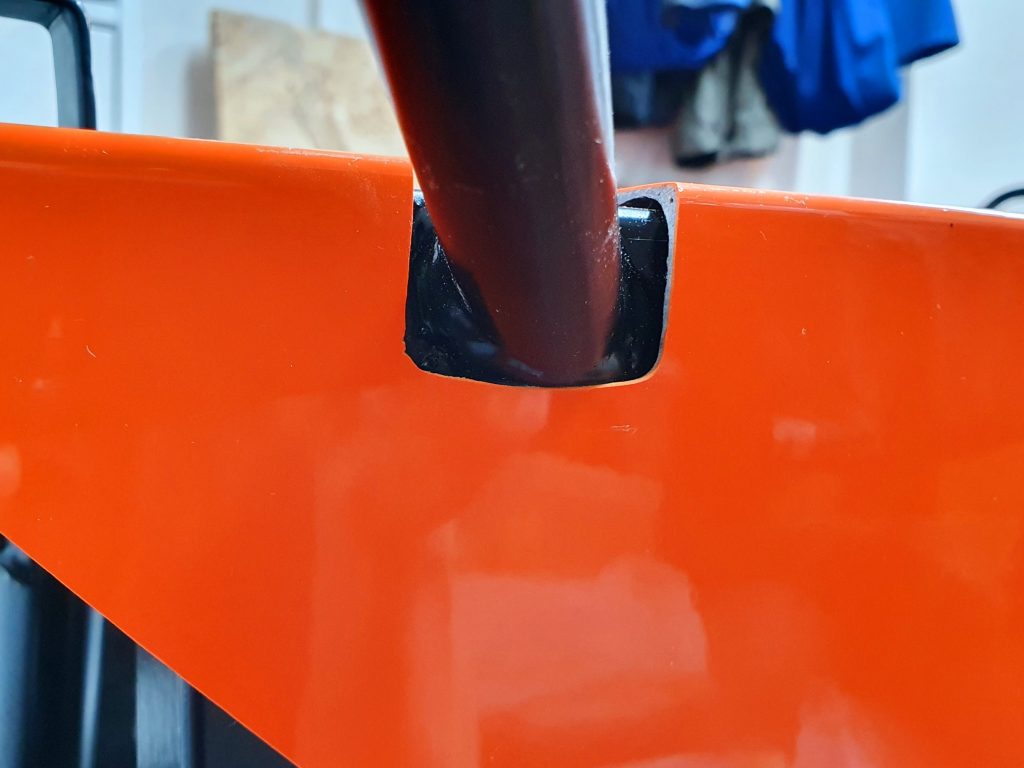
Roll Bar Cut Out
We also measured out the cutouts for the roll bar. A top tip for this was to mount the roll bar but space it out from the chassis with 3x washers so there is a gap underneath. The panel then fits nicely on the side of the chassis and you can then easily add masking tape and draw round the roll bar mounting point for cutting. We also marked put all the other notches that needed to be cut out for the MK Indy side panels for the light bracket and scuttle mounts.
We then cut out all the other notches we needed for the roll bar mounts, light brackets and scuttle mounts. This used 6mm drill bit to drill the corners then the hacksaw blade by hand again.
Dry Fitting MK Indy Side Panels
We then dry-fitted the cut panels to make sure all the notches and holes were correct and made any adjustments necessary.
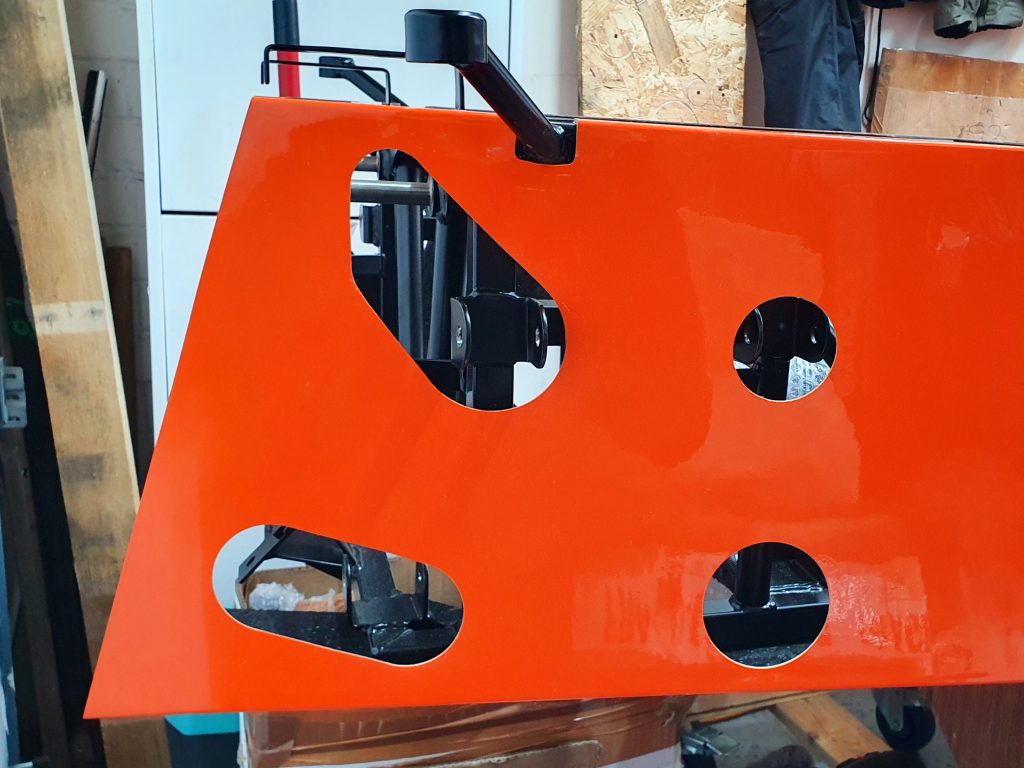
We clamped the panels to the chassis with some small clamps to make sure everything lined up.
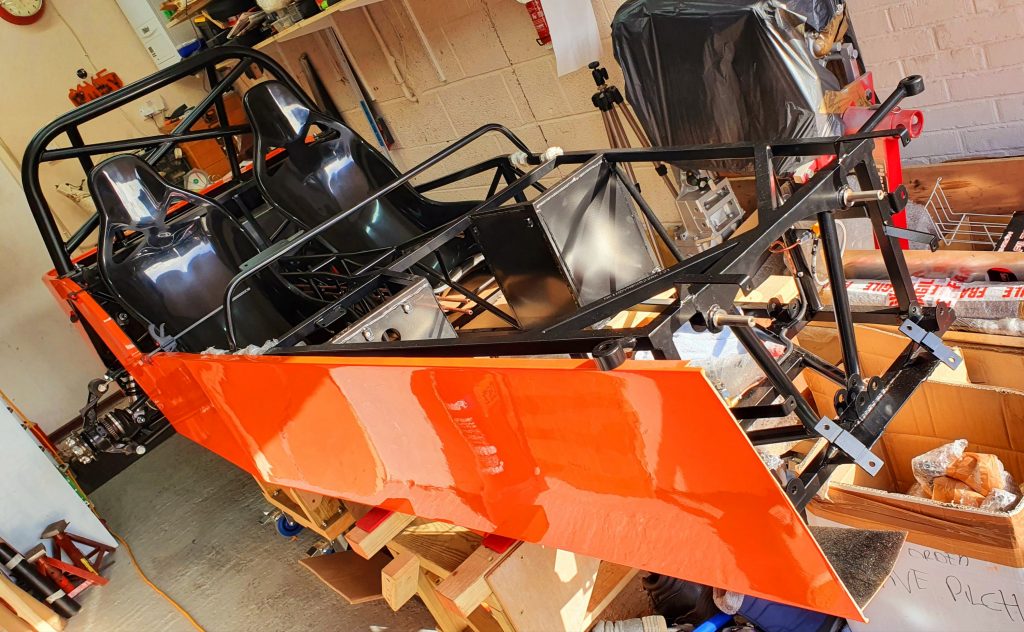
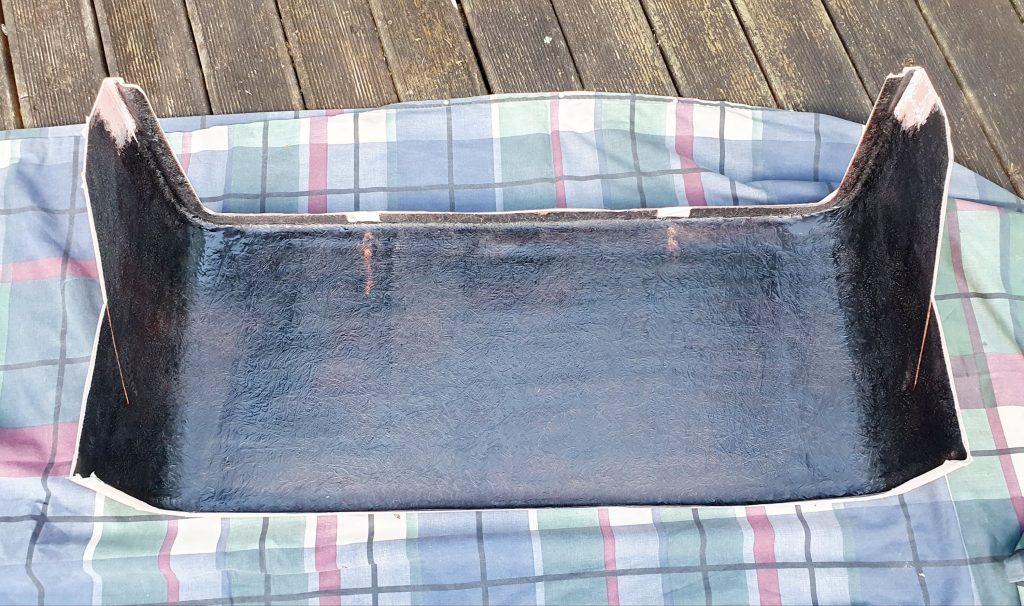
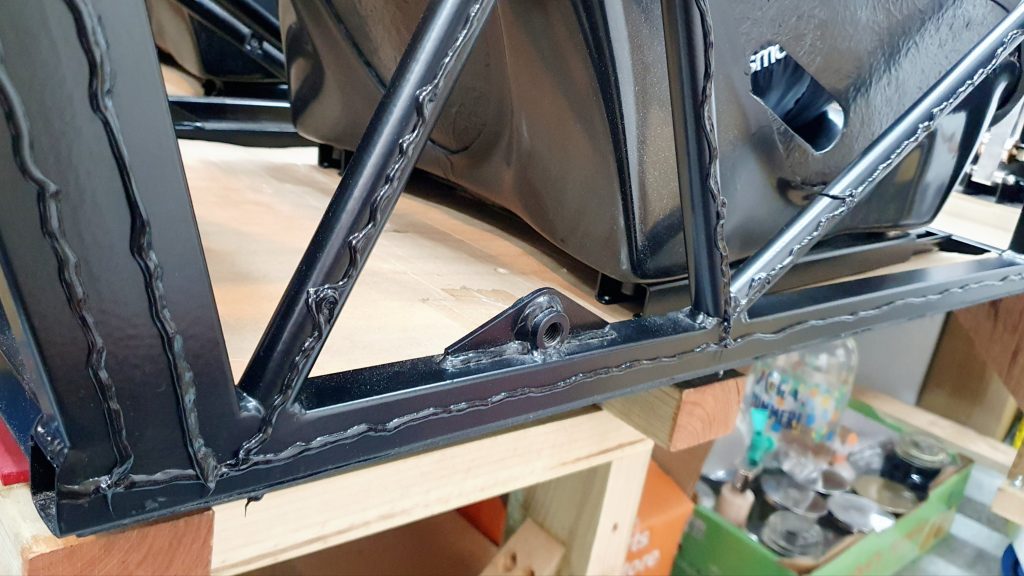
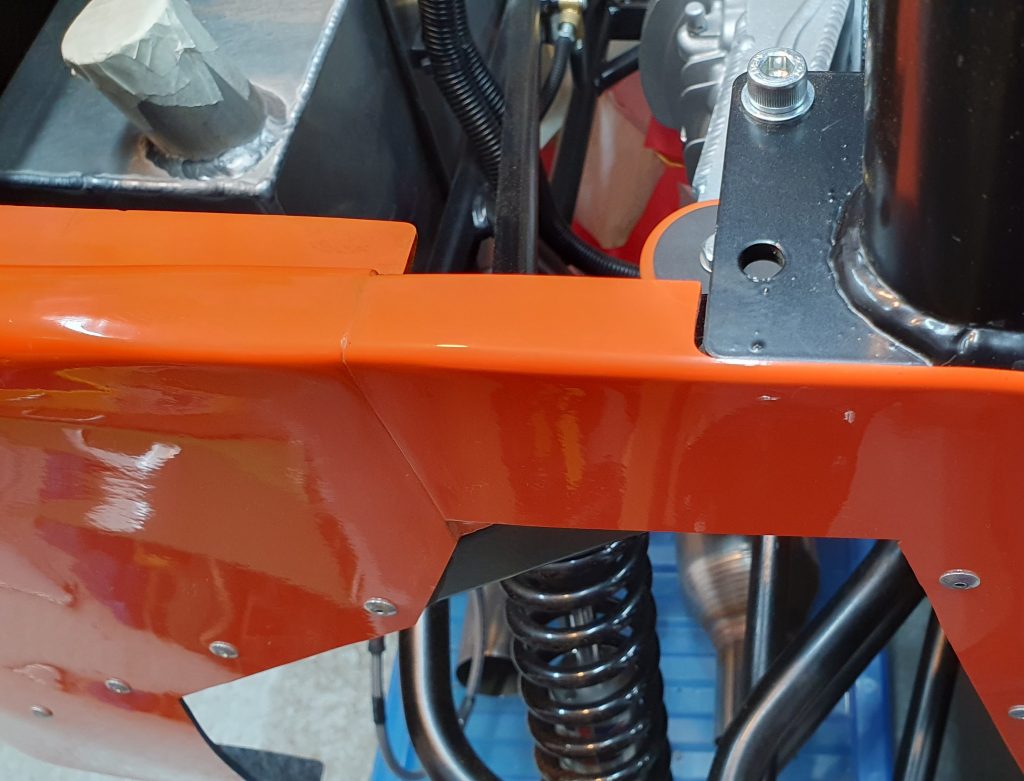
Rear Tub
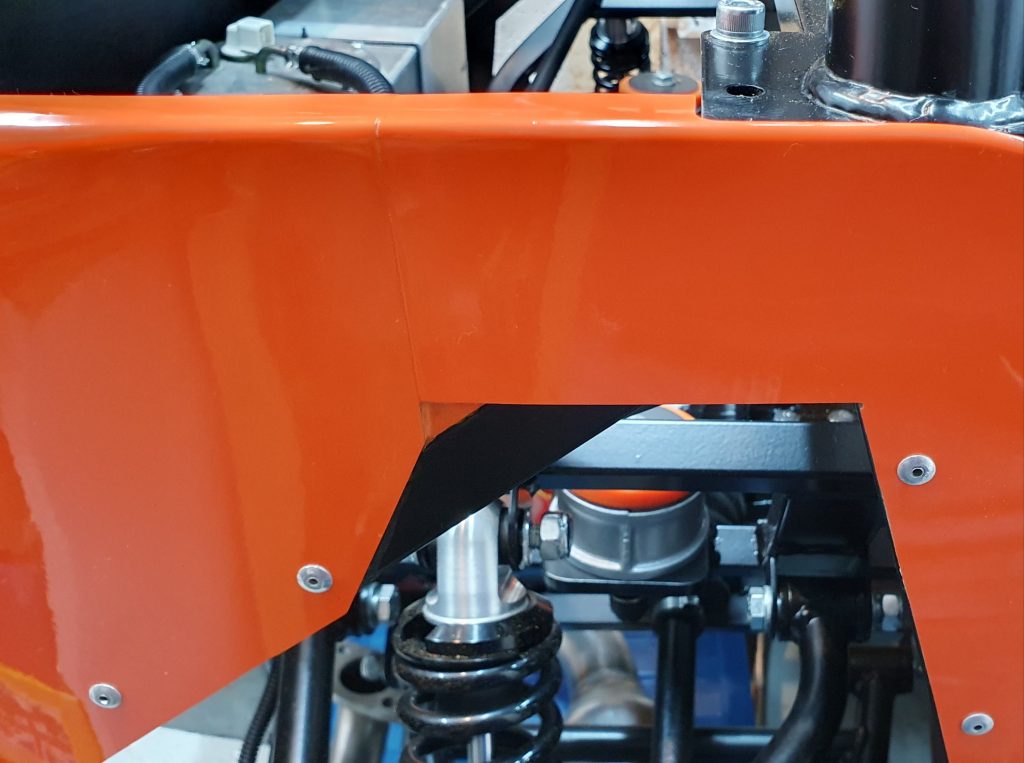
The marking up and cutting of the rear tub was a similar process, but actually much easier. We offered up the panel to the back and marked up with Masking tape and pencil again where the notches would need to be for the rear roll bar braces. Cutting these out was the same approach as before. The manual is quite clear on the correct measurements in this area to check it is fitting correctly.
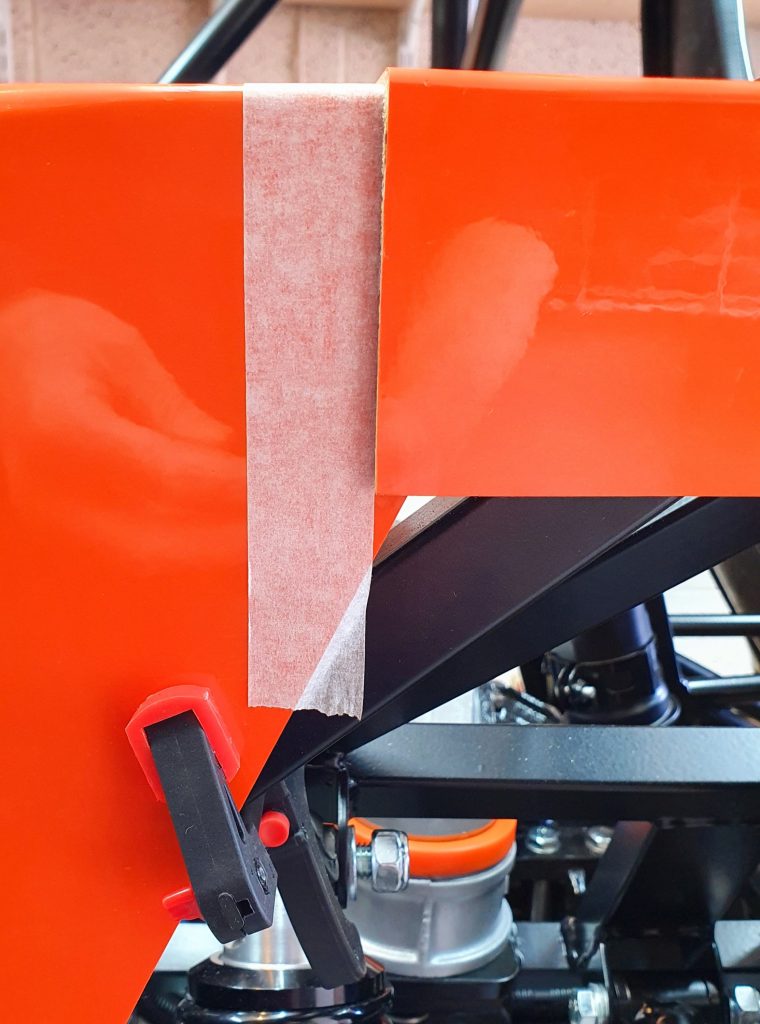
The next challenge was to get the side panels and rear tub to align and to cut the panels at the overlap point to make sure it was nice and flush with minimal panel gap. This is where you find out how good your tolerance is between the panels and the chassis.
The side panels dictate the height of the panel join, there is not much you can do to adjust this so the main thing you can adjust is how the rear tub sits. On the right-hand side, mine was about perfect but the left-hand side was difficult to get at the same height as the side panel.
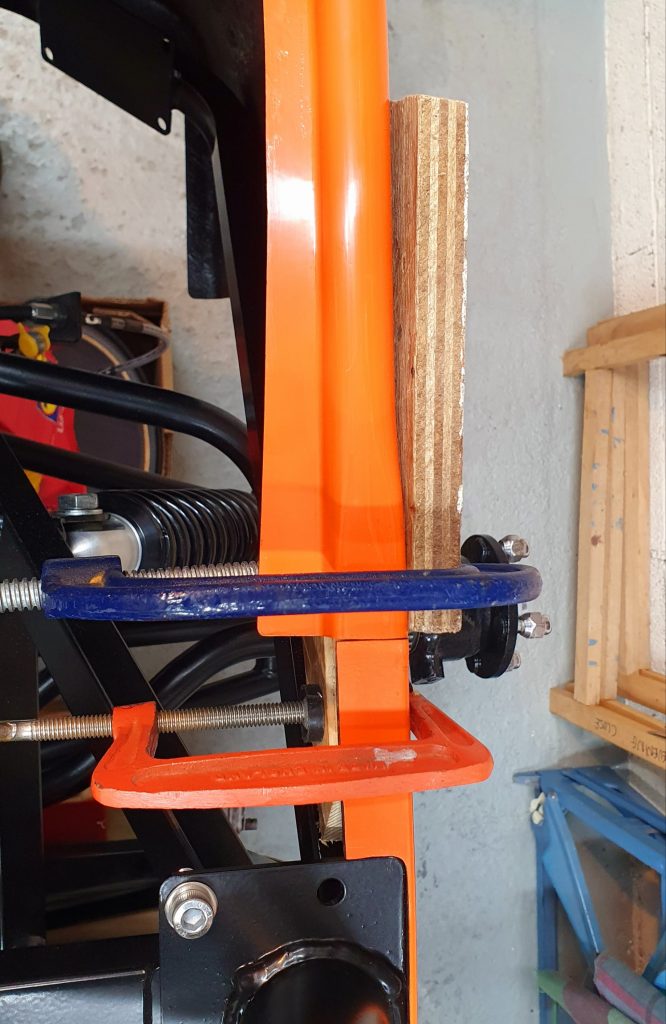
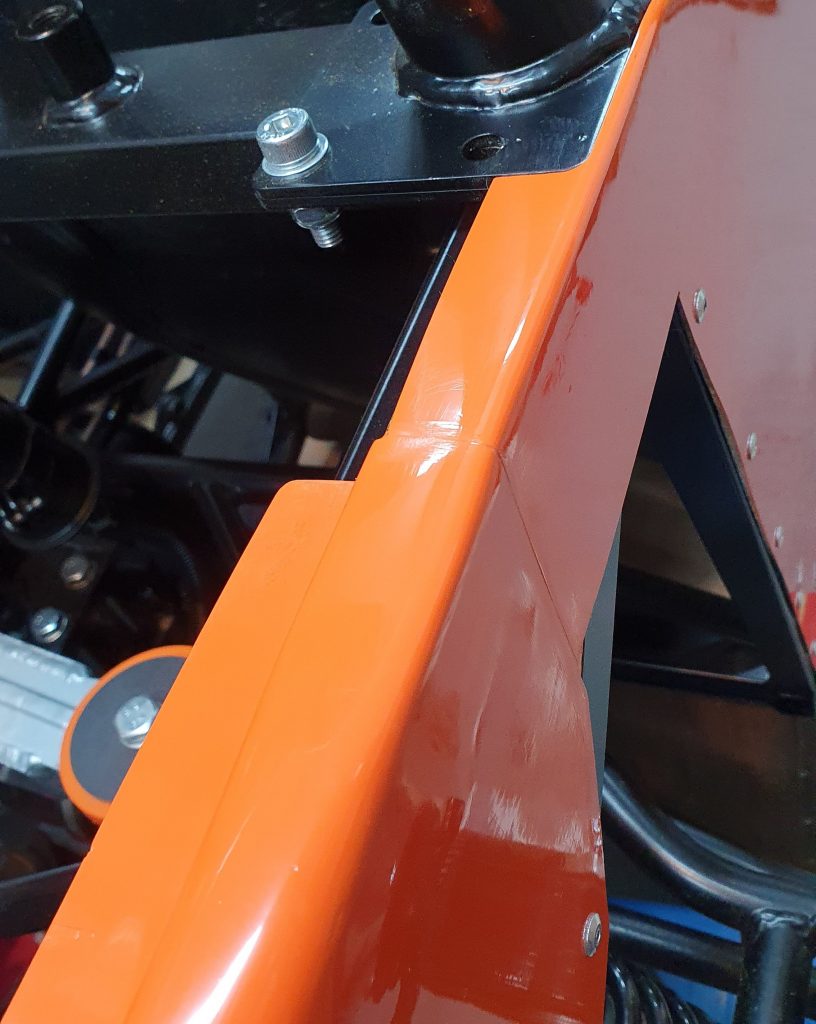
Getting Rear Tub Alignment
My solution was to borrow my Wife’s hair dryer and heat up the GRP rear tub along the bottom rear edge. This allowed me to gently lift and clamp the rear tub by bending the rear underneath edge slightly which essentially allowed the rear tub to go up slightly on the left-hand side. I clamped the tub with a G-clamp and wooden blocks and let it cool down. The fit was much better. I carried on with this approach until it sat level and everything looked even.
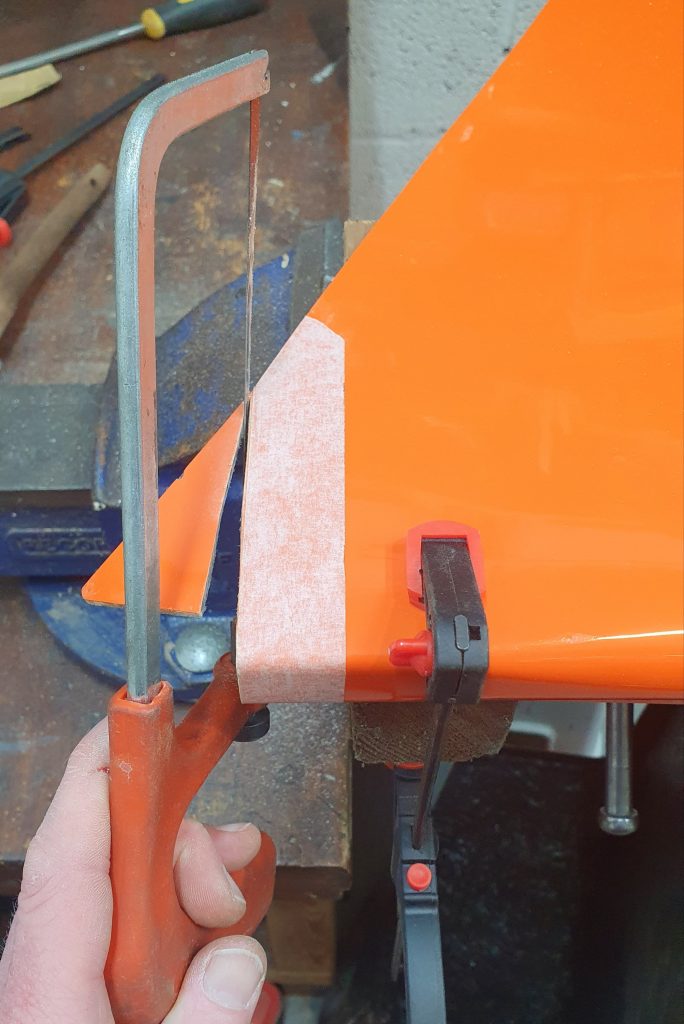
Once the height was right I could then work on getting the overlap correct. Which again was marked up with Masking tape and pencil.
This was then cut by hand and then test-fitted again. It was pretty close and after a bit more fettling it was as good as it was going to get. This was probably the one thing that I spent the longest to get right and needed the most adjustment.
Bonding and Riveting the Panels
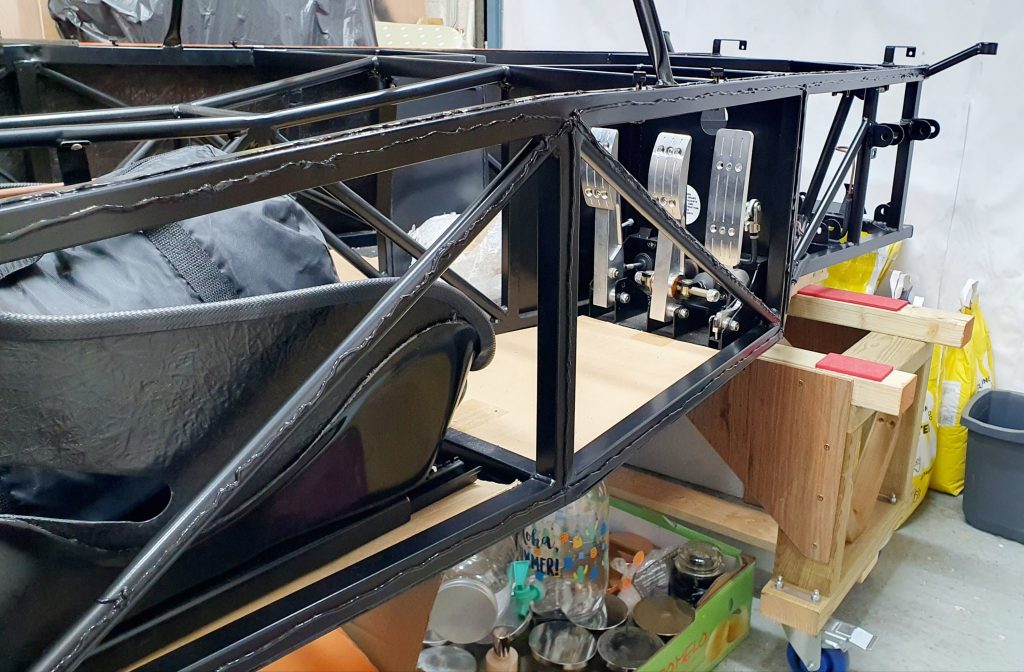
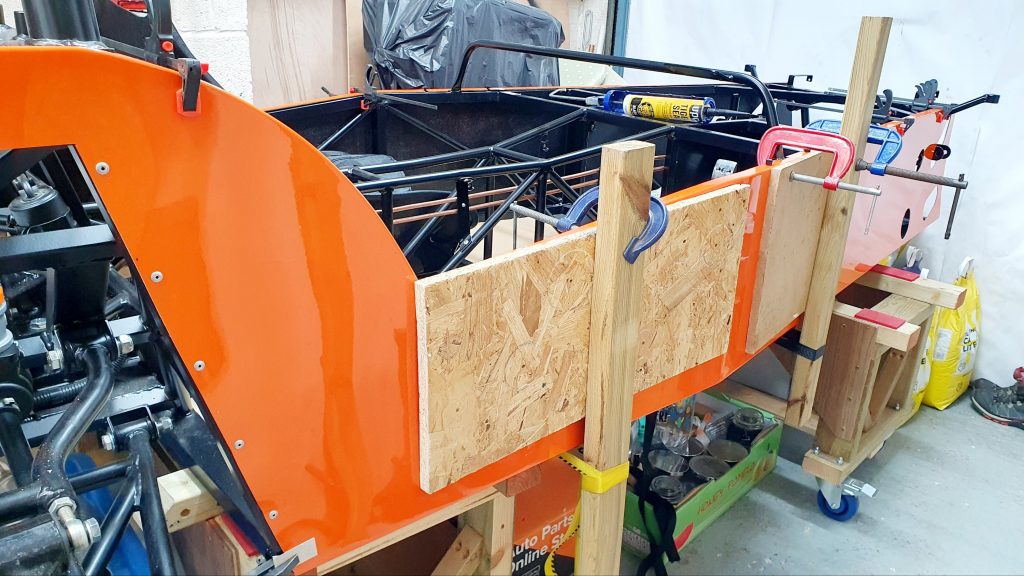
Once I was content with the panel joins and all the cutouts and how flat the panels sat (more Dremel work) I was ready to bond and rivet the panels on. My youngest Son helped me with this as it definitely helps to have 2 pairs of hands.
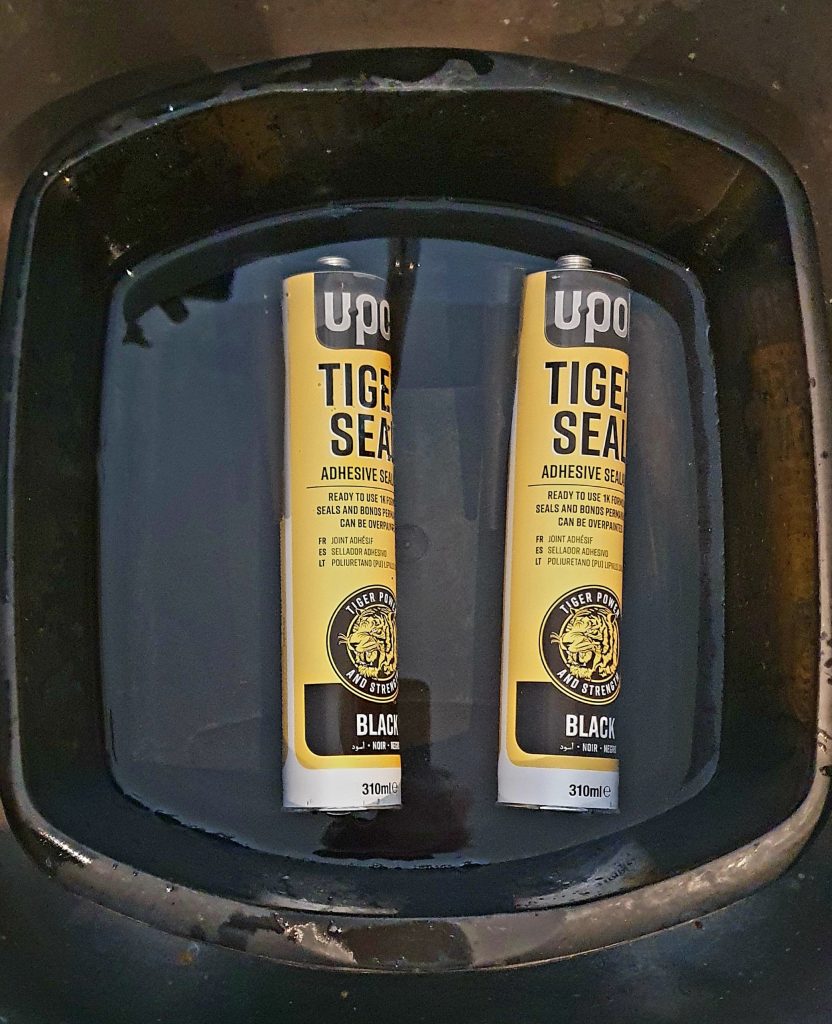
So for the binding I chose to use UPol Tiger Seal which I also used for the floor and it was brilliant. This is available from Eurocarparts for £9 a tube or many places online.
We used a rag and meths to clean all of the chassis and inside of the panels from dust from all the cutting and Dry Fitting.
Bonding
While we did this we left the Tiger Seal in a bowl of warm water for 15mins to warm up. Thanks to The Parrott Bros for this top tip!
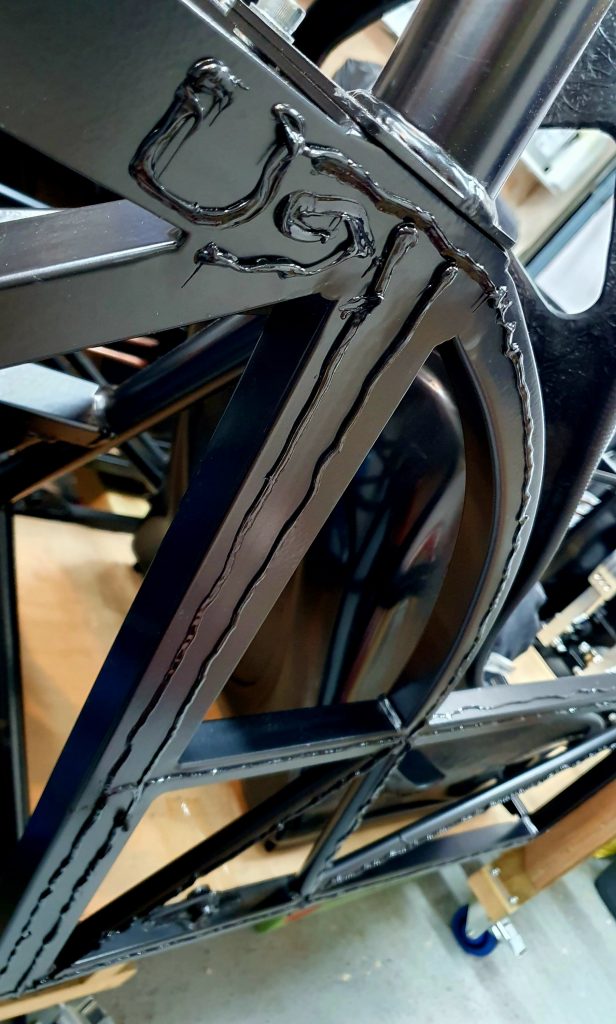
We then applied Tiger Seal in a medium-sized bead to all the outside edges of the chassis on one side and a small amount on the top and bottom edges.
Riveting
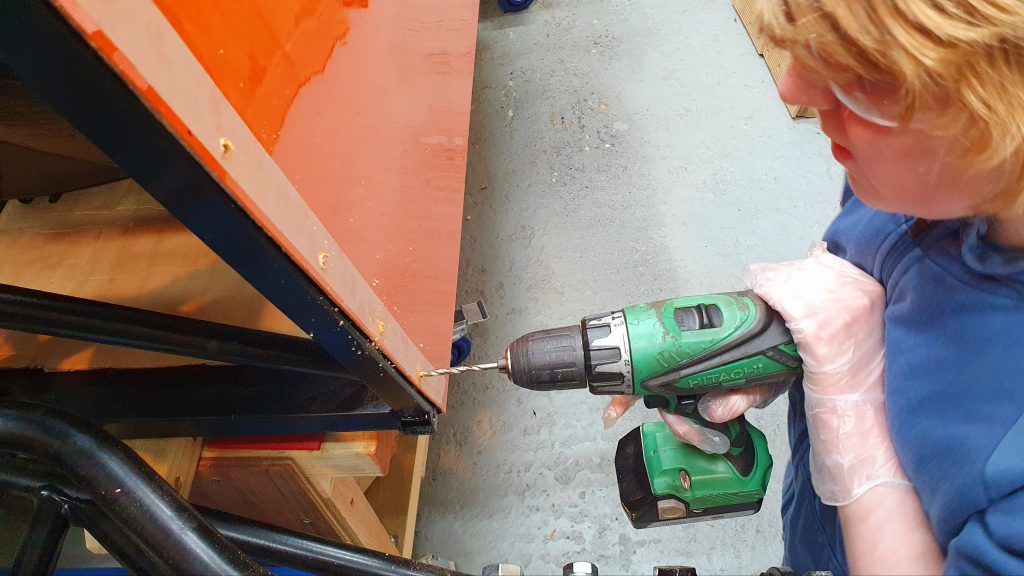
Then we lifted carefully the side panel onto the side of the chassis and clamped it in place. We then marked out where the rivets would go as per the manual and set about drilling the holes.
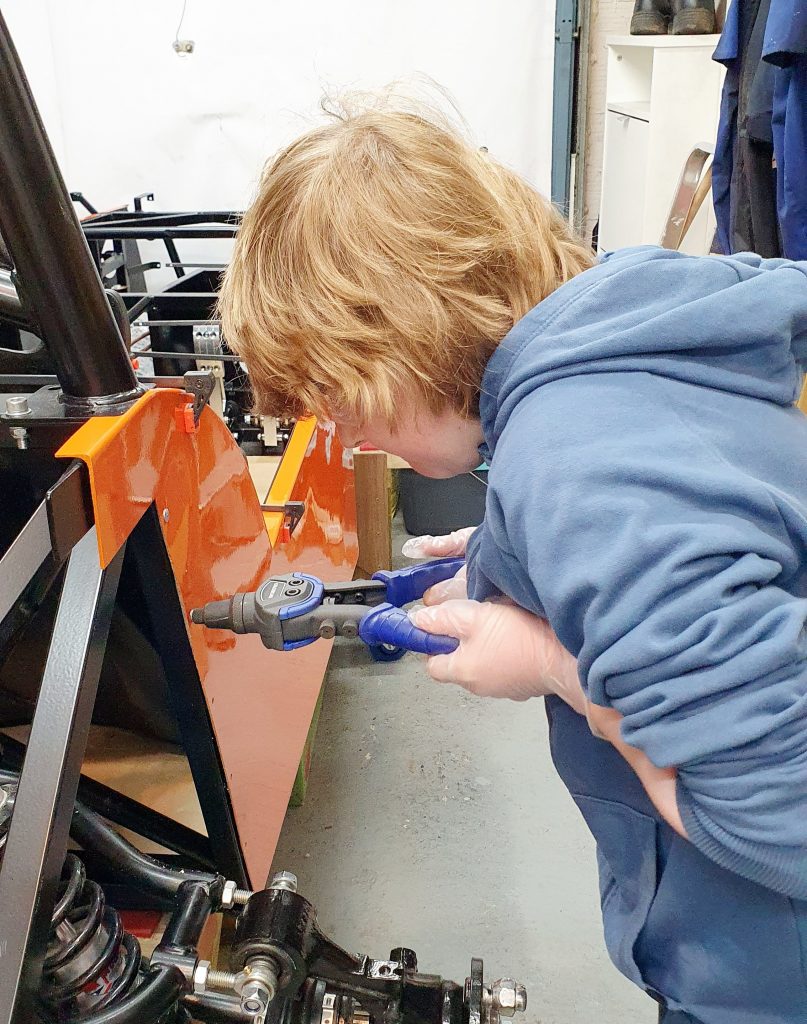
Then used 12mm x 4.8mm closed Aluminium Rivets (same as for the floor) to hold the panels in place.
The manual also says to put rivets on the underside edge which we did but the only issue here is that there was a slight gap at the front between the side panel and the floor. So as the rivet went in it pulled the panel edge flush with the floor it actually bowed out the side panel which pulled it away from the chassis in the middle.
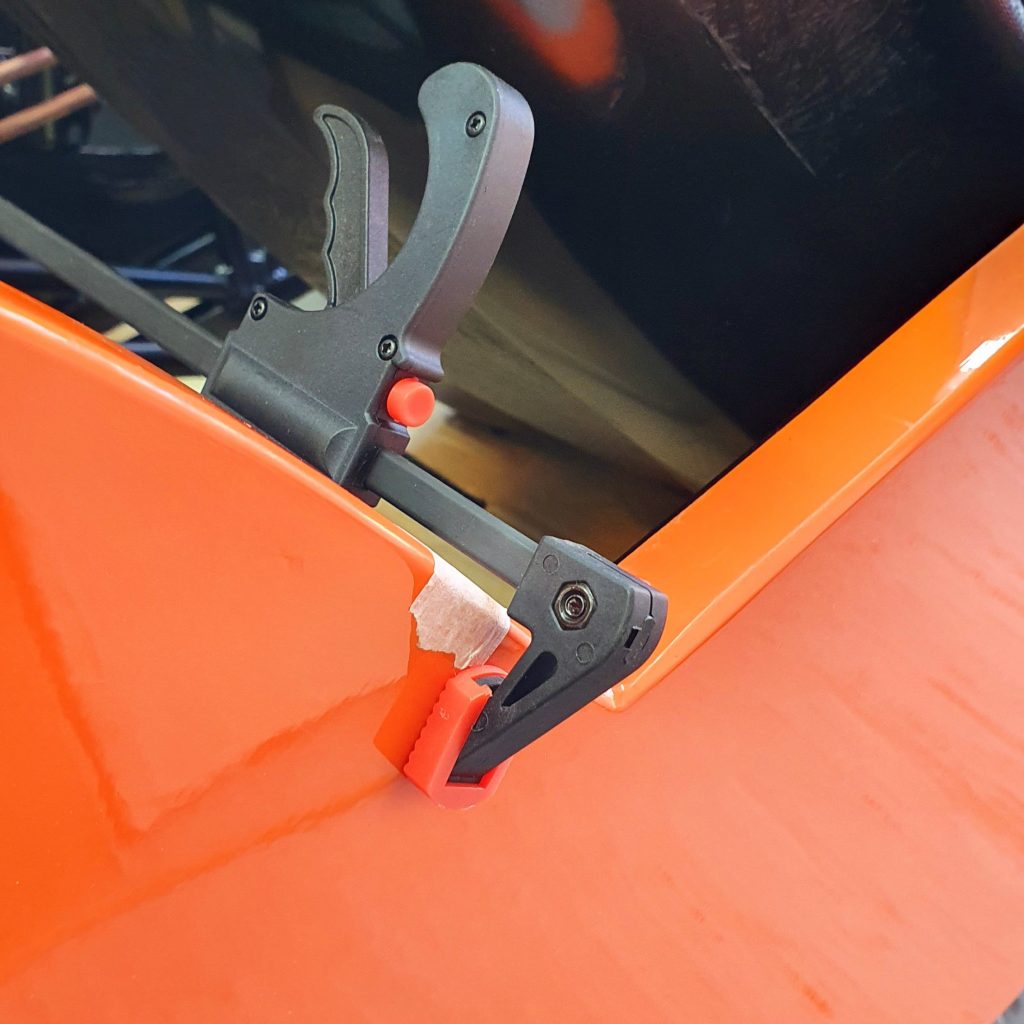
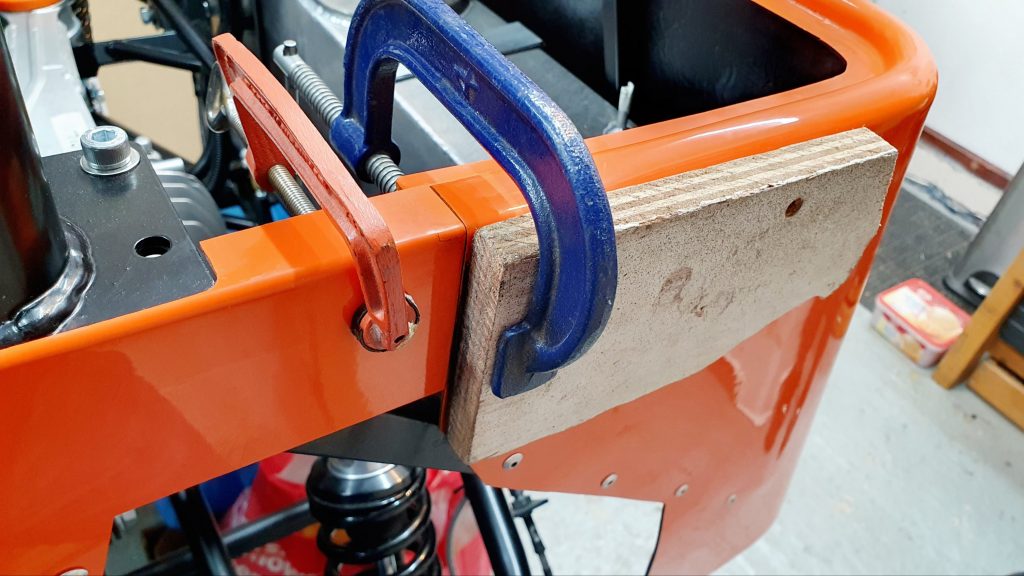
Clamping
This meant I had to create a better clamping system to put pressure evenly across the side panels while the Tiger Seal Set. You can see what I ended up with below, a combination of straps, clamps and bits of wood. It actually ended up working quite well.
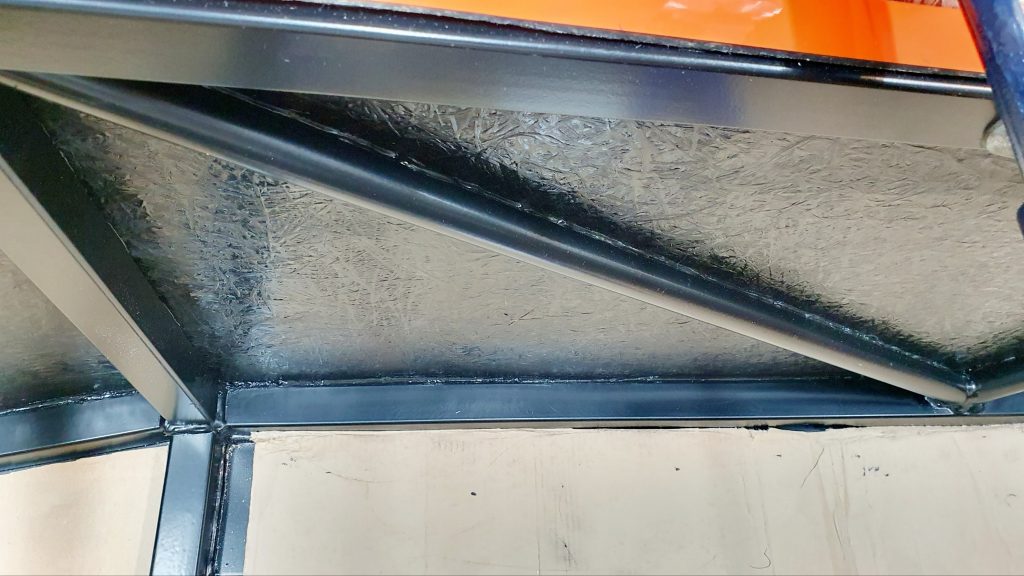
We did the same for the other side then added a bit of extra Tiger Seal on the inside to provide a clean complete seal at the bottom of the chassis rail.

Nest we turned our attention to the rear tub and applied the Tiger Seal in all the stated places in the manual.
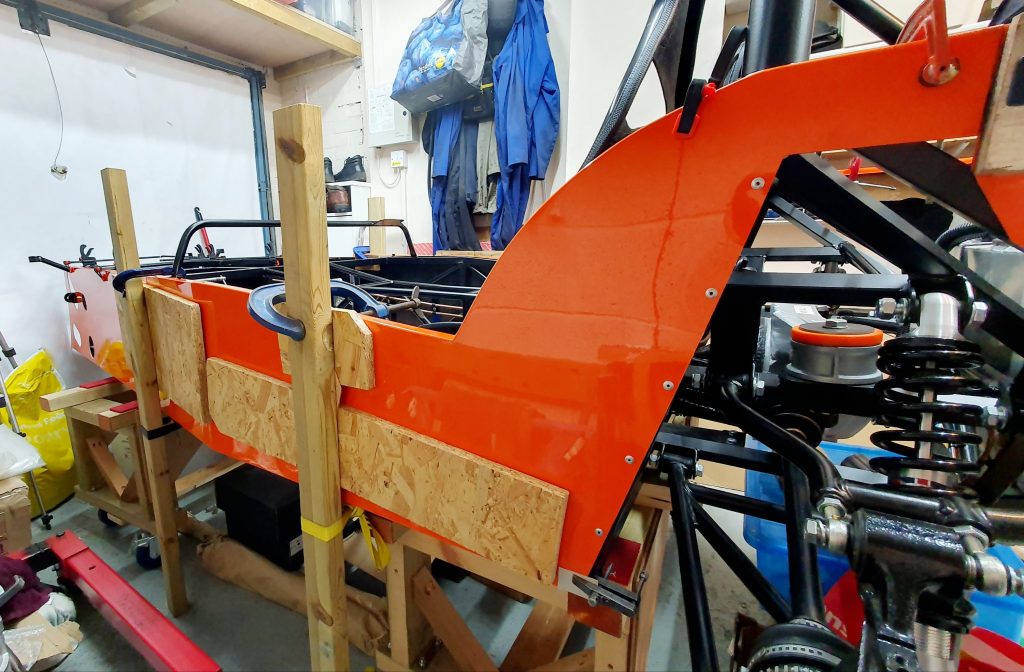
Then we lifted the tub carefully into place. This is where we had more issues. Even with all the adjustments I made to the tub to make it fit, it was still pretty tight. But when dry Fitting I managed to clamp it in place reasonably easily. Now with the Tiger Seal on it acted like a lubricant which made it easier to put on but even with a tough G-clamp it wouldn’t hold it enough and it kept slipping. Eventually, with me holding it tight and my son winding up the clamp real tight with wooden blocks, we managed to get enough clamping force to keep it in the right place. We then added the rivets as per the manual. We then left it overnight to set.
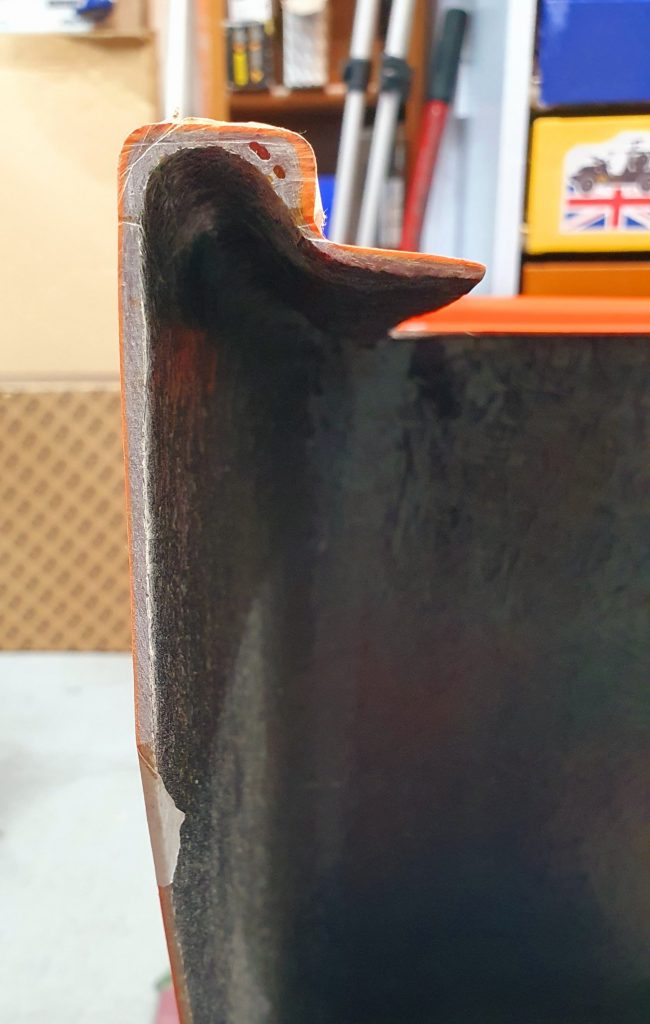
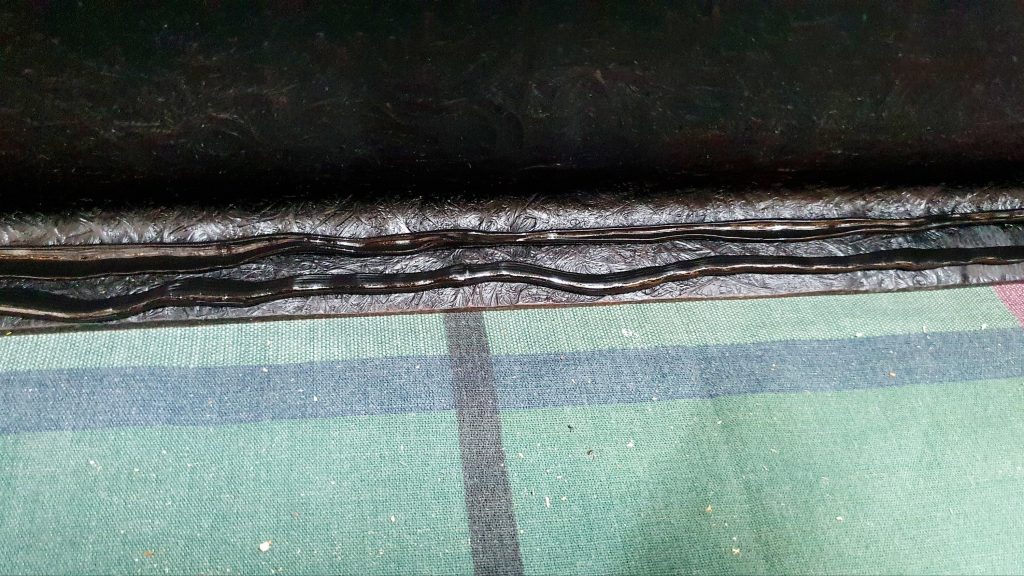
Panel Gap and Seams
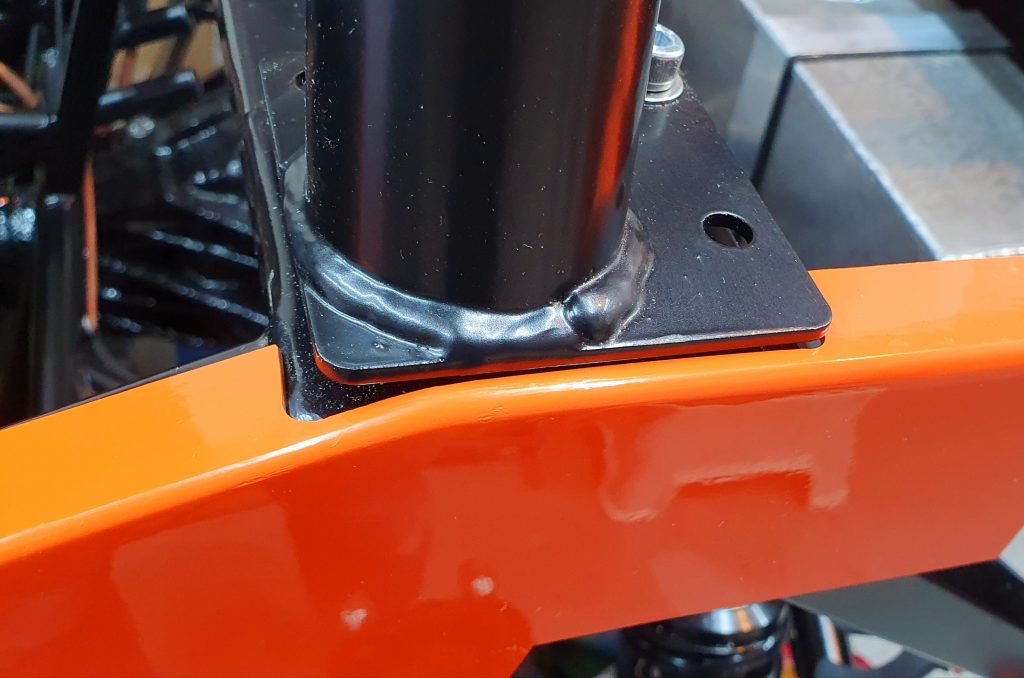
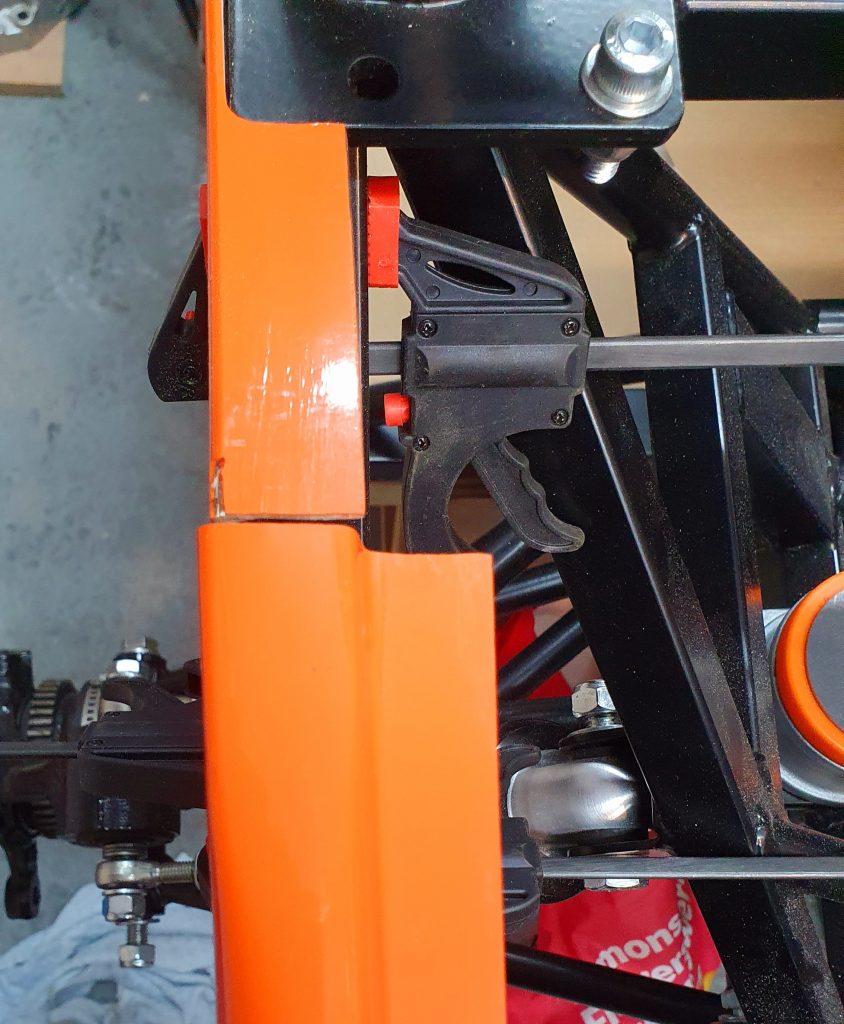
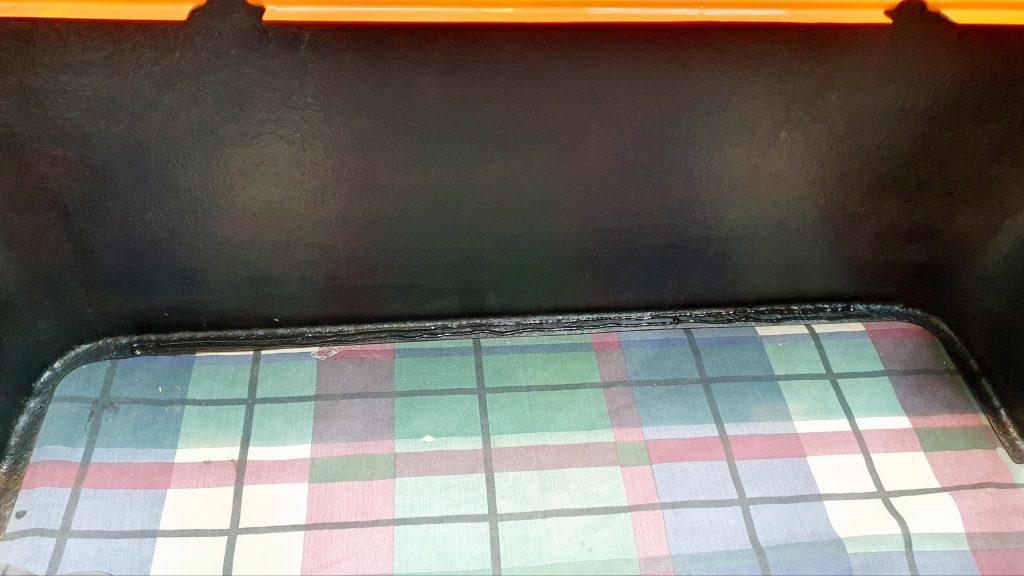
After leaving the bonding to set for 24hrs I removed the clamps and I was really pleased with the result. The final thing that needed sorting out was the panel seam between the side panel and the rear tub.
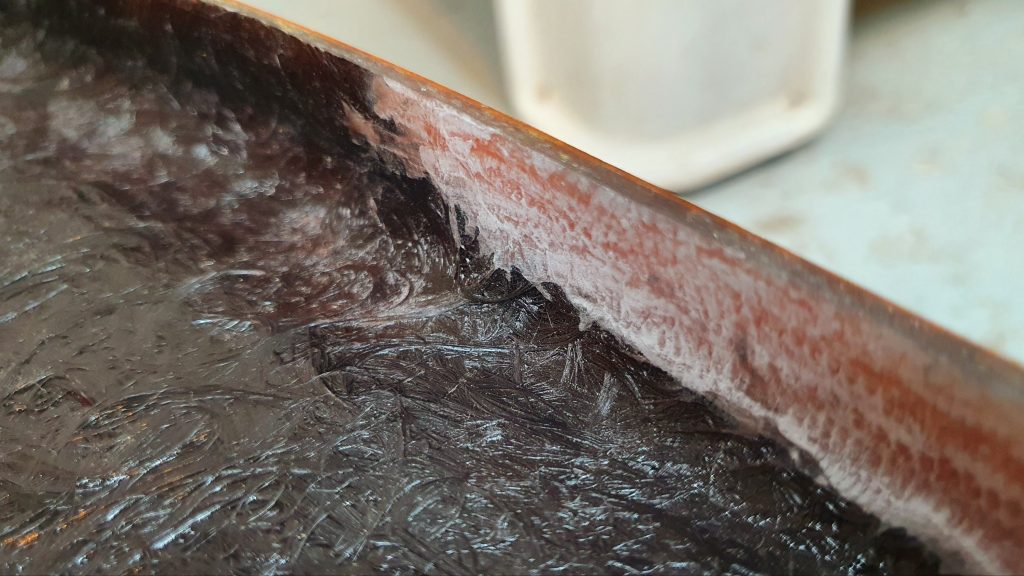
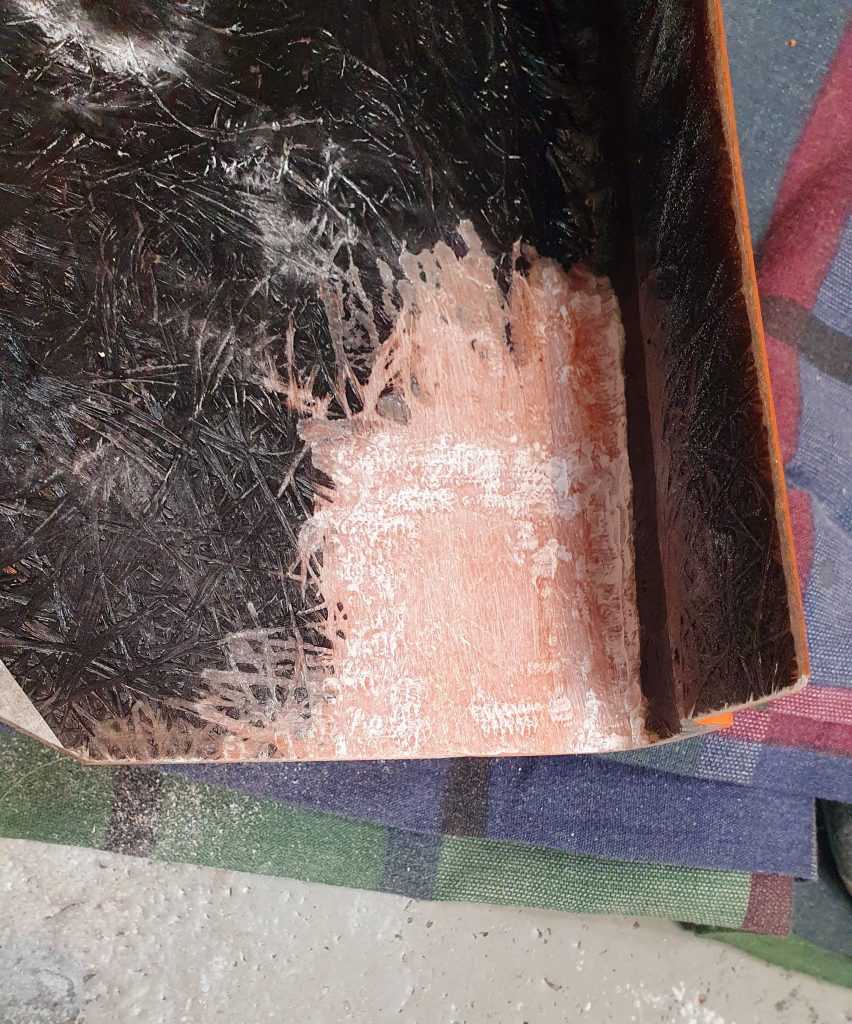
This needed a bit more fettling before I would be completely happy with it. Now, I know this won’t really be seen and most of the time covered by the boot cover. But, I wanted to make it better than it was at the moment. The first thing to address was the rather annoying (in my view) triangular gap just at the bottom of the panel gap between the side panel and the rear tub.
Panel Gap
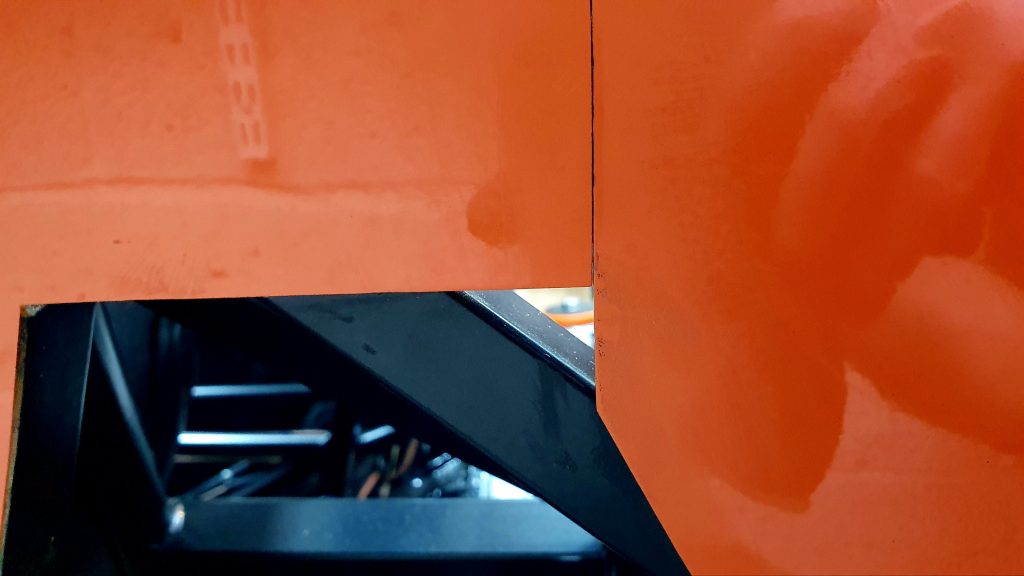
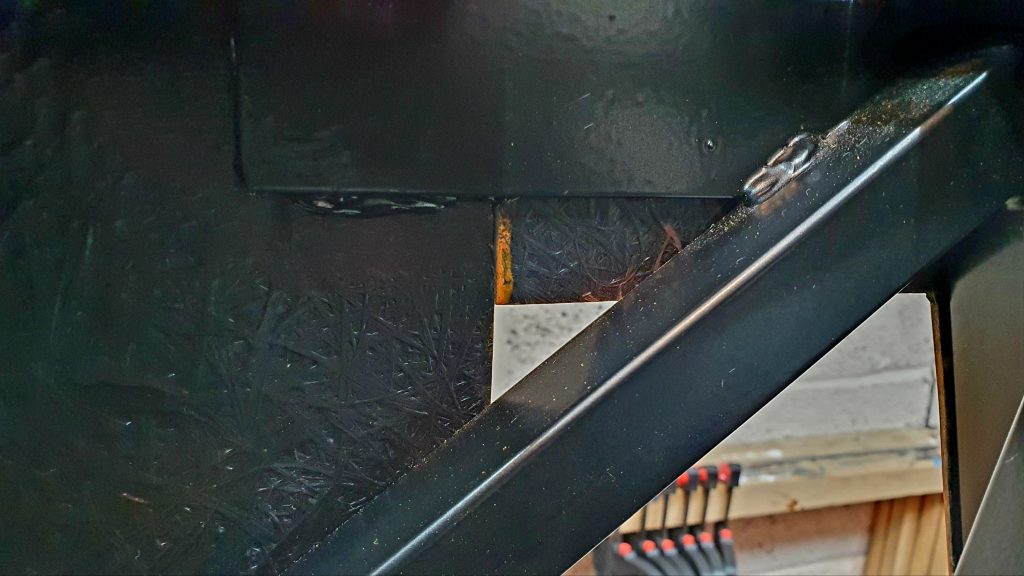
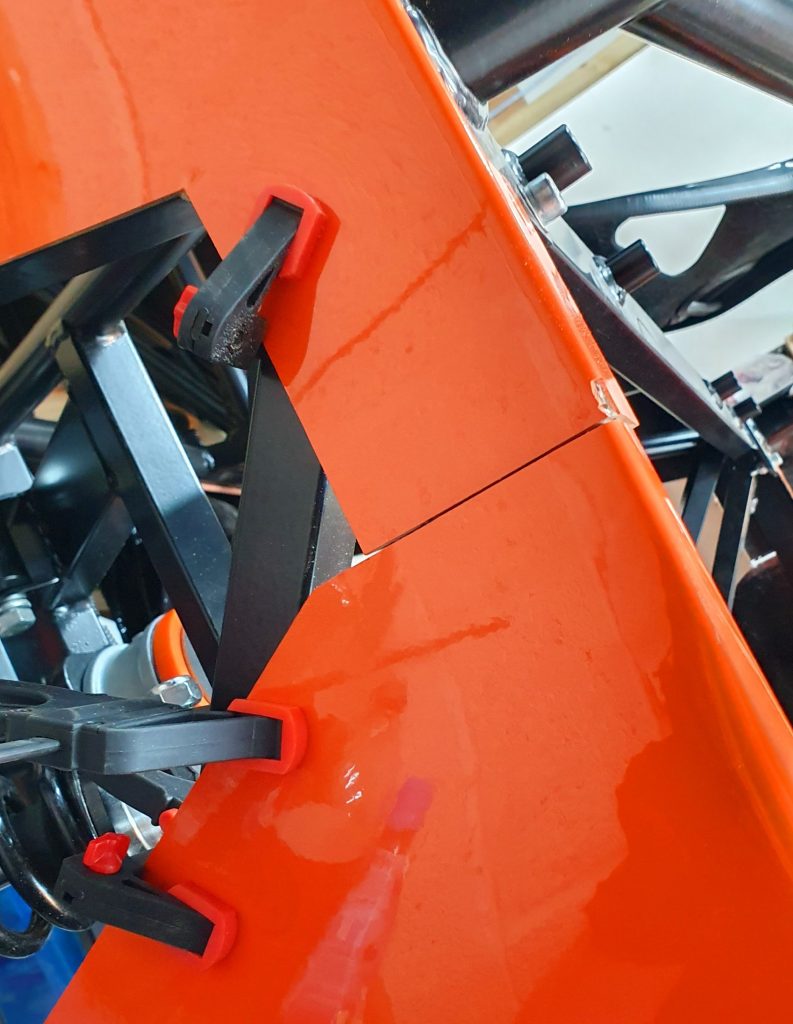
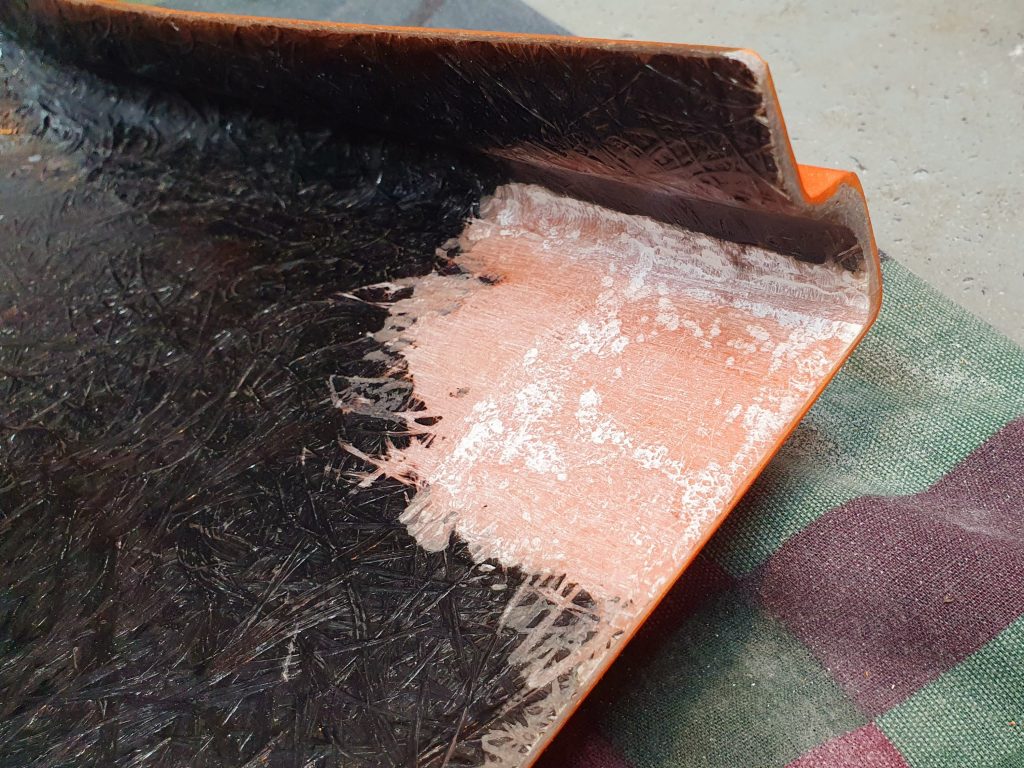
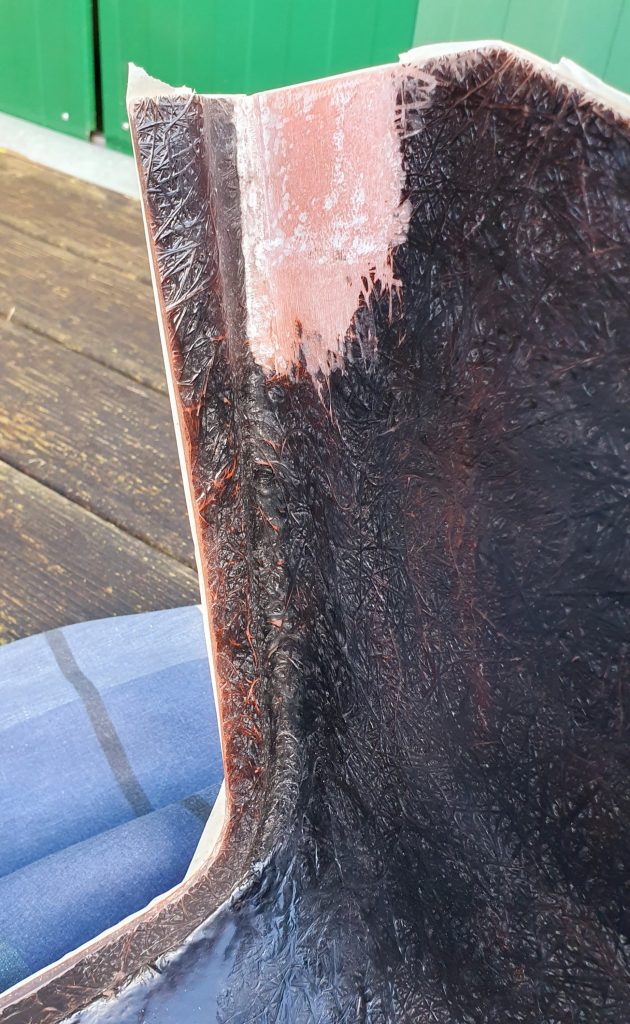
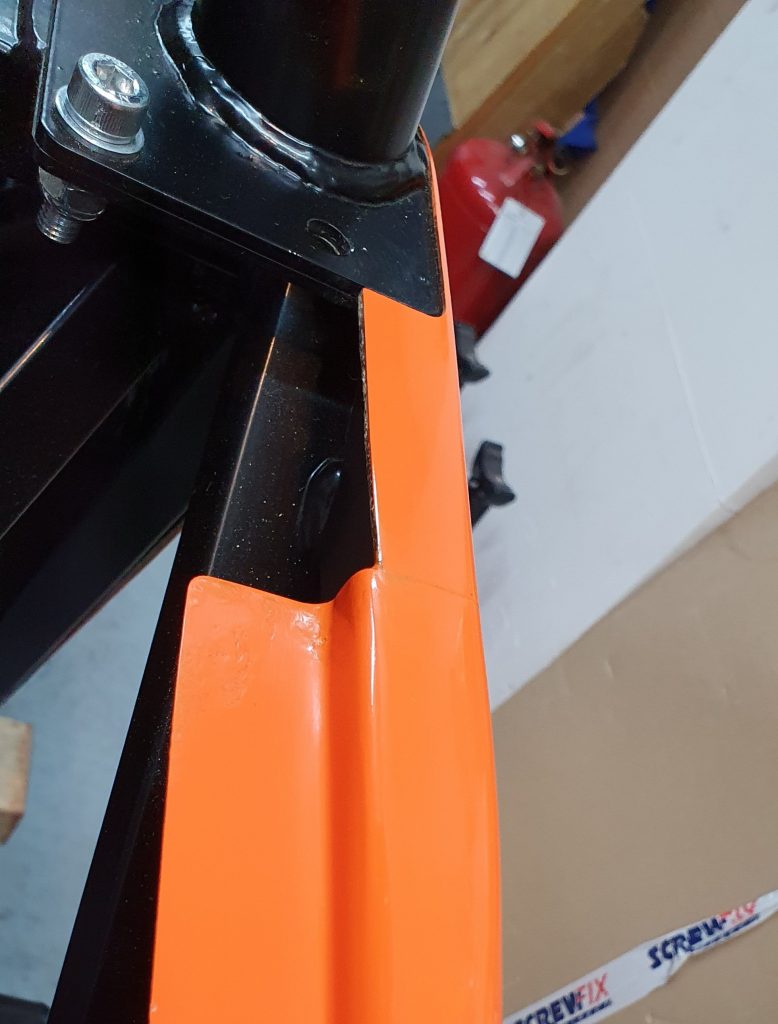
I decided to use some of the circular offcuts from the holes in the side panels for the suspension to not only fill the gap but also provide addiiotnal strength in this area.
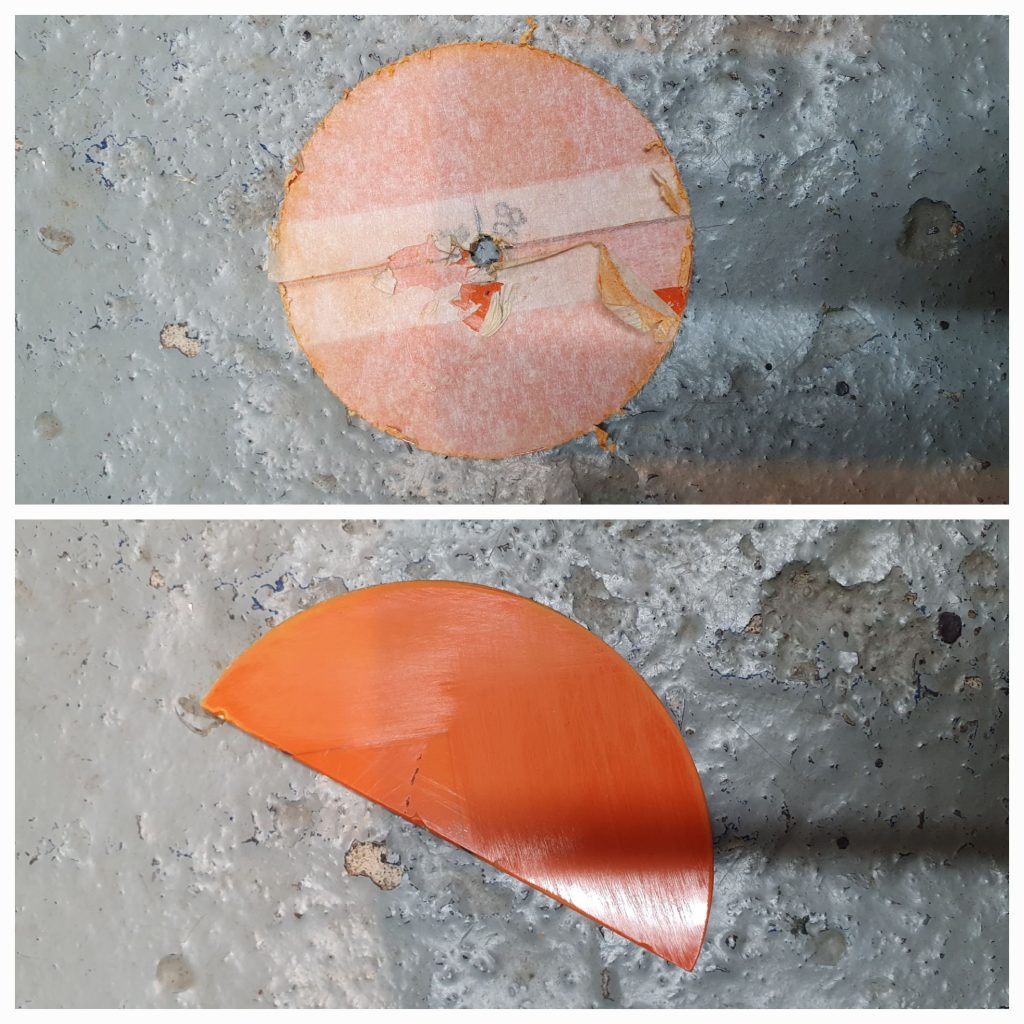
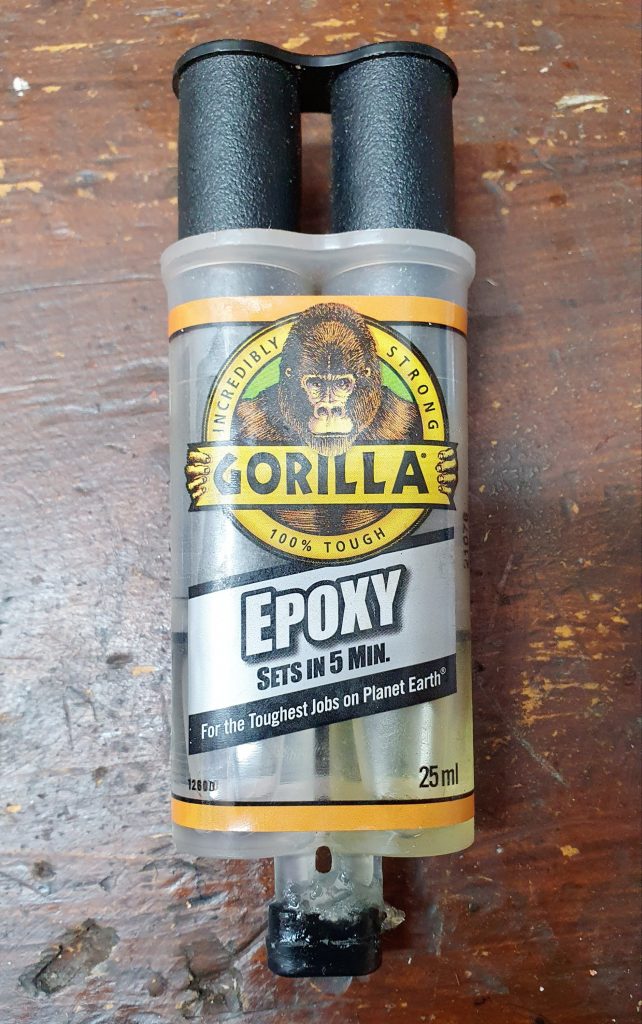
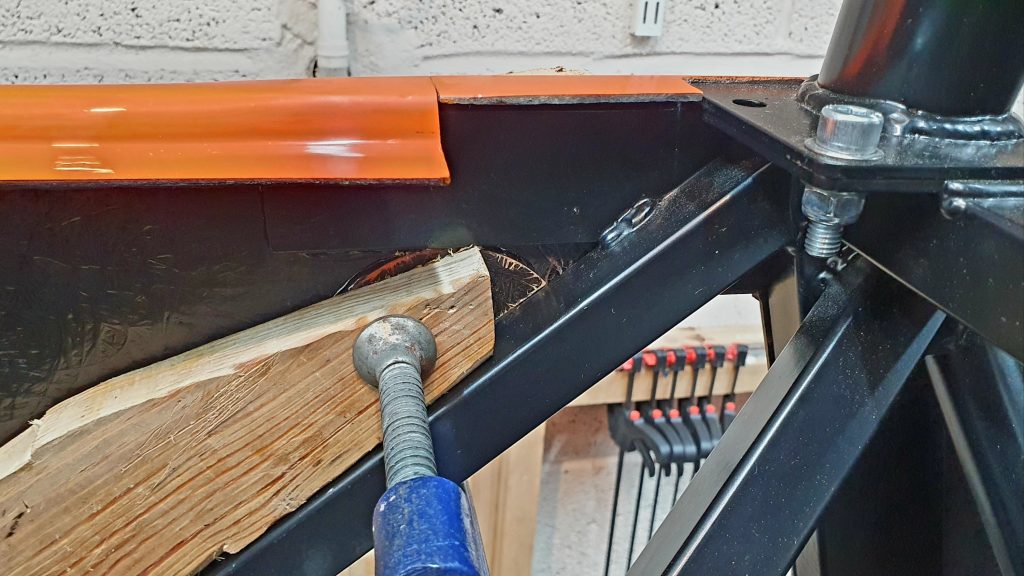
I used Gorilla Epoxy 2x Part Glue to fix the offcuts in place and clamped them to set. This worked extremely well and made this area much stronger and filled in the hole at the same time. I was very pleased with the result.
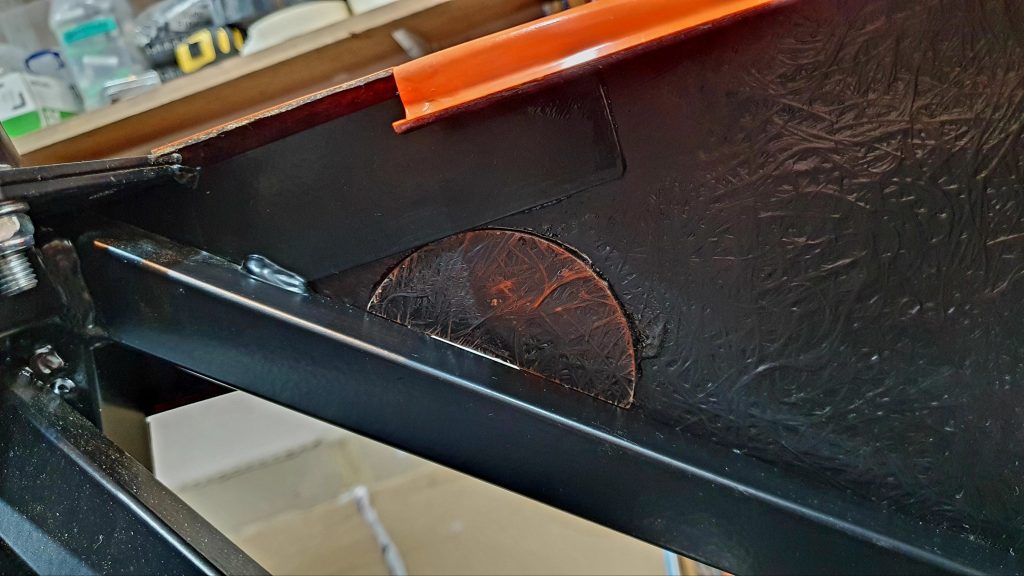
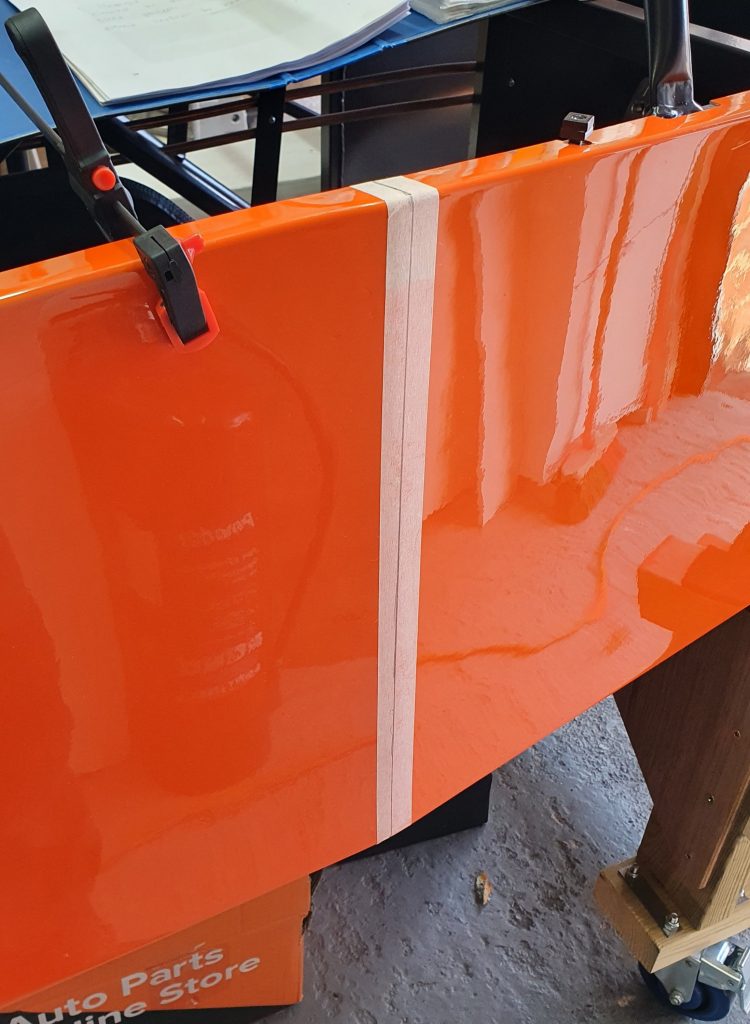
Panel Seams
So next was onto finishing off the panel seam between the side panels and the rear tub. The remaining gap here was pretty good but I felt I could make the thin black line almost disappear with a bit of effort. So, I already had some RAL 2009 Traffic Orange caliper paint which I used a small amount of to ‘fill‘ the gap between the panels as best as I could. All that was needed was a few thin coats and I left them to dry overnight.
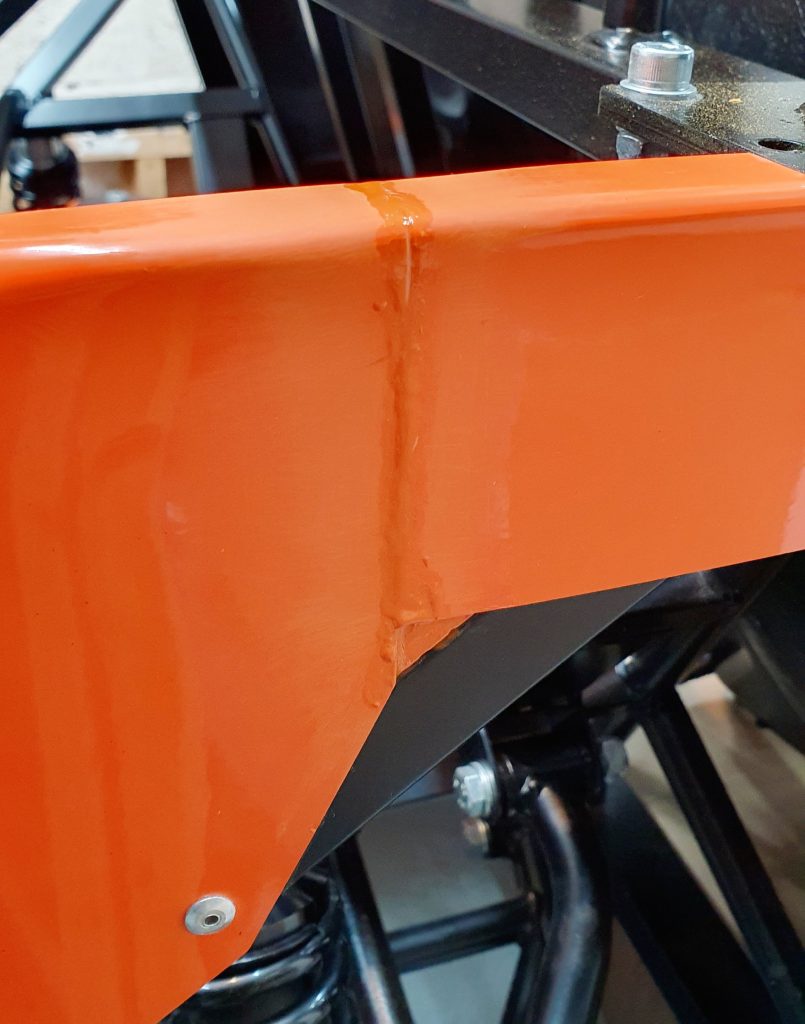
I then used some 400 grit wet and dry followed by some 800 grit to smooth down the painted ridge. I then used some paint rubbing compound and finished off with some Simoniz Liquid Diamond Polish and Wax to blend in the paintwork. Just remember, GRP is pretty thick and can in general be sanded and polished. But be very careful and don’t go too deep with the sanding! Once again I’m quite pleased with the result!
Selling Donor Parts
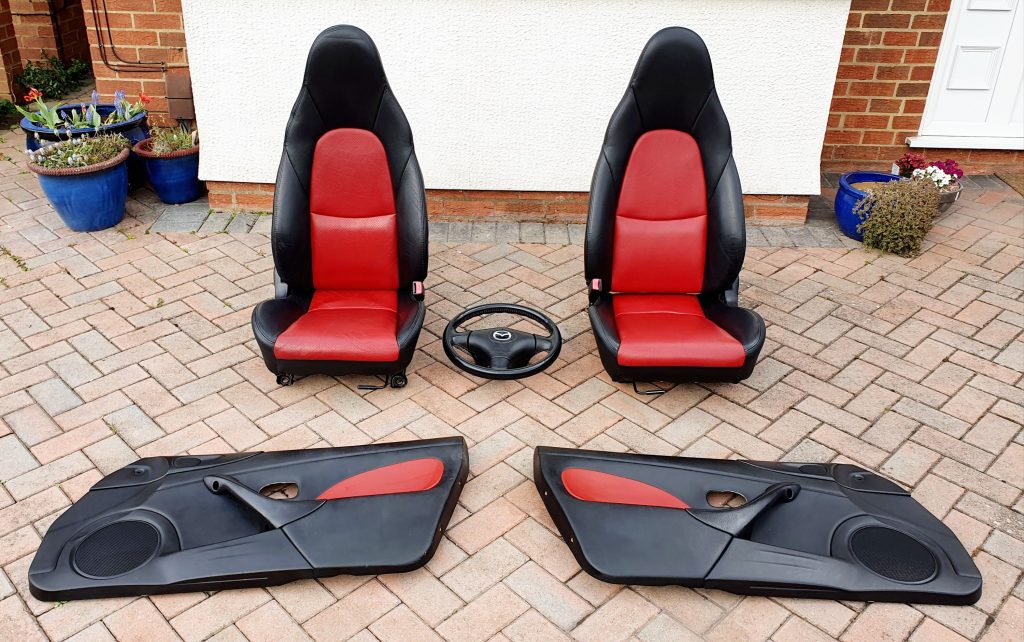
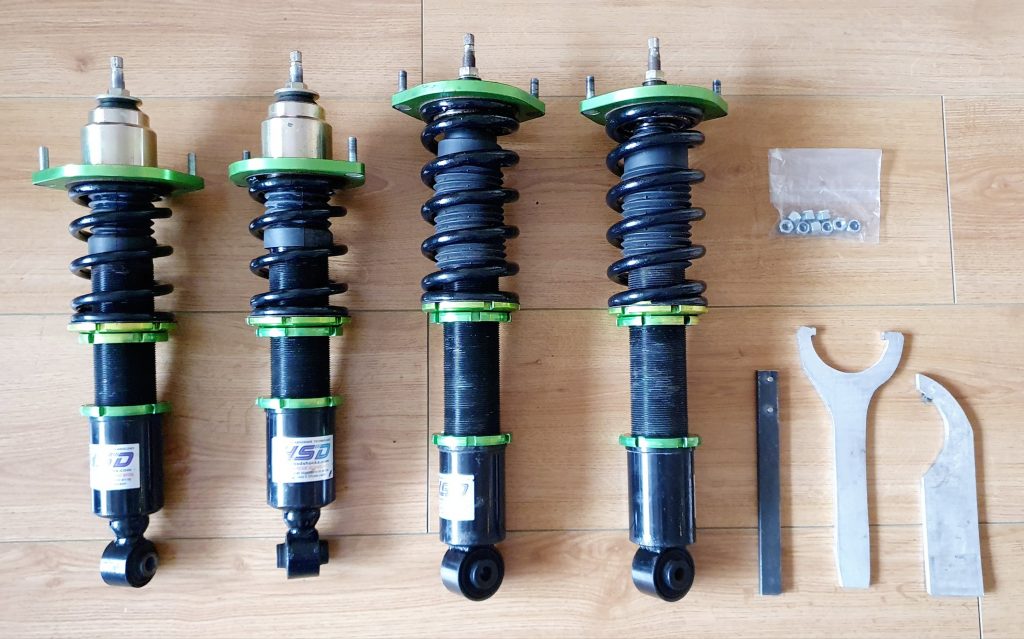
I have also managed to sell some more Donor Parts which I haven’t yet logged as a negative cost on this blog. I am very fortunate to have a nice special edition Euphonic MX-5 as the donor which had red and black leather tombstone seats in very good condition and some aftermarket HSD Coilovers. I fully reconditioned the coil overs with fresh paint in the springs and new boots and bump stops from HSD (£50 spent in total). Sold both on the Facebook Market place.
Leather Seat and Steering Wheel Set – Sold for £200
I know I could have got more for these as I had several inquiries within minutes but I really priced them to give me room quickly n my garden shed!
HSD Coilovers – Sold for £550 (but spent £50 refurbishing them)
These are over £800 new and only a couple of years old so a massive bonus to have these on the donor. I still have the original hocks to sell as well!
In total out of three items Catalytic Converter (£580), Seats (£200) and HSD Coilovers (£500) I have made £1,280 back from the donor vehicle which only cost me £700 to buy. So, nearly double the purchase price of the car. Not a bad return on my investment so far and I still have a shed full of parts still to sell!
Summary of Build Costs and Hours
Here is a summary of the costs and person hours (total number of hours for every person that has helped) for the build so far. This should hopefully help others with the planning of their builds, by providing cost and time actually incurred for this build. A more detailed breakdown of all the costs and hours worked on the build to date can be viewed here.
| Person Hours Worked This Post | |
|---|---|
| Cut and Dry-Fit Side Panels (2x people 6 hours) | 12 hrs |
| Cut and Dry-Fit Rear Tub | 7 hrs |
| Bond and Rivet Side Panels and Rear Tub (2x people 5 hours) | 10 hrs |
| Tidy Up Panel Gaps | 1 hrs |
| Car Build Costs This Post | |
|---|---|
| U-POL Tigerseal Black Pu Adhesive & Sealant - 310ML | £8 |
| DONOR PART SOLD - Leather Seats, Steering Wheel and Door Cards | £-200 |
| DONOR PART SOLD - HSD Coilovers | £-500 |
| Totals | This Post | To Date | All Posts |
|---|---|---|---|
| Person Hours Worked | 30 hrs | 344 hrs | 500 hrs |
| Car Build | £-692 | £11,844 | £13,956 |
| Tools / Consumables | £0 | £459 | £470 |
| Total Cost | £-692 | £12,303 | £14,426 |
