Wow, looking back I suddenly realise it has been 7 months since my last post. Where has that time gone? I’m so sorry that there hasn’t been an update until now. We’re at the start of 2023 and the better weather is approaching fast. Will 2023 be the year I get enough motivation and time to finish my MK Indy build? Time will tell…
So despite not posting since July 22, I have actually done quite a bit of work since then. However, I have struggled to both build the car and create content for the blog and YouTube at the same time. Maybe I did overstretch my ambitions to both build my kit car and to document the journey well at the same time. The one thing I know is that I’ve started documenting it now so I can’t stop! Maybe I just need to be a bit more efficient with what I do to find the right balance. Anyway it’s time to update you all on what I have actually achieved since my last post.
A Helping Hand
I was very fortunate to have my Dad come down to stay for a week in the October 22 to help give the build a super boost in progress. I really wanted to get him to help with something substantial on the build – rather than just help tidy the garage! So, we set our sights for the week on seats, rear suspension and bodywork. Up first was the seats, which doesn’t appear until later in the manual, but from all the MK workshop walks it seems easier to tackle now before you get all the bodywork in the way. It should’ve been quite a straightforward job to tick off the list first. However, it wasn’t quite as quick as I hoped…
Preparing the MK Indy Seats
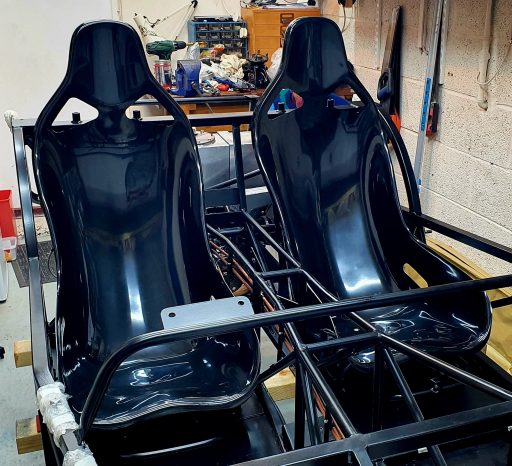
The first thing to do was to prepare the seats before installing them in the chassis. The MK Indy seats are fresh from the mould therefore they generally have some marks on them which need cleaning up. There is a round almost 20p size mould mark at the very bottom of the bucket in each seat which needs a good polish. One of mine had a white mark on it and I thought it was lacking the black top coat and even emailed Neil at MK to see if this was normal.
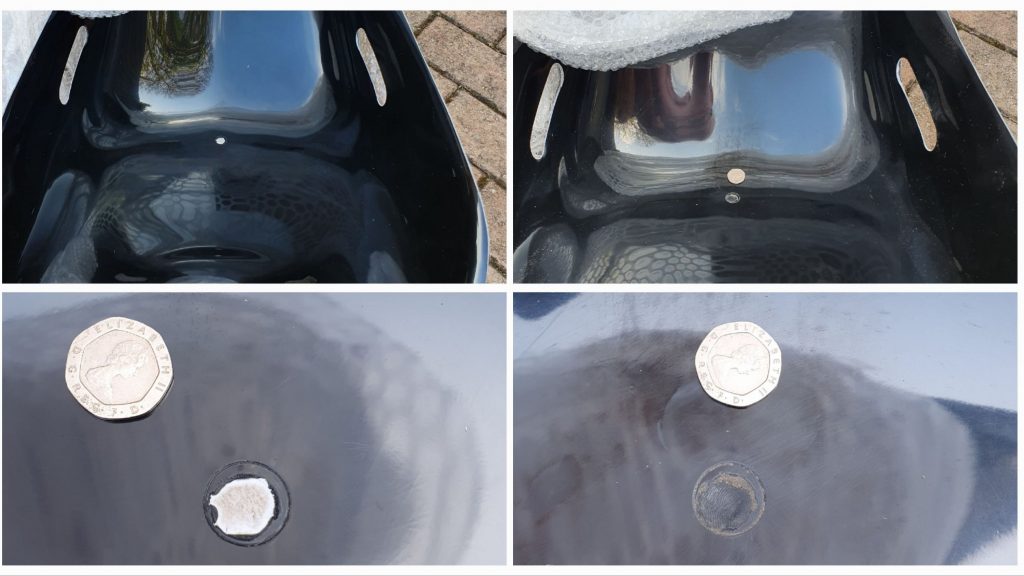
But actually, the white mark must have been some of the release agent still left on the seat from the mould. This came off really easily with a bit of methylated spirit on a rag.
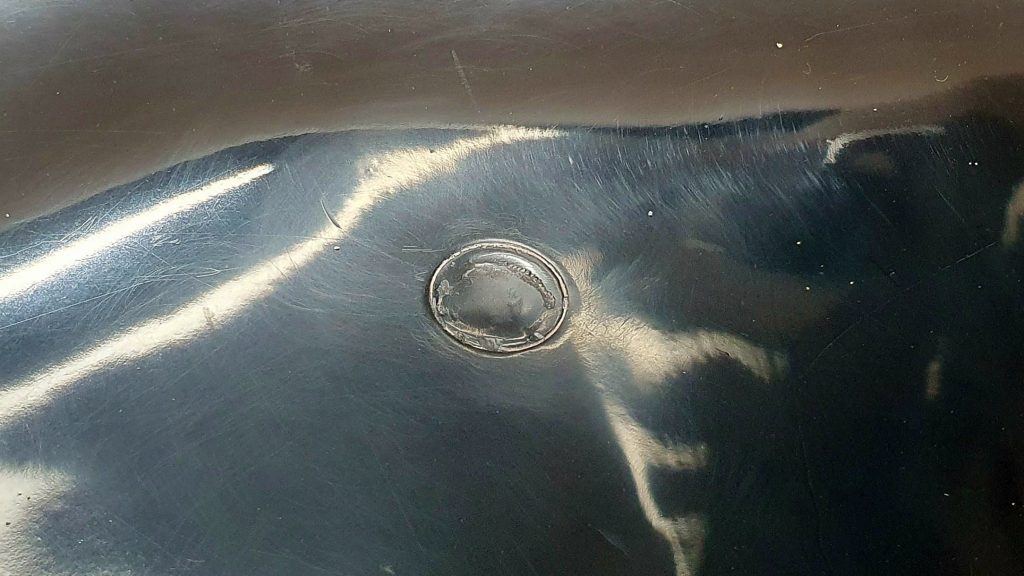
Once any marks were cleaned up on the front of the seats, the back of the seats were then given a spray with some black spray paint. This was to clean up some of the marks around the cutouts for the seat belts and to generally tidy up the look of the back of the seats.

My mate Dave kindly did this for me and then went on to fit the seat trim that came with the kit. Just make sure you use the actual seat trim and not the trim for the body panel cutouts like I accidentally gave to Dave initially!
The correct seat trim fits well and needs a bit of gentle persuasion at times with a rubber mallet. Dave added a small amount of the tiger seal to the 2 ends where they came together. He placed the join at the front bottom of the seat, which worked well.
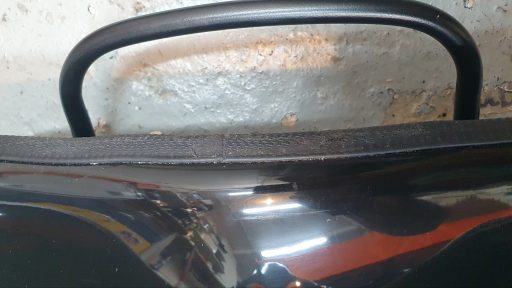
The seats came up pretty well in the end but we just ran out of trim as we only received one pack with the kit instead of the ordered 2x. A quick email to Neil at MK sorted that out and more is on the way. So the seat belt holes are still to be trimmed.

MK Indy Seat Runners
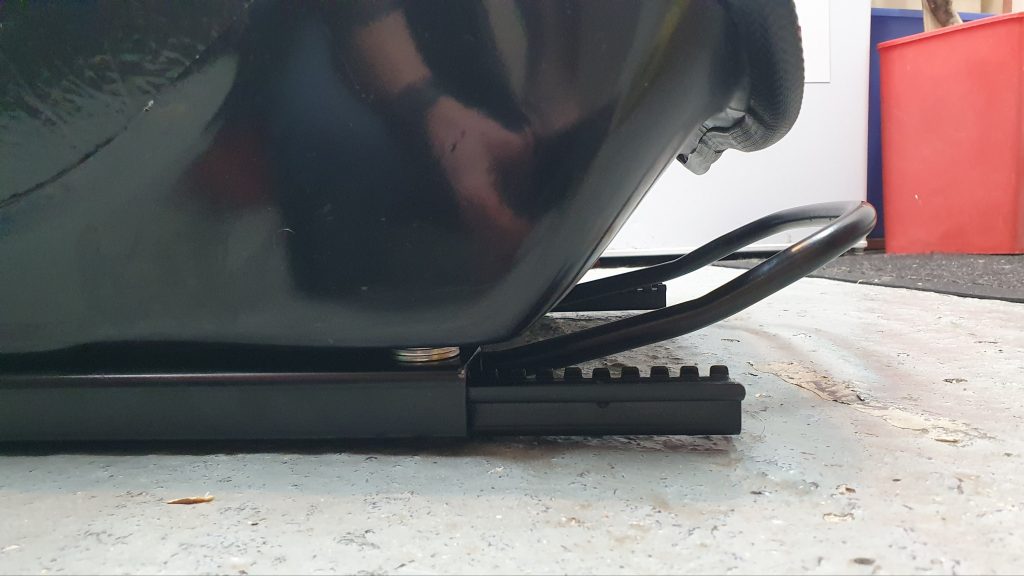
I went for seat runners on both sides for my MK Indy seats to give adjustment to both driver and passenger. These are reasonably easy to fit. They just need M8 large washers added between the seat runner and the seat. This is to make it level due to the moulding not being straight all the way along on the right hand side.
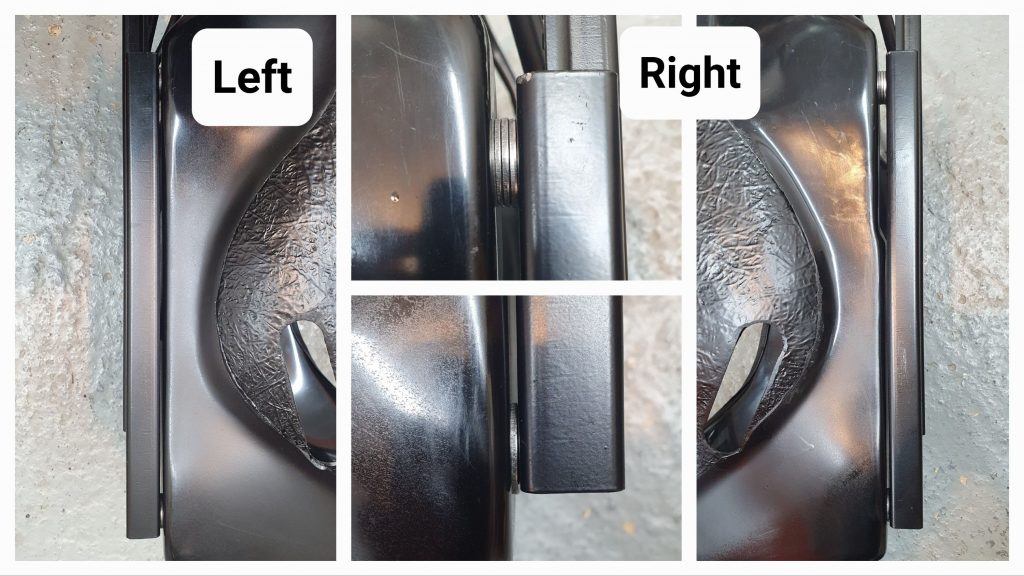
The main issue was the fettling of the adjuster pipe/ bar at the front which releases the ratchet. Due to the seat being quite narrow and the runners being universal, the angle of the sides as it connects to the mechanism needs bending straighter to allow it to sit completely flush with the mechanism.

The second issue is that the bar also needs to be bent upwards away from the floor to provide greater clearance to the floor chassis rail. Otherwise, you will end up taking your fingers off when you come forward as it clashes with the MK Indy chassis rail that goes across under your legs. This was reasonably easy to solve by adding an additional bend upwards. I did this by placing the bar in the vice and gently easing a bend into the tube at a set distance on both sides.
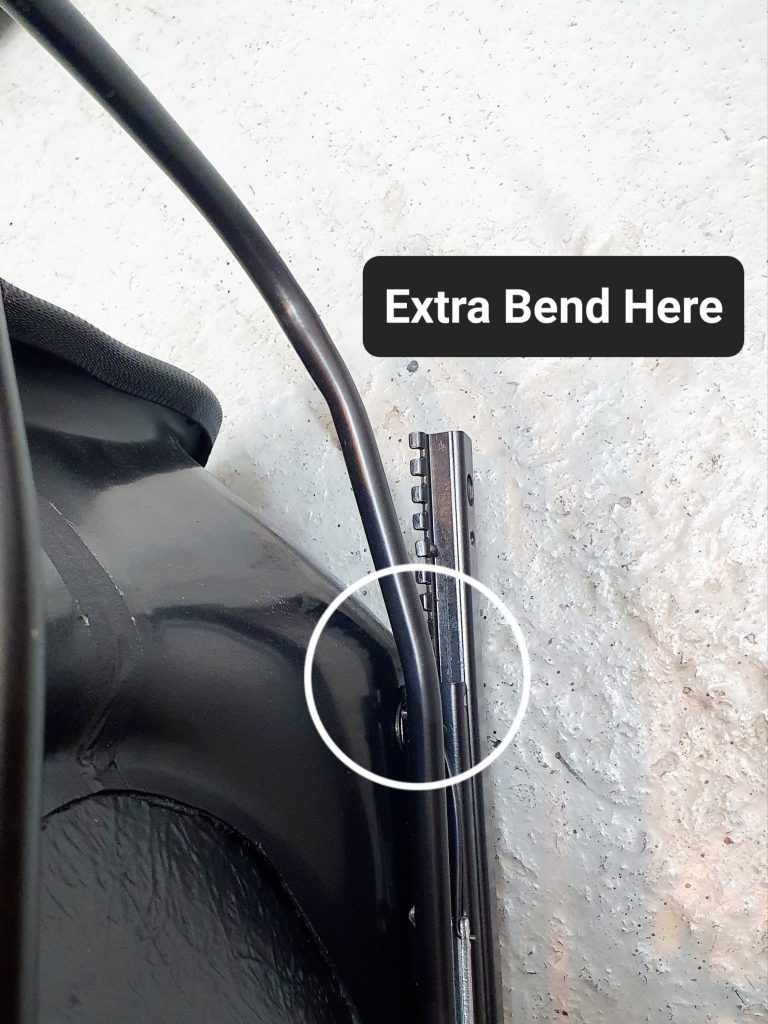
This worked really well and we did the same fettling on both sides. This then provided adequate clearance to the MK Indy seat adjuster handle when the seat would be fully forward.
Drilling the Seat Mounting Holes
The manual shows you how to measure and drill the holes in the floor for MK Indy seat mounting. Now this is a good guide, but I do have one word of caution. Don’t just blindly measure in accordance with the manual and hope everything will be OK. This is particularly an issue if you are using the adjustable rails like I am on both sides. You must make sure that the seat doesn’t clash with the chassis sides when fully forward and fully backward. On the driver’s side, I had the mounting points parallel to the chassis side. However, I moved the mounting 10mm to the right of the centre line to make sure the seat didn’t rub on the centre tunnel when fully forward. This small change made all the difference and shouldn’t be noticeable from a driving position perspective.
On the passenger side, I had more issues, no matter what I did I couldn’t get the seat holes parallel to the side and not clash at the sides when either fully forward or fully backwards. Something seemed out of alignment. Initially, I thought it might be the seat was moulded sightly wonky but swapping the driver’s side seat instead had exactly the same problem. I measured several comparative points on both seats to see if they were straight. This proved that actually both seats were built to a reasonable tolerance and only differed by a few mm here and there.
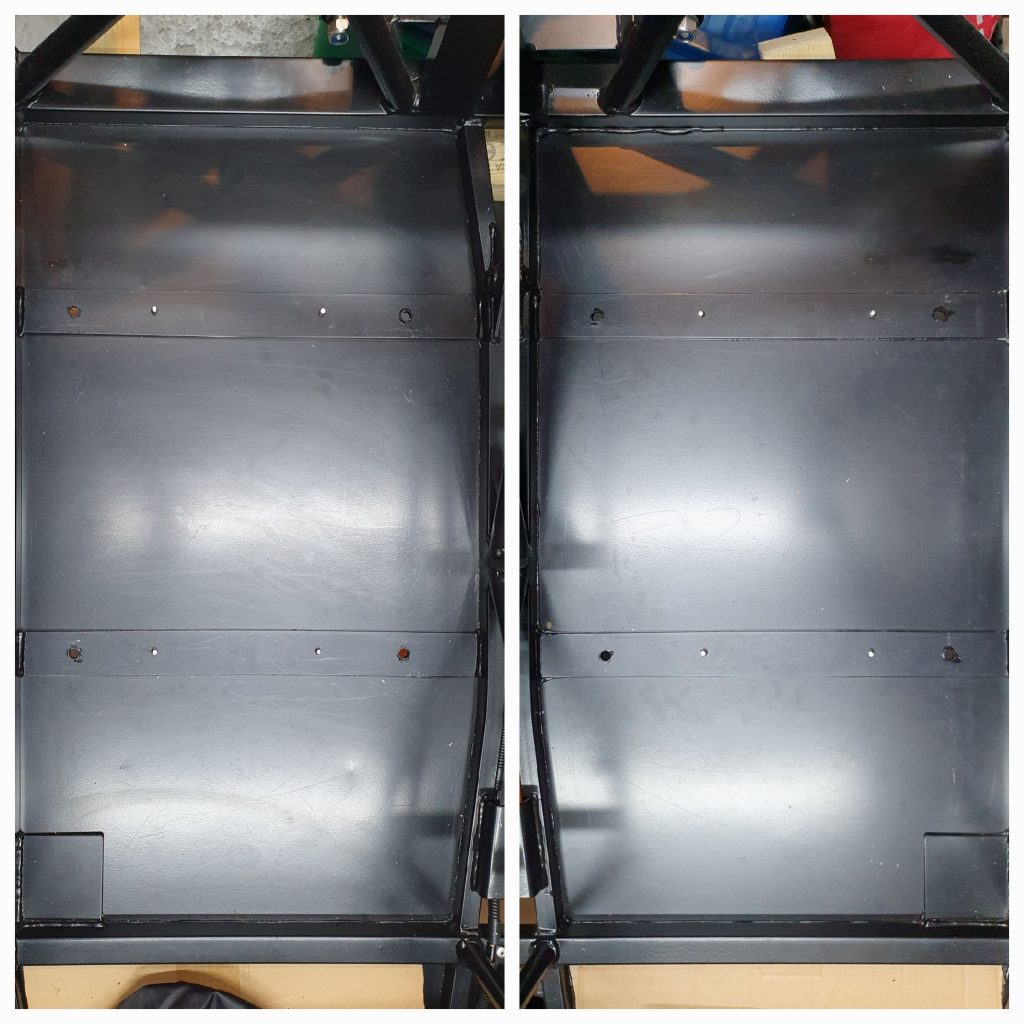
So, I then measured the chassis to see if that was out in any obvious areas. But, again all the measurements were pretty spot on and the chassis seemed very straight in all areas. So to solve the issue I ended up having to drill the mounting holes not quite parallel to the side with the back holes being circa 10mm further towards the centre line of the vehicle than the front holes. This got my OCD going but ended up being a simple solution.
Once we’d worked out the hole positions and checked several times, my Dad got to work drilling through the chassis floor.
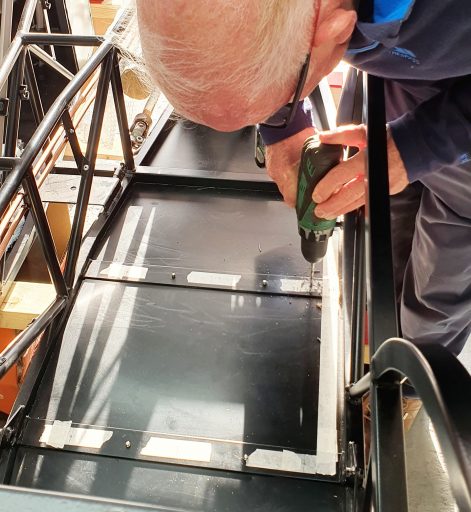
The final positions on both sides allowed the MK Indy seat to go fully forward and fully back without clashing with the chassis. Once bolted in this is not noticeable when seated but solves the issue quite nicely.
Summary
This is not a difficult job and it is actually quite satisfying to get it done and be able to sit in the car and test the runners for the first time. It is definitely easier to do this at this stage of the build to get access to measure and drill before you get too many body panels in the way. It just needs a little bit of careful measurement and checking before you dive in and drill the holes.
Summary of Build Costs and Hours
Here is a summary of the costs and person hours (total number of hours for every person that has helped) for the build so far. This should hopefully help others with the planning of their builds, by providing cost and time actually incurred for this build. A more detailed breakdown of all the costs and hours worked on the build to date can be viewed here.
| Person Hours Worked This Post | |
|---|---|
| Prepare Seats, Mount Runners and Drill Mouting Holes (2 Persons) | 8 hrs |
| Car Build Costs This Post | |
|---|---|
| A2 Stainless Steel Large Flat Washers M8 x 2mm Qty 50 | £16 |
| Totals | This Post | To Date | All Posts |
|---|---|---|---|
| Person Hours Worked | 8 hrs | 274 hrs | 404 hrs |
| Car Build | £16 | £12,501 | £13,202 |
| Tools / Consumables | £0 | £389 | £470 |
| Total Cost | £16 | £12,890 | £13,672 |
