
This is a modification for the Mazda MX-5 Miata Clock Spring, to allow the horn to be used when installing the collapsible Momo Boss for an after market steering wheel. I have completed this mod for my MK Indy kit car build. However, it is also suitable for anyone wanting use an after market steering wheel on the MX-5 Miata and maintain the horn function.
The Issue
There appear to be 2x main options for after market steering wheel bosses:
- Bosses that are not collapsible. These seem to fit with the standard Mazda clock spring and connections, however it would not collapse in an accident.
- Bosses that are collapsible. These seem to not fit with the standard clock spring and connections. These would collapse in an accident and certainly is needed for the kit car IVA test in the UK.
Now this might be a bit of a generalisation but I haven’t managed to find in the UK a collapsible boss that works without removing the clock spring.
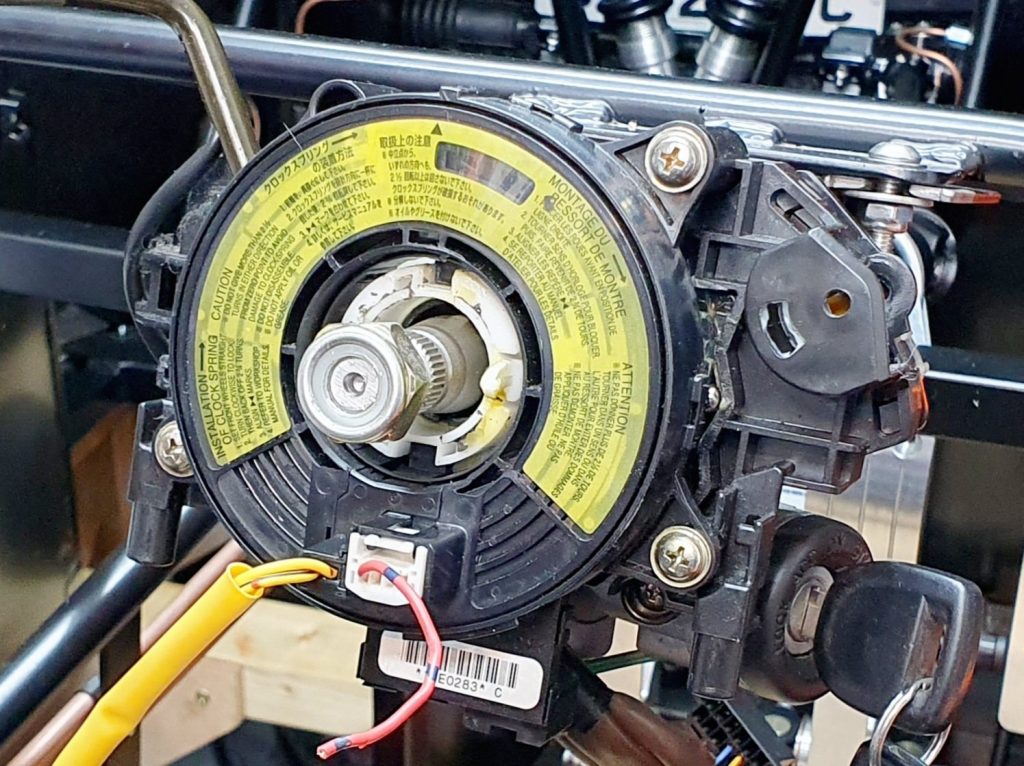
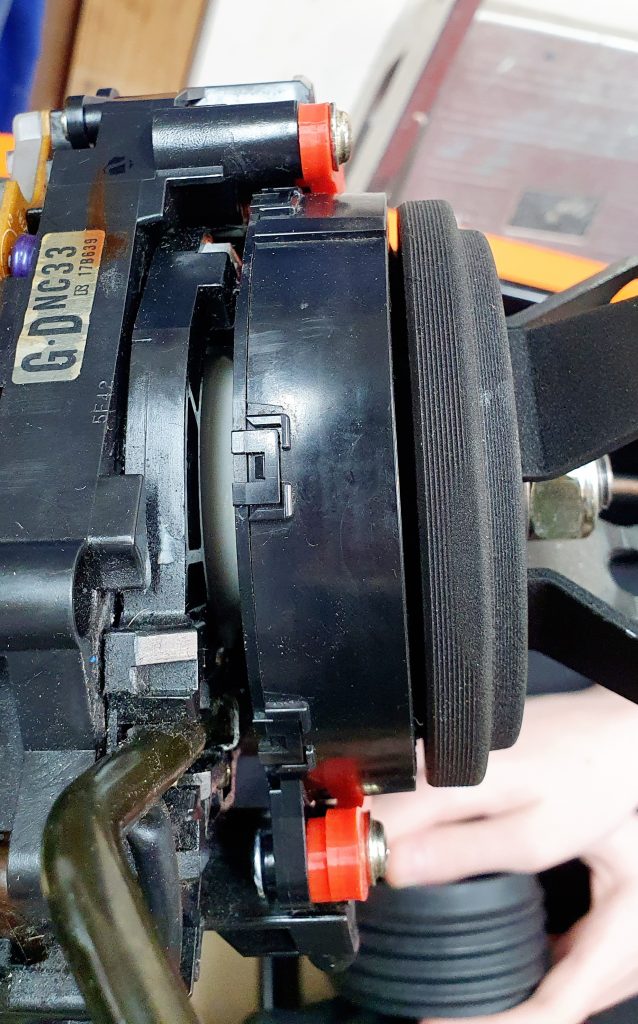
The issue, looking at the image above, is that the Momo boss needs to sit flush with the white collar in the middle. This is to actually engage sufficiently with the spline on the steering column. The only way to do this normally is to remove the clock spring completely. Like this:
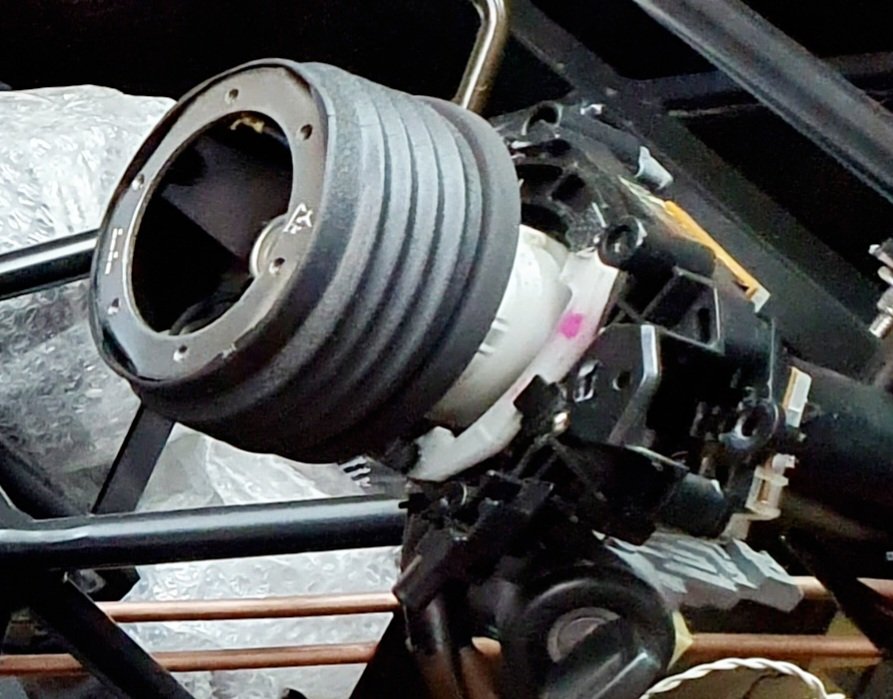
However by doing this you then remove the connection for the horn. So this is an OK approach if you don’t want a horn. However, in the UK there is a legal requirement for a horn as part of the yearly MOT test required. So most people may choose to use the built in slip ring which the Momo one looks like this:
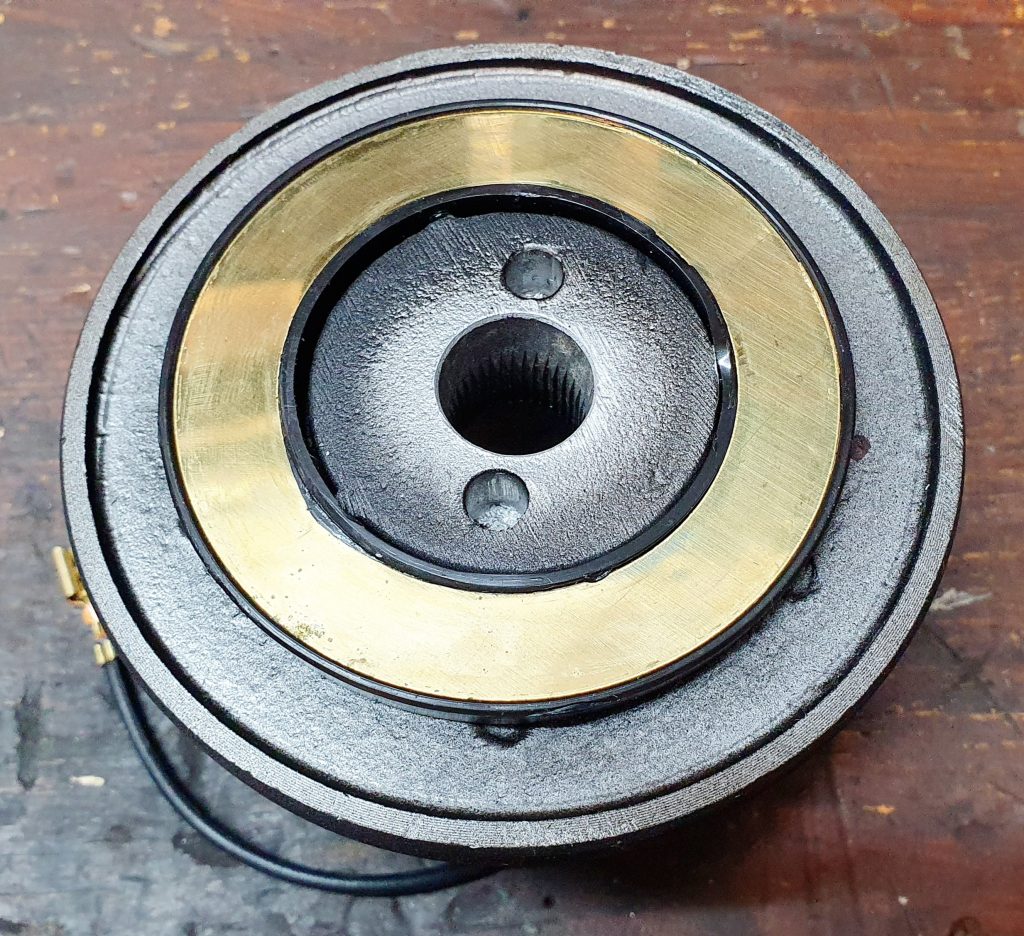
The issue with this is that it ends up with you needing you create a connection to the slip ring. This normally mean bending up a bit of wire to touch the surface and connect into the horn connection. This approach can work but it often not particularly robust/ reliable after a bit of use the wire bends and you lose the connection.
The Solution
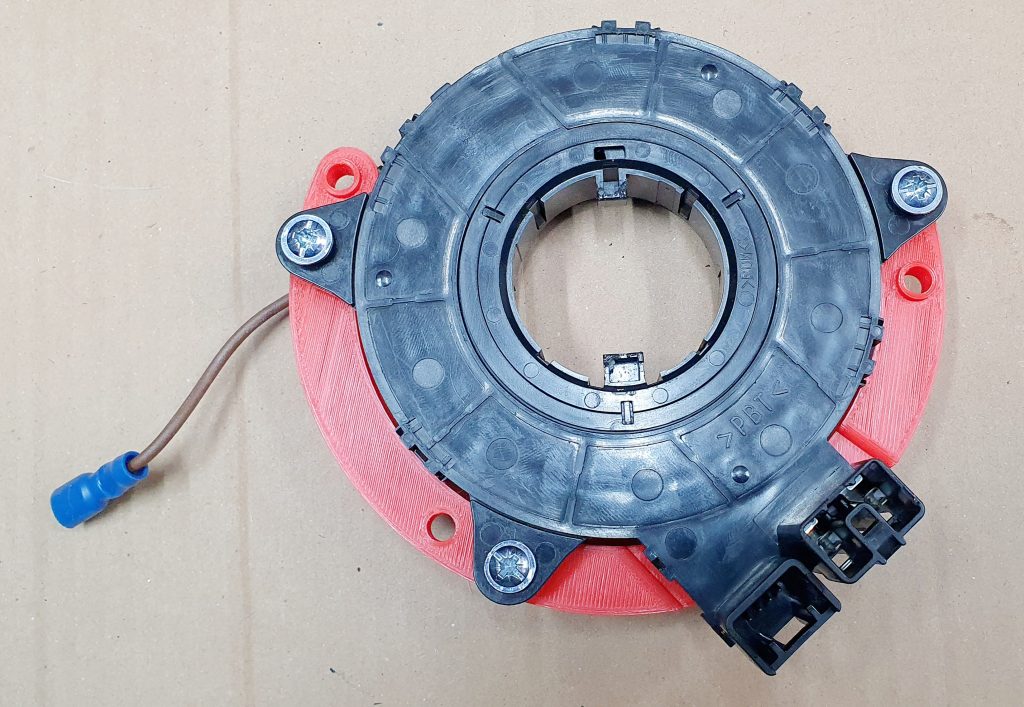
The modification I have created here essentially mounts the clock spring 10mm lower down. This uses a 3D printed adapter bracket and flattens the horn connection on the clock spring. This allows the Momo boss to fit flush fully engage with the spline.
It allows the horn to be connected to the standard clock spring connection on the car loom side. Then the horn to be connected to a single wire on the steering wheel side.
The Modification
Here is a summary of the different steps you need to take to modify your Mazda MX-5 / Miata:
Modify the Steering Boss
I have the Momo Boss which seems to be quite a common choice if you want one that is collapsible.

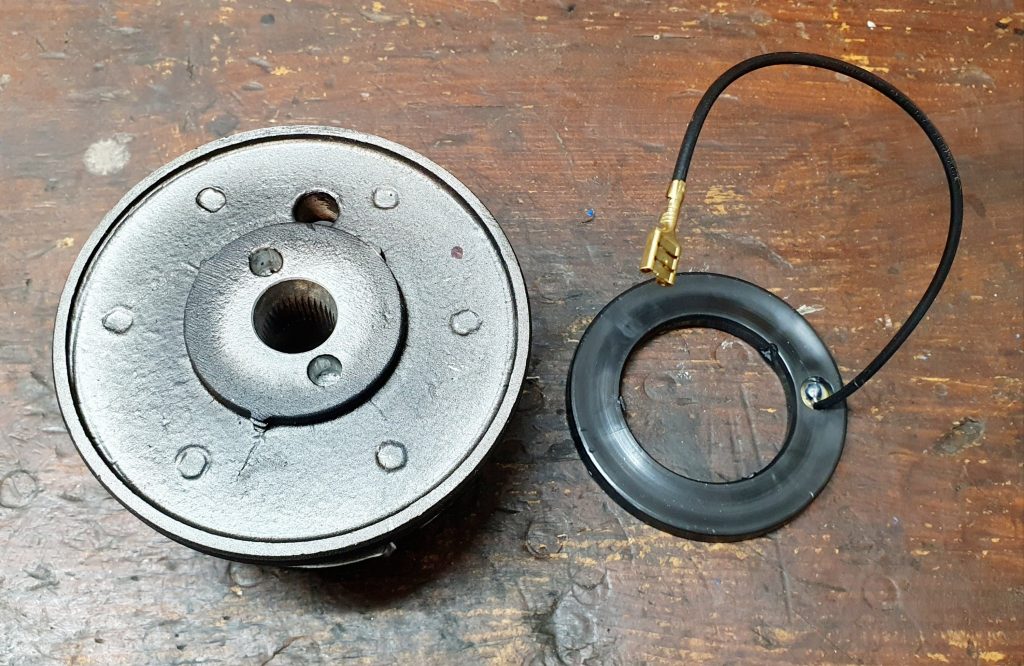
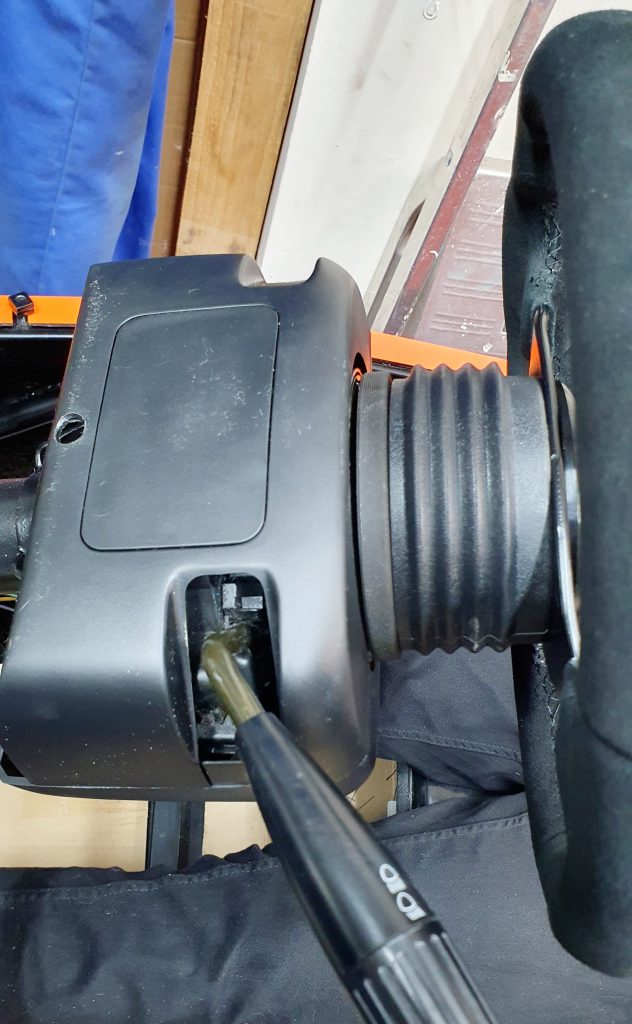
You simply need to remove the slip ring by gently prising it off the back of the boss. This is a interference fit with no glue so it comes off much easier than I thought as below.
Modify Clock Spring
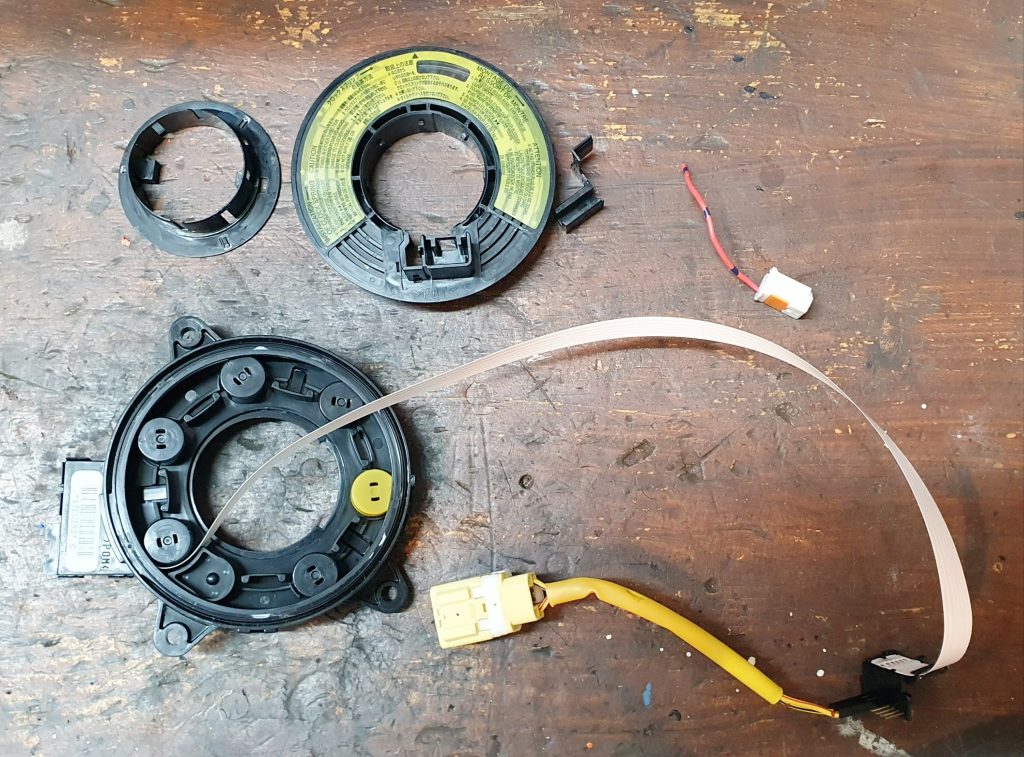
I took my clock spring apart to complete the modification but this could actually be achieved without doing this. This is what a dismantled clock spring looks like:
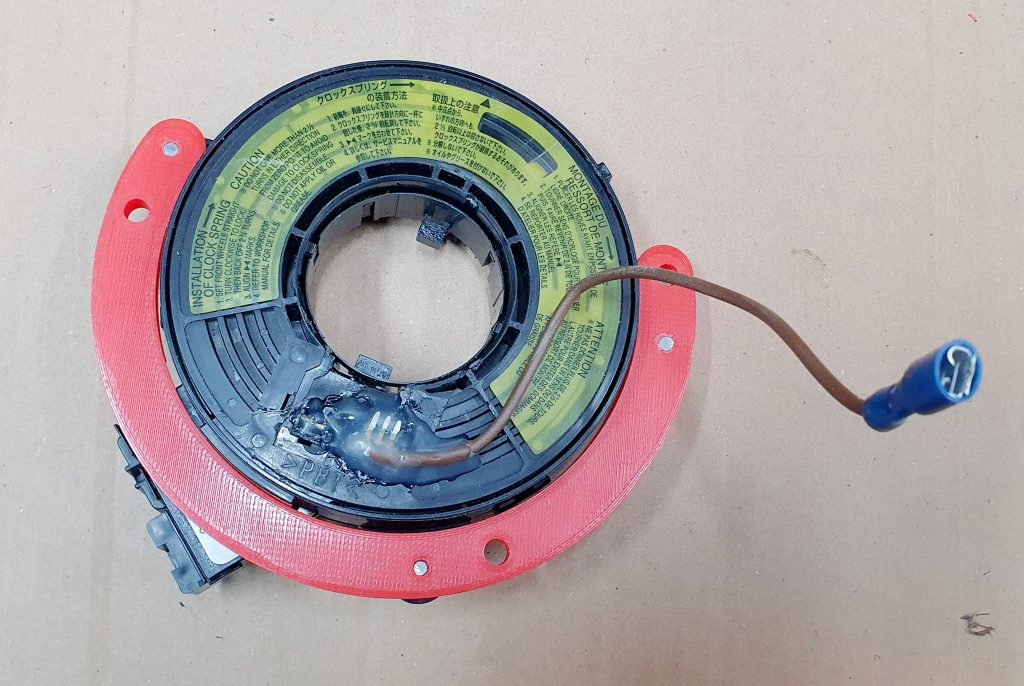
The modification is to remove the large connector for the horn and the airbag. Then simply solder in a single horn cable instead.
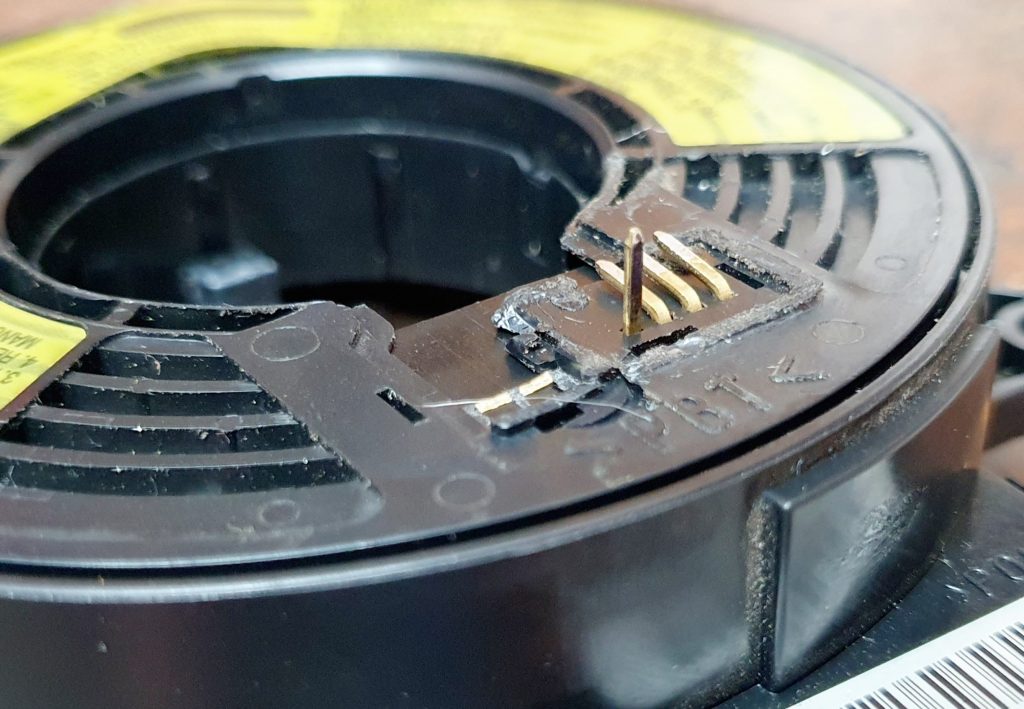
So I used some electrical side Cutters to cut back the connector plastic until it was flush with the face of the clock spring.
I then cut the Air Bag connector pins off completely (connected to the yellow wires). These will not be needed due to there being no airbag on the after market wheel.
I decided to bend down the other pins next to the single horn pin. This is just in case later on I want another switch on the steering wheel for something. You can just cut the other pins off but definitely leave the single pin you can see sticking up below as this is the one you need for the horn.
I then soldered on a horn wire about 15cm long. I used the same gauge wire as the horn connector on the Momo slip ring.
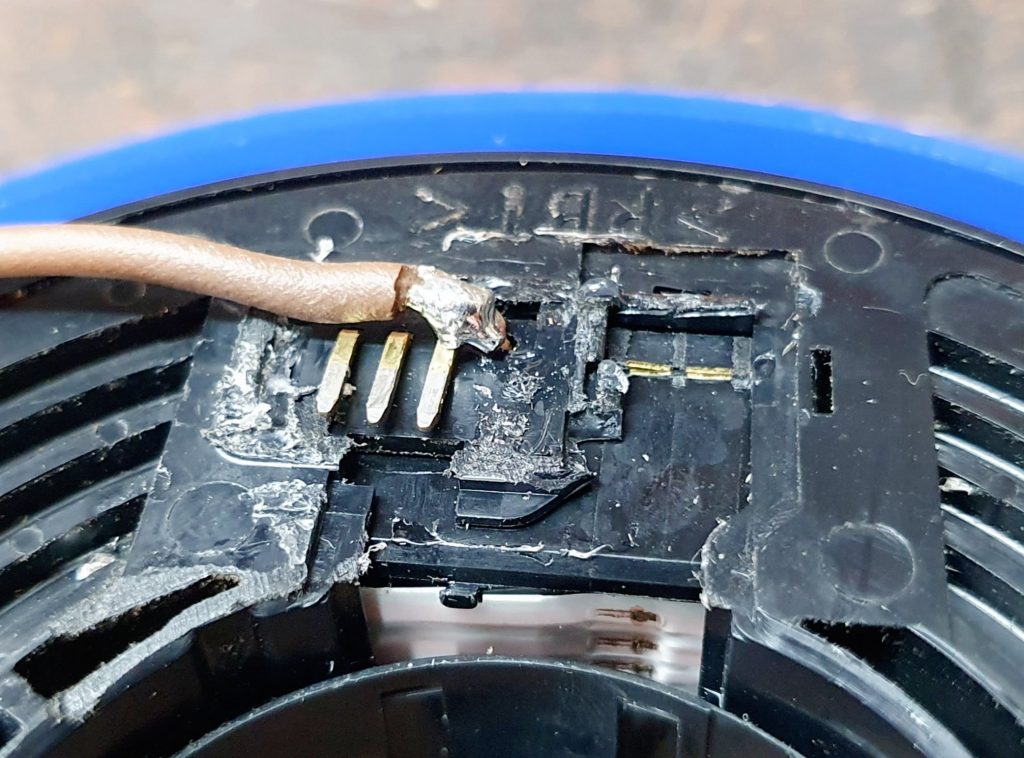
I then used some Hot Glue to pot the soldered connection. This holds it in place and gives it some protection against vibrations in the future. I’ve used Hot Glue here as it goes on easily but is also easy to remove if needed.

That’s the clock spring now ready to be installed.
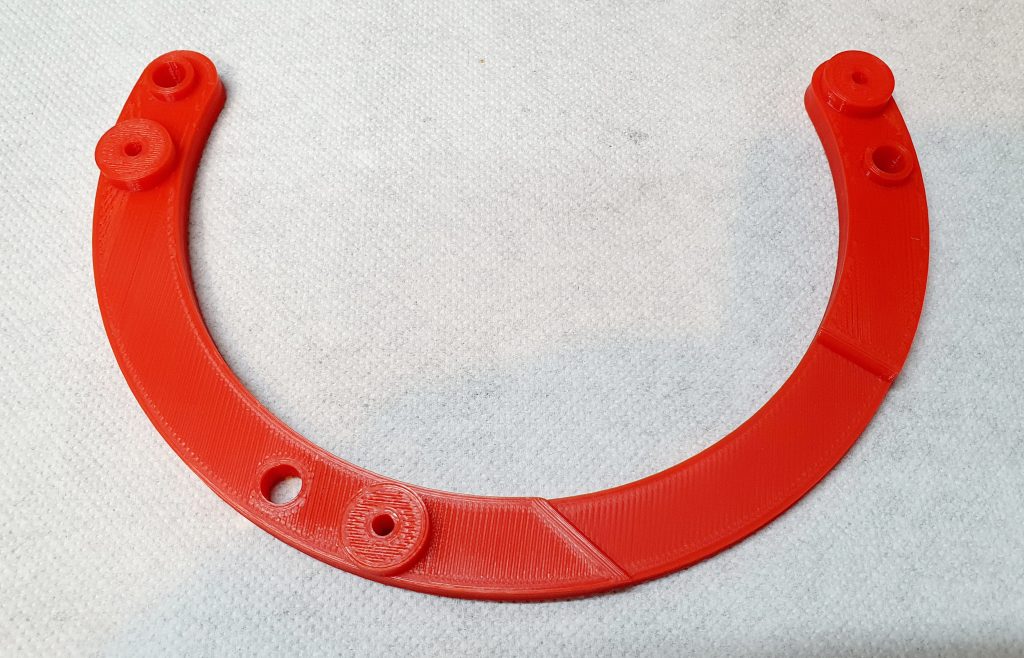
The Adapter Bracket
I then designed an adapter bracket to mount the Clock Spring 10mm lower in CAD. This uses the existing fixing points on the Clock Spring and the Steering Column.
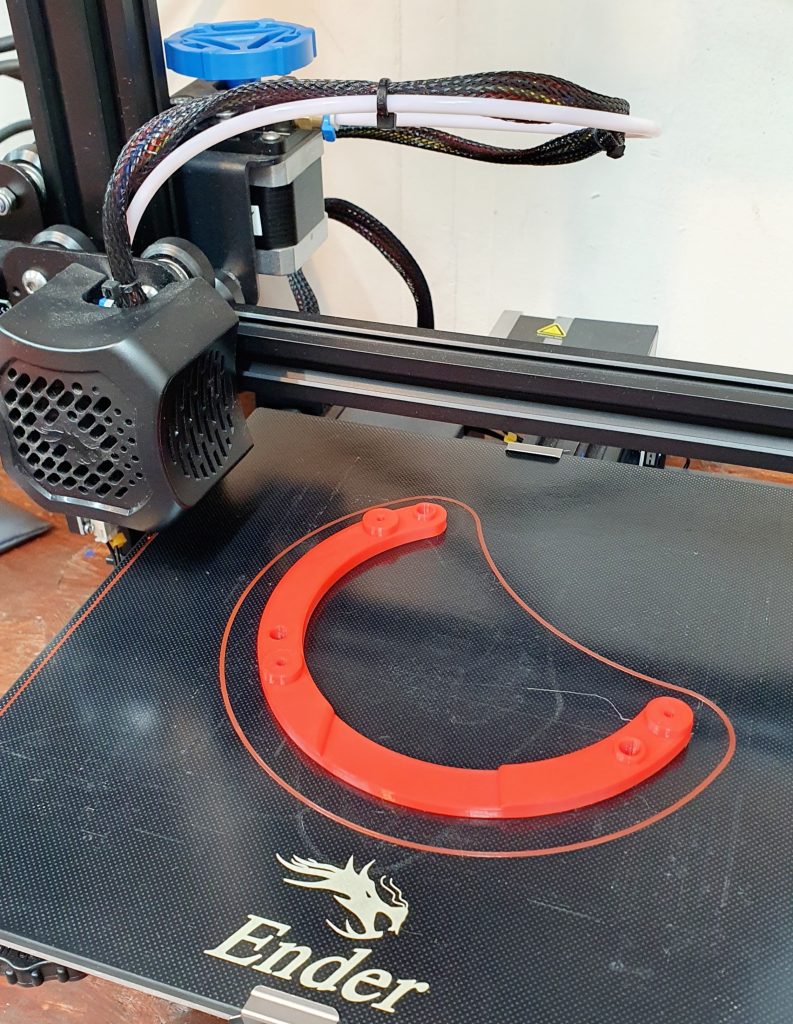
You can download the CAD STL file from the link below and print it yourself on a 3D printer.
I used the following settings on my Ender 3 V2 3D Printer:
- Filament Material: PLA (I used eSun PLA+)
- Rafts: Doesn’t Matter
- Supports: Doesn’t Matter
- Resolution: 0.2mm
- Infill: 20%
- Wall Count: 4 (1.6mm) – this is to allow sufficient wall thickness for tapping the thread.
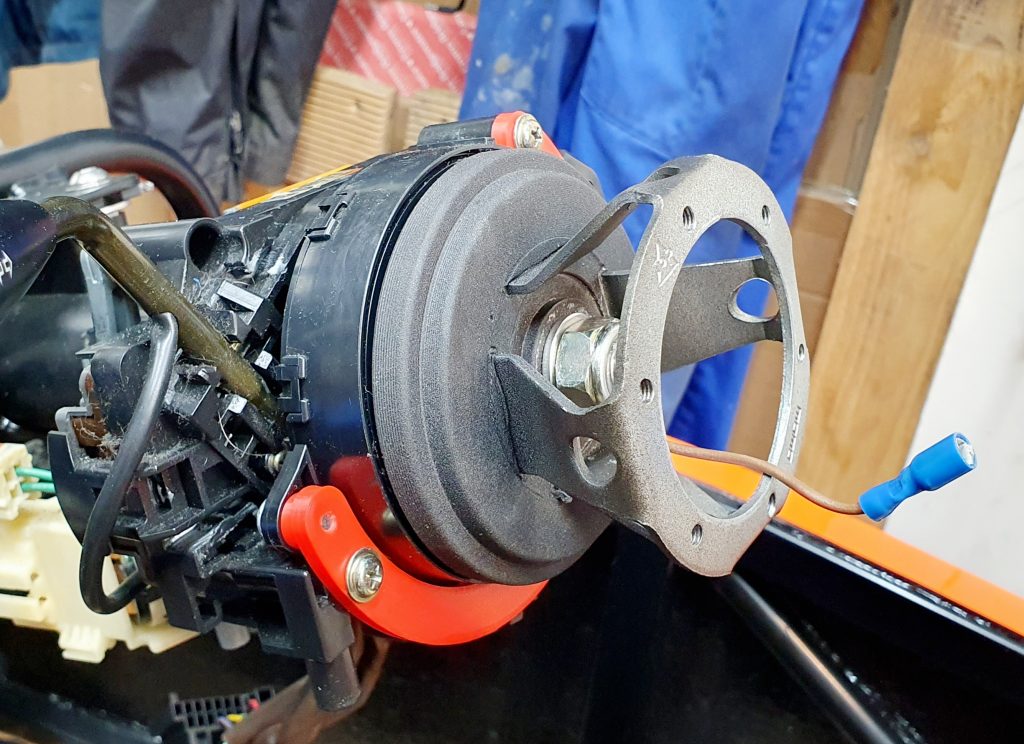
I then 3D printed the adapter and tapped the smaller 3mm holes with a M4 thread. I then mounted the Adapter bracket to the clock spring first with short M4 screws.
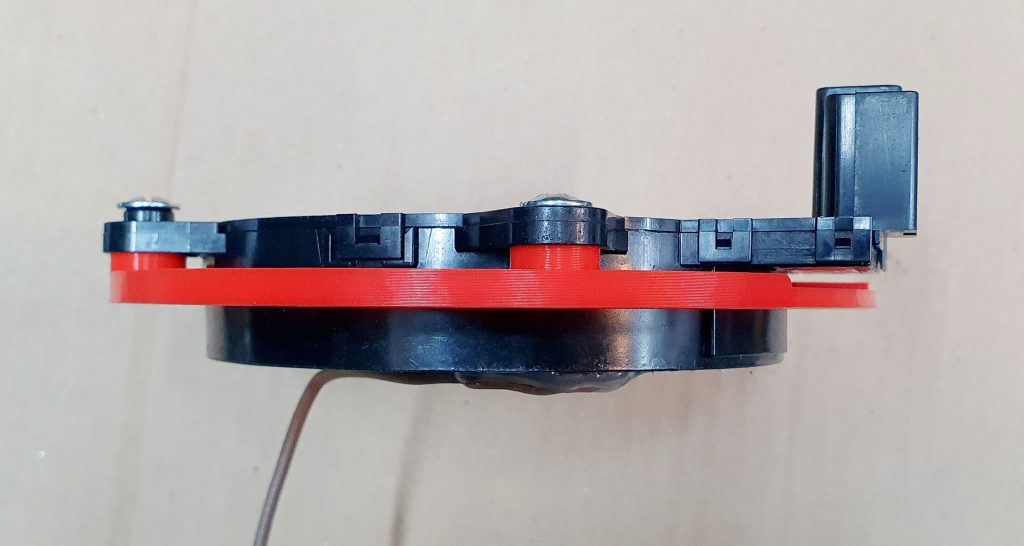
I then used the new fixing points on the adapter to mount the clock spring to the steering column. Then the Momo boss has sufficient room now to connect fully to the spline with the clock spring in place.
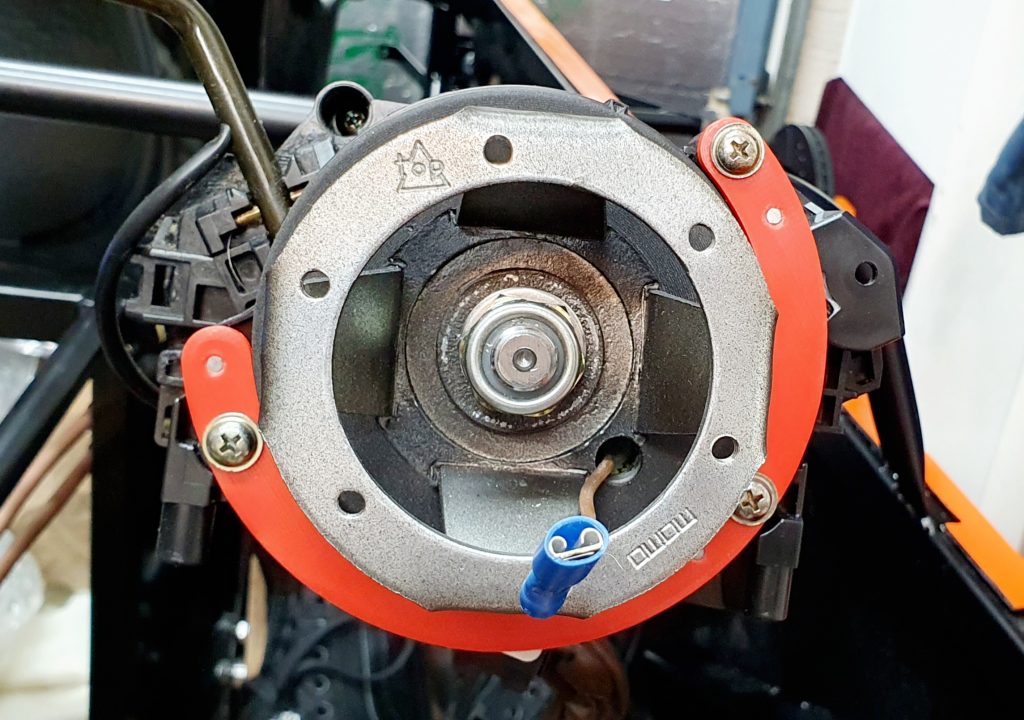
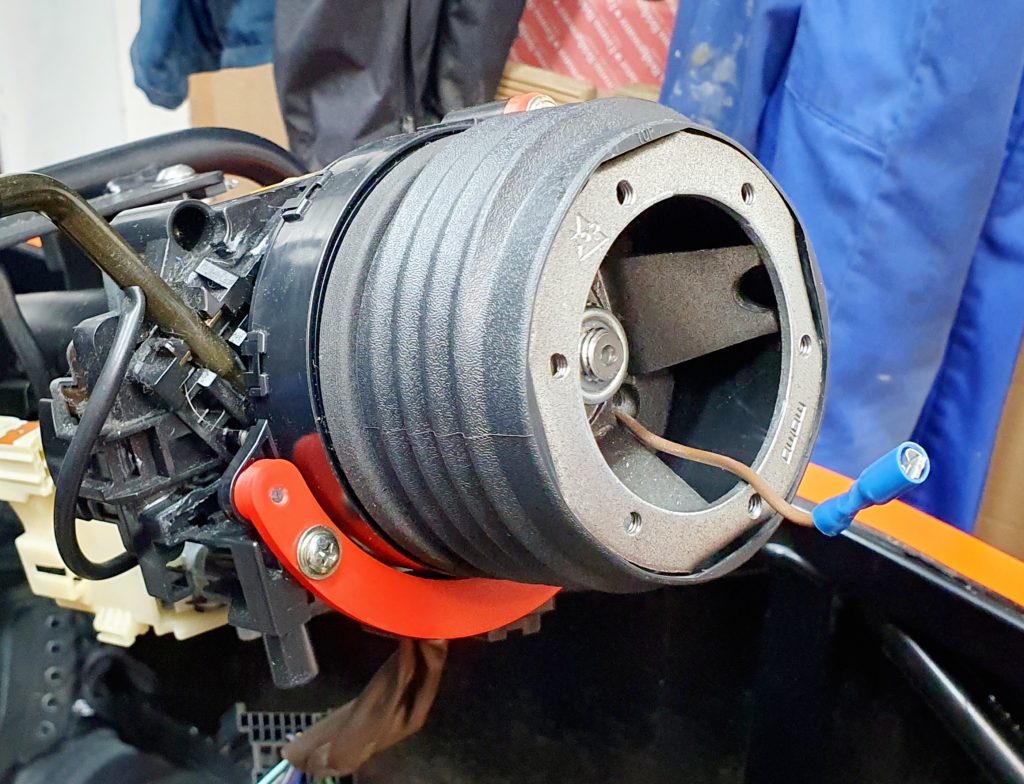
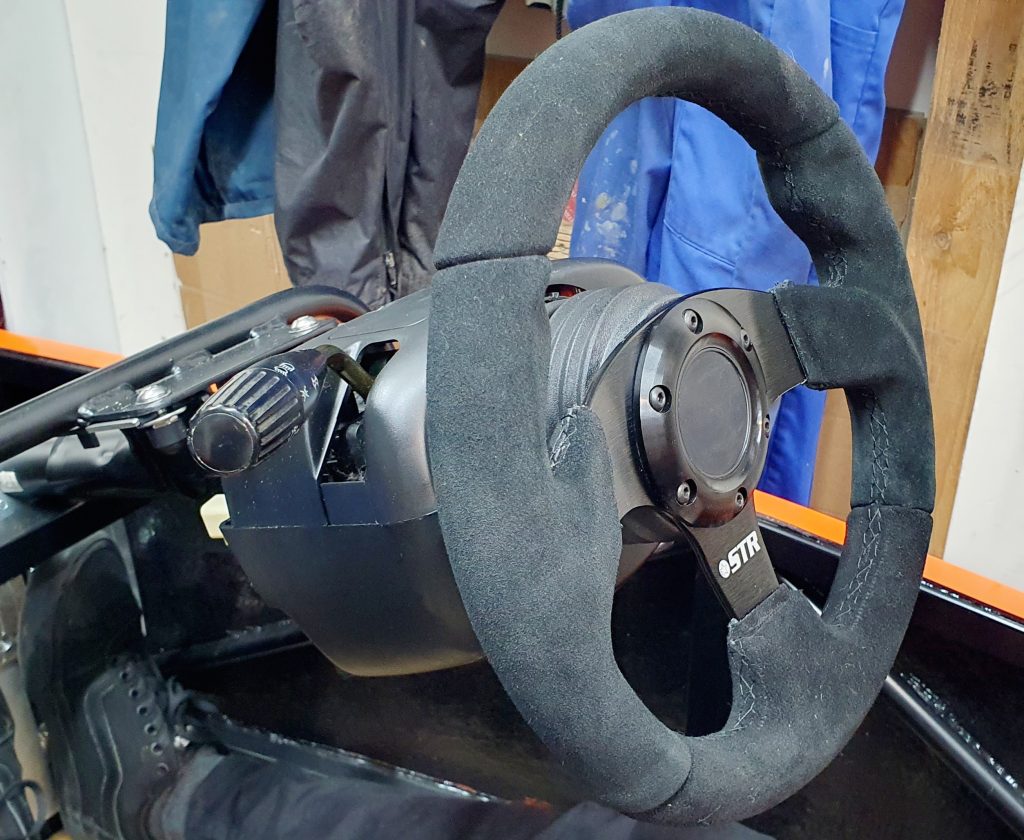
You can now mount the steering column surrounds back in place. Then mount the steering wheel to the boss connecting up the horn connection from the clock spring
Summary
It ends up with a very neat solution to provide a reliable horn connection for the collapsible Momo steering wheel boss. This allows the horn to work as normal with an after-market steering wheel.
Summary of Build Costs and Hours
Here is a summary of the costs and person hours (total number of hours for every person that has helped) for the build so far. This should hopefully help others with the planning of their builds, by providing cost and time actually incurred for this build. A more detailed breakdown of all the costs and hours worked on the build to date can be viewed here.
| Person Hours Worked This Post | |
|---|---|
| CAD Design of Clock Spring Adapter Bracket | 2 hrs |
| Fitment of Clock Spring | 1 hrs |
| Totals | This Post | To Date | All Posts |
|---|---|---|---|
| Person Hours Worked | 3 hrs | 363 hrs | 500 hrs |
| Car Build | £0 | £12,349 | £13,956 |
| Tools / Consumables | £0 | £459 | £470 |
| Total Cost | £0 | £12,808 | £14,426 |

Great job, thanks for publishing this. I’m not yet sure if I’ll need it for my RX-5 build but it’s good to have it available if I do.
I cannot get this to fit properly, when at look at your picture’s there’s a gap in between the hub and the clockspring.
For me that gap isn’t there, the steering wheel rubs so hard on the clockspring that it’s difficult to turn.
This is an NB MX5, maybe that creates a problem somewhere