
I have painted the Mazda MX-5 engine so, now it is time for painting the Mazda MX-5 gearbox and other engine parts.
I was really pleased with the results of painting my engine block so, I decided to adopt the same approach for the gearbox and other engine parts. The items left to paint were:
- Gearbox
- Inlet plenum/ manifold
- Variable Valve Timing (VVT) housing and pipework.
- Auxillary pulleys.
- Camshaft Cover
Painting the Gearbox and Engine Parts
I cleaned the gearbox and other engine parts in the same way as the engine. I used Gunk degreaser, wire brushes on my drill and a final clean with Holts brake cleaner. Then I masked up the areas I didn’t want to paint with 3M blue masking tape.
The same VHT paint system that I used for the engine in my last post was used for the gearbox. I had already bought enough paint for this purpose. I set up my paint booth again at the end of my garage and heated the area to +20degC. Then I also used a hairdryer to warm up the gearbox casing and engine parts to help with paint adhesion. I also heated the paint cans in warm water before using them.
The same paint process as I used before for the engine was used for painting the Mazda MX-5 gearbox:
- Primer – 1st light coat > wait 10mins > 2nd light coat > wait 10mins > medium wet coat > wait 30mins before emamel colour coat.
- Emamel Colour Coat – 1st light coat > wait 10mins > 2nd light coat > wait 10mins > medium wet coat > wait 30mins before clear gloss coat.
- Clear Gloss – 1st light coat > wait 10mins > 2nd light coat > wait 10mins > medium wet coat > wait 30mins before taking masking tape off.
I used a Simoniz Gloss Black Engine Enamel spray paint for the engine pulleys instead of the VHT paint.
Photos of Painting


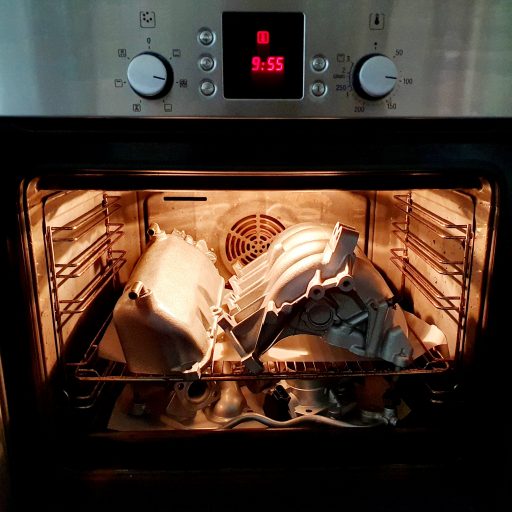
Curing Smaller Parts
The VHT paint states on the instructions that the paint isn’t fully durable and resistant to oil and fuel until it has been cured. To do this the parts need to be heated to 93degC for 1 hour. For most parts, this will naturally happen as the engine is used and goes through its heat cycle. However, I thought I would give the smaller parts a helping hand by putting them in our fan-assisted electric oven for the same heat and duration. My wife looked at me like I was barking mad, but didn’t stop me…
Time-lapse Video of Painting
Camshaft Cover Finish Choice
I decided I didn’t want to paint the camshaft cover myself, I wanted a better finish than a rattle can by me. I narrowed it down to 2 options which I got quotes for.
- Powder-coated in a black satin crinkle finish – £60.
- Hydro dipped in a carbon fibre effect – £100.
Here are the images that inspired me with the black power-coated option on the left vs carbon fibre effect hydro dip on the right.
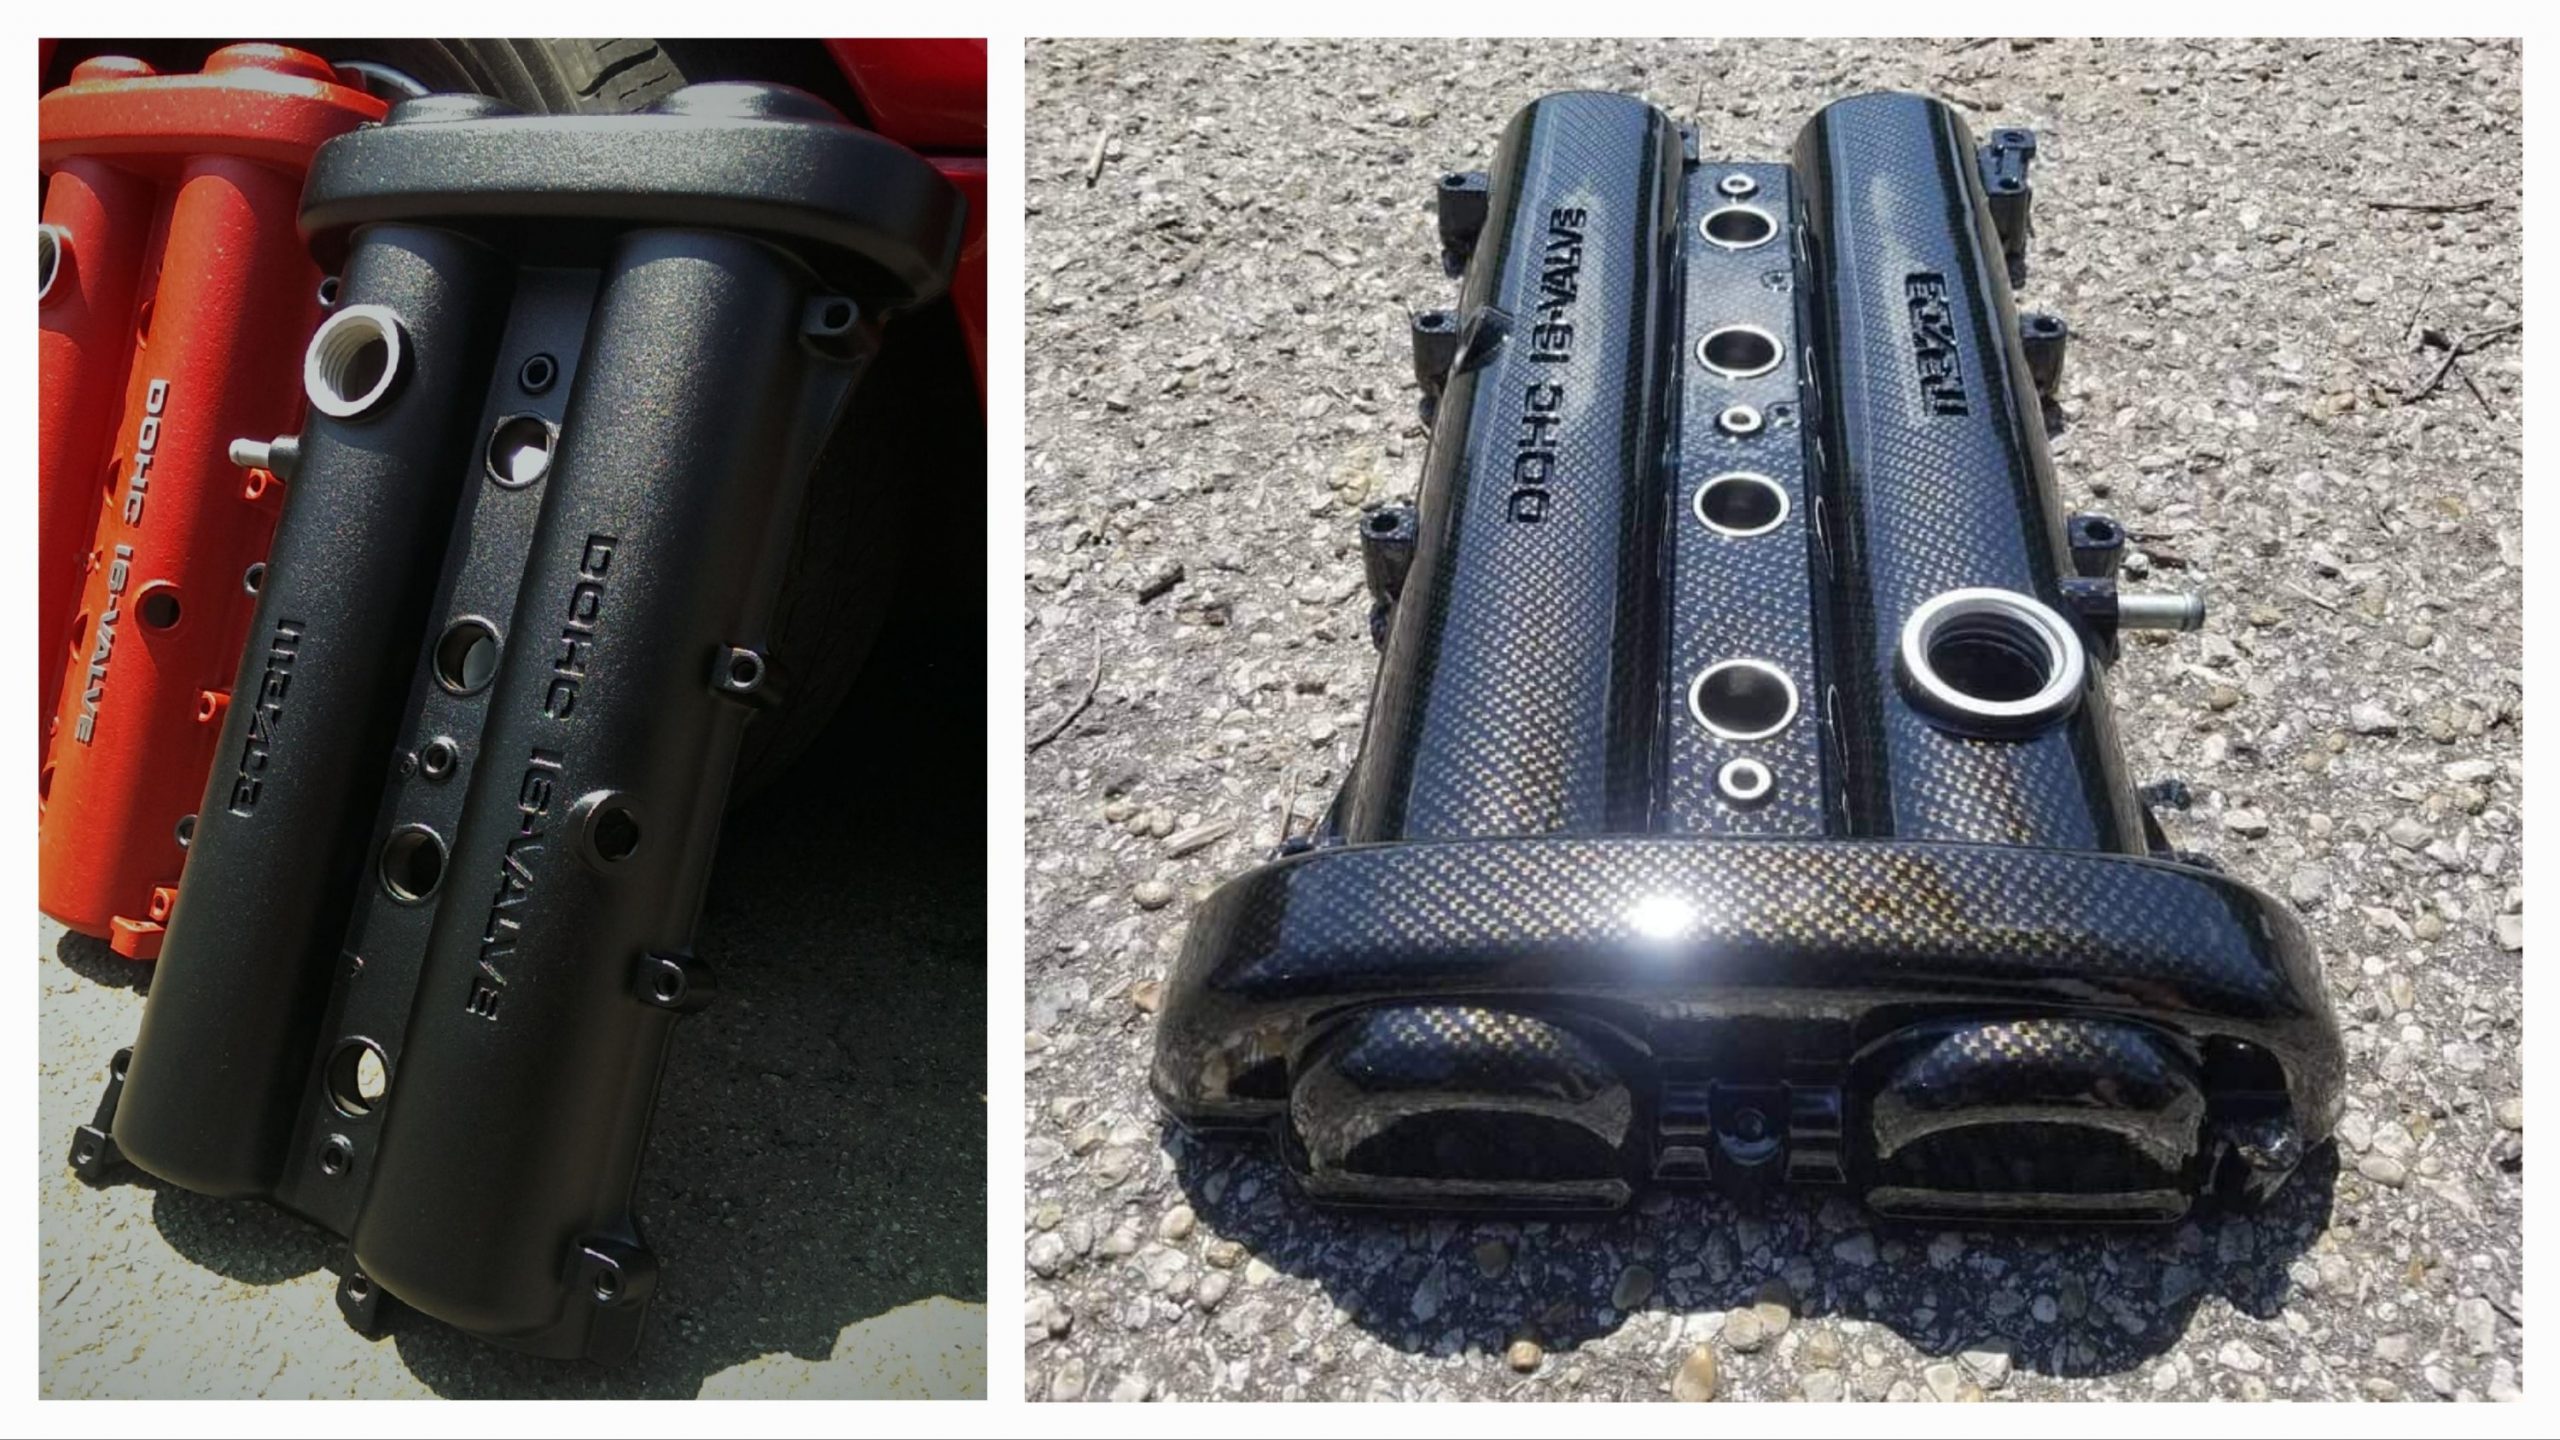
I decided, in the end, to keep it simple and go for the powder coating in black. Whilst the carbon fibre effect might have worked well and may have complimented the other real carbon on the car, I was concerned it might end up looking a bit cheap if I didn’t get quite the right print. Also, the closest place I could find to do the hydro dipping was a good hour away so, it was a long way to drive to look at samples.
Powder Coating Camshaft Cover
Once I had decided on the black powder coat option I set about finding a local place that could do the job well. I found quickly on Google Griff’s Reality Motorworks which specialises in powder coating motorcycle parts amongst other things. They have really good reviews on Google and they responded with a quote on email quickly.
Griff’s Reality Motorworks also asked if the cover was baffled and if the baffles could be removed. They were concerned about vapour blast material getting stuck in any baffled areas. This gave me confidence that they knew what they were doing. I confirmed to them that I had already removed the baffles from the cover. Total quote of £60 for full vapour blast, clean and powder coat in a satin, crinkle black.
I took it down there and collected it 3 weeks later. They had been very busy so it took a bit longer than originally hoped. However, I wasn’t in a rush for it and the finish was absolutely spot on! I’m so pleased with the finish and it reinforced that I made the right decision for Powder Coating.
Camshaft Cover Photos


Summary of Build Costs and Hours
Here is a summary of the costs and person hours (total number of hours for every person that has helped) for the build so far. This should hopefully help others with the planning of their builds, by providing cost and time actually incurred for this build. A more detailed breakdown of all the costs and hours worked on the build to date can be viewed here.
| Person Hours Worked This Post | |
|---|---|
| Paint Gearbox and Engine Parts | 8 hrs |
| Car Build Costs This Post | |
|---|---|
| Powder Coat Camshaft Cover | £60 |
| Simoniz Gloss Black Engine Paint 400ml | £9 |
| Totals | This Post | To Date | All Posts |
|---|---|---|---|
| Person Hours Worked | 8 hrs | 211 hrs | 500 hrs |
| Car Build | £69 | £1,506 | £13,956 |
| Tools / Consumables | £0 | £314 | £470 |
| Total Cost | £69 | £1,820 | £14,426 |
