
So I finally bought the right donor vehicle for building the MK Indy RX-5. My next challenge was to clear my garage and to plan how I was going to strip the Mazda MX5 donor vehicle to start the project.
Clearing Garage
In January 2021 my garage was frankly a complete and utter tip. It was filled with a lot of leftover cardboard boxes from Christmas and many packing boxes were still untouched from when we moved in nearly 4 years ago! It was time to start clearing and sorting what will become the new home for my RX-5.
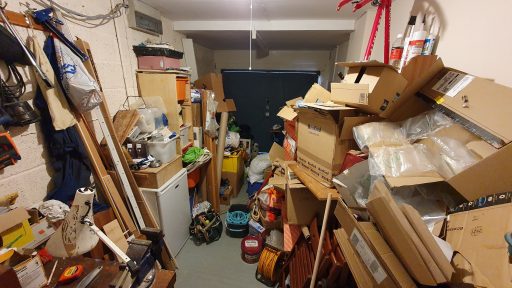
My quest to clear space led to the inevitable mess spreading through the house as I dragged box after box into the house to sort through and find new homes for the contents. My poor wife despaired as the garage gradually cleared it seemed for a while it was simply making the lounge much messier! After several weeks of hard graft and many, many shelves being built and boxes emptied, the space was finally clear. I also added a 2kW heater to the wall and I plan to insulate the garage door to hopefully make it more bearable during the winter months.

Research in How To Strip a Mazda MX5
So alongside clearing the garage I started to research the work that lay ahead. I needed to work out how to strip the Mazda MX5 donor vehicle. This is where I found some great videos on YouTube that give a good overview of the process and what to look out for.
I stumbled across a great YouTube series by Pixel Armory who used a Mazda MX5 NB Mk2 to build a MEV Exocet. This is a build series of videos with the first 8 episodes being the most useful showing how they managed to strip their Mazda MX5 donor vehicle.
Here are some observations to bear in mind of the differences for an MK Indy RX-5 strip down vs the Exocet.
- The MEV Exocet reuses the whole ‘rollerskate’ so all of the subframes and suspension. This is not the case for the RX-5 so you don’t need to worry about some of the bits they reuse.
- Pixel Armoury doesn’t really cover the reconditioning of the engine or gearbox as the car was theirs beforehand and therefore it had a known service history. You may want to do more of a refurb to the engine and gearbox. I certainly plan to.
- The trim level varies from car to car which means different wiring harnesses and bits you may or may not have to remove. The Pixel Armoury Mk2 NB has Air Conditioning, I’m lucky mine doesn’t, so one less thing to remove and worry about.
- The steering wheel is on the wrong side of the car…
I also found another YouTube series called Building the Exocet which stripped an Mk1 MX5 again for building an Exocet. It shows some of the same strip processes on another car. I found viewing both of the series useful as you pick up different things from both.
These are both great resources to really help you understand what it will take to strip the donor vehicle.
Tools Needed
Here is a list of the tools I think I will need for the strip of the Mazda MX5 donor vehicle. Some I already had, some I bought for this job.
Tools I Already Had
- 1/2 inch socket set 12 point;
- 3/8 inch socket set;
- 2x Axle Stands 2T;
- Breaker bar;
- Hydraulic jack;
- Side cutters large and small;
- A range of screwdrivers and driver bits;
- Electric drill;
- A range of pliers and mole grips;
- Angle grinder;
- Dremel;
- Several torches including head torch (although I plan to do the strip down outside so hopefully won’t need a torch!);
- Gloves and Safety Goggles;
- Some Plus Gas, GT85, and other penetrating oils;
Purchased Tools
- 1/2 inch socket set 6 point 18 pcs 10-32mm;
- 1/2 inch extractor set 17, 19, 21, and 22mm;
- Draper Flare Nut Spanner set 6-22mm;
- 4x Ratchet Axle Stands 2T;
- 4x wheel chocks;
- 2T Engine Hoist – kindly given to me by a friend;
- Clarke Impact Driver – kindly given to me by a friend;
- Electrical tape for labeling connectors;
- Cable ties;
- Ziplock bags;
- More Plus Gas Penetrating Oil 400ml.
Planned Approach
I plan to follow the general approach in the Pixel Armoury videos as this seemed to work well for them. My general approach is to get as many of the large components removed early and out of the way to make it easier to get to wiring etc. So here is the planned order for stripping the vehicle:
- Seats;
- Parcel shelf carpet;
- Soft top;
- Doors;
- Bonnet/ hood;
- Boot/ trunk;
- Wings/ fenders Front and Rear;
- Bumper Front and Rear;
- Lights Front and Rear;
- Rear shelf above fuel tank;
- Centre console;
- Interior carpets;
- Steering wheel;
- Dashboard;
- Pedal box;
- Wiring harness (this in 3 main sections);
- Radiator and piping;
- Heater matrix;
- Exhaust;
- Drain and disconnect hydraulics for brakes.
- Disconnect handbrake;
- Drain fuel tank and disconnect fuel system from the engine;
- Final preparation for the separation of shell from rollerskate, removing the main bolts and unbolting shock mounts;
Keeping Organised
The wiring harness is the most time-consuming single job on the list as there are 3 separate harnesses going to all the extremes of the car. I plan to carefully label each connector on the harness once removed with a simple wrap-around strip of electrical tape and a permanent marker pen. This way it will make the sorting out of the wiring loom much easier later on.
I plan to reuse the entire loom but I will properly remove all of the sections I do not need (e.g. Window switches). One good thing about the MX5 loom is that pretty much every connector is unique which also helps to know what goes where.
I also plan to use sandwich zip lock bags to put bolts and fixings for all things removed from the car. Then cable tie the bag to the item so it keeps everything organised and nothing gets lost.
A Helping Hand
So I plan to start the strip of the vehicle at the beginning of June. I will be stripping the Mazda MX5 donor vehicle on the drive, so hopefully, the weather will be better by then as it is miserable at the moment. Worst case scenario I have a large event shelter I can put over the car to give some cover if it rains.
I have enlisted the help of my Dad for stripping the MX5 as he is a true legend when it comes to all things engineering and car-related. He has been my engineering inspiration since I was I boy and has just turned 80, I couldn’t do this without him being by my side. I have also enlisted the help of a good friend of mine who is a car nut and can tell most cars just from their headlights. Both have been given the homework of watching the YouTube videos. So the team is born…
Summary
So I’m as ready as I can be for the strip of the donor vehicle. A final check of all my tools and a re-watch of the first few YouTube videos and we are ready to start the strip of the MX5 donor for real! Fingers crossed.
Summary of Build Costs and Hours
Here is a summary of the costs and person hours (total number of hours for every person that has helped) for the build so far. This should hopefully help others with the planning of their builds, by providing cost and time actually incurred for this build. A more detailed breakdown of all the costs and hours worked on the build to date can be viewed here.
| Tool Costs This Post | |
|---|---|
| 1/2 inch socket set 6 point 18pcs 10-32mm | £34 |
| 1/2 inch extractor set 17, 19, 21 and 22mm | £22 |
| Draper Flare Nut Spanner set 6-22mm | £22 |
| 4x Ratchet Axle Stands 2T | £60 |
| 4x wheel chocks | £10 |
| 2T Engine Hoist - kindly given to me by a friend | £0 |
| Clarke Impact Driver - kindly given to me by a friend | £0 |
| Electrical tape for labelling connectors | £8 |
| Cable ties | £3 |
| Zip Lock Bags | £3 |
| Plus Gas Penetrating Oil 400ml | £6 |
| Totals | This Post | To Date | All Posts |
|---|---|---|---|
| Person Hours Worked | 0 hrs | 0 hrs | 363 hrs |
| Car Build | £0 | £765 | £12,342 |
| Tools / Consumables | £168 | £168 | £459 |
| Total Cost | £168 | £933 | £12,801 |