
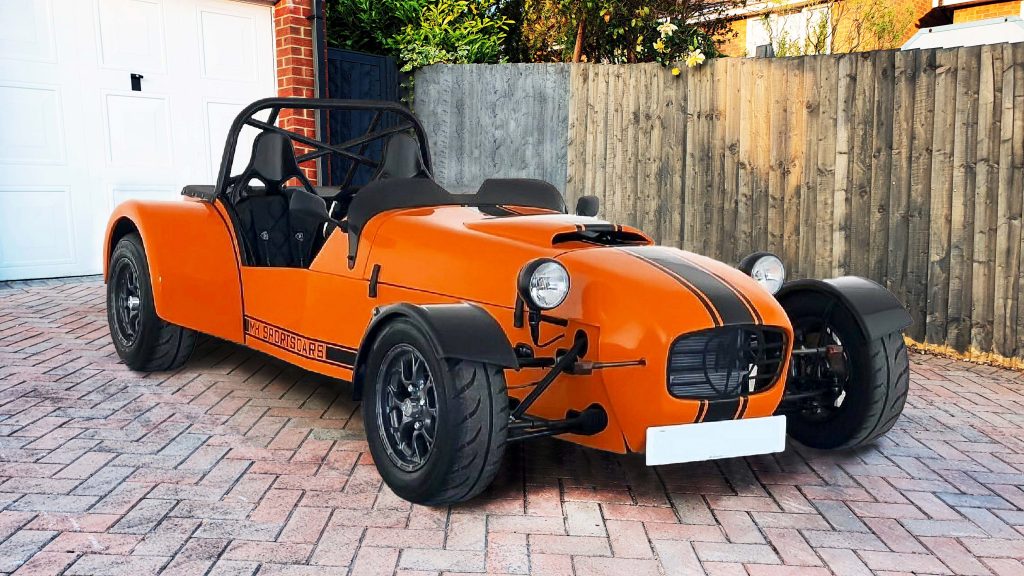
So I have finally decided to order my MK Indy RX-5 kit so I can start the build of my car. I have already stripped my MX-5 donor vehicle ready for the build and have been for a test drive in the MK Sportscars MK Indy RX-5 Turbo demonstrator. So really there was only one thing left to do and get on and order the kit!
Ordering my Kit
The MK Sportscars Ordering Process
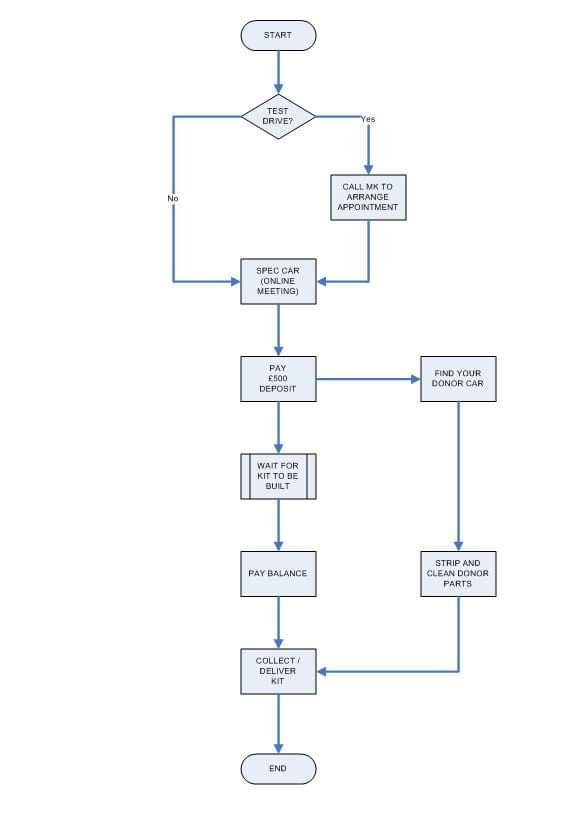
MK Sportscars have a handy flow chart to show the process. Neil assured me that despite the flow chart indicating that if you find your own donor car you can’t actually skip paying of the final balance and get a kit for only £500! Oh well, it was worth a try!
I was very much in the ‘spec car‘ box at this stage. So, I clearly needed to work out what options I was going for. Fortunately again MK Sportcars have a handy spreadsheet showing the full contents of the RX-5 kit. This has a plethora of options to choose from. I love a good spreadsheet! So, I had actually downloaded this a while ago and created my own kit car cost/ budget spreadsheet to record all my thoughts.
One thing to remember is that this is not an order form. The costs in the spreadsheet are not dynamically linked to the website where the latest prices are. It is updated quite frequently but you will need to check the website for the latest costs for each item if you want to get to the right level of pence. It is very good though and gives an accurate figure for the cost of your build and the kit.
So I had already chosen the Mazda MX-5 route which leads to the RX-5 spreadsheet linked above. There are other spreadsheets for all the different MK Indy sports car versions. This includes the classic, R and RR on their website from the menu.
Zoom Call
Once I had worked out the details of my order, which you can see further down, I arranged a Zoom call with Neil to run through it all.
This was a really great way to talk through my list of options and to get Neil’s input where I had questions or were unsure about anything. Neil was great with advice and suggestions but wasn’t pushy in any way. It is very much a bespoke service of helping you to get the kit right for you.
I spent 2 hours going through the spec for my car with Neil and was very happy in the end with the decisions I made. I then finalised my version of the spreadsheet after the call and emailed it to Neil as my formal order. This then gets loaded onto the MK Sportscars system and you get various emails confirming your order. All that is needed to secure your order in the queue is a £500 deposit.
I ordered my kit in November 21 with a forecast date for the kit being ready for March 22 so 4 months. For me, this was good news as I didn’t want it too soon as I still have all the donor parts to refurbish!
Chosen Specification Overview
- RX-5 standard poly bush chassis, power coated in black with matching black floor pan and bosses welded on for anti roll bars.
- Standard x-brace roll over protection.
- Orange body panels with the newer SX bonnet and SX nose cone.
- Standard Mazda clocks GRP dashboard with black GRP tunnel top, tunnel sides and back panel.
- GRP high sided seats with 3″ FIA harnesses.
- Carbon exhaust.
- Carbon stone guards.
- Carbon front Cycle wings.
- Carbon effect boot cover.
- Carbon Stripes.
- Billet pedal box with individual brake fluid pots.
- 55mm aluminium radiator with 120w fan and OBP header tank.
- Standard Caterham 7 headlights.
- Rear LED light pack.
Chosen Specification Detail
So here is a more detailed rundown of the options I selected and the choices I made. My strategy with this build and specification is to future proof it as much as possible. I do intend to go down the turbo route later on. So, I wanted to spec the build with that in mind.
Chassis
I chose the standard black powder-coated chassis. I included the option for the welded bosses for the front and rear Antiroll bars. This is so it can easily be added later on if I decided I wanted it. This is not detailed in the spreadsheet as an option but one that Neil will add to the order if you want it.
From all accounts, the vehicle is very capable without the Antiroll bars. Most people don’t run them even on the track. However, I don’t want to rule it out as an option in the future. This is part of my future-proofing plan.
The floor pan is normally provided bare metal if you are fitting it yourself so that you drill all the holes for the rivets before you do the powder coat. If you want MK to powder coat the floor they will pre-drill the holes in the floor and chassis then powder coat the floor for you so it is ready to fit. For this, you need to select their floor fitting service from the options menu. I have opted for this service as I want to fit the floor myself along with me fitting the brake pipes etc but I want the floor powder coated so it is ready to fit. A slight cop out maybe but one area that will speed my build up a bit at the start.
Roll Over Protection
I have chosen the simple X-brace for the rollover protection. Personally, I prefer the look without a full roll cage and most of my planned use (at the moment) will be road rather than the track.
Of course, with the MK design of modularity, it means I can remove the X-brace and change to a full cage later on if I want with 20 bolts to secure in a full cage.
Body Panels
So you have probably already worked out the colour I’m going for with the reoccurring colour theme on this website… For me, it has to be orange! I wanted a bright colour for the car so it is easy to spot in traffic and pulling out of junctions etc. I have always had a love for orange so it didn’t need much deliberation.
For the bonnet, I have gone for the newer SX version. This is because I have the Mk2.5 MX-5 as my donor with the VVT which needs the extra clearance. I have also gone for the newer SX nose cone to make it more streamlined. This means I will also have the honeycomb style grill. The older MK Logo grill doesn’t fit the SX nose cone. I actually prefer the look with the honeycomb grill so I am happy with this. I have also gone for orange body-coloured rear arches.
Interior
So for the interior, I’m going to keep it simple and utilise as much from the MX-5 donor as possible. I’m going for the standard MK Indy RX-5 sports car GRP dashboard that houses the standard MX-5 clocks. Also, I will use the standard MX-5 steering column with indicator stalks and switches. The only additional switches you then need are the fog light, hazards light and dash brightness dial. This is by far the easiest way to get the car on the road using all the existing switches and dials. It is a more straightforward plug and play approach. It is not the prettiest of dashboards compared to a nice flat carbon affair. However, I can always upgrade this later on.
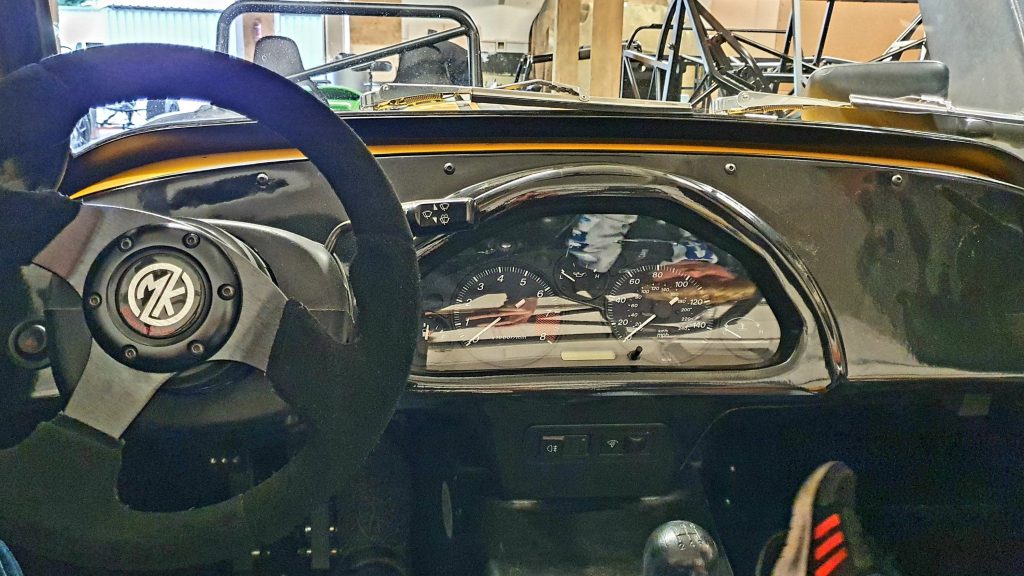
With the dash being standard black GRP, I’m also sticking with the black GRP tunnel top, sides and black aluminium rear panels. I’ve gone for the 280mm steering wheel (as above). I already have the MK gear knob which was given to me as a present.
Seats
I’ve gone for the high sided black GRP seats, these are much more supportive than the low side version. I don’t have a particularly large frame so I need all the support I can get! I have specced an adjustable runner for the driver’s seat and will have the passenger fixed.
The one area I have upgraded from the standard offering is seat belts. Trying both options out on my visit to MK Sportcars made that decision easy.
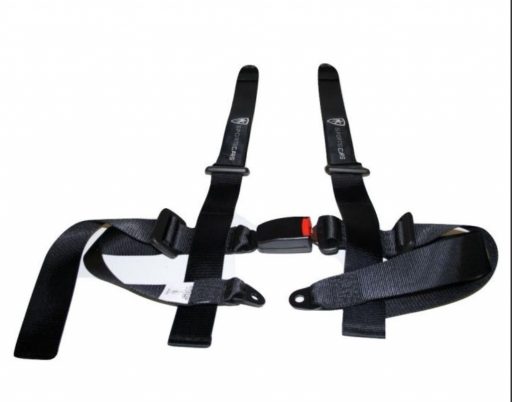
The thinner 2″ budget harness is essentially 2x fixed hoops on either side fixed above your shoulder to by your hip with a single loop. The 2x loops are joined together with a traditional car buckle. These are a bit of a faff to get out of as you have to put them on like a rucksack. They will also slow you down trying to get out in an emergency.
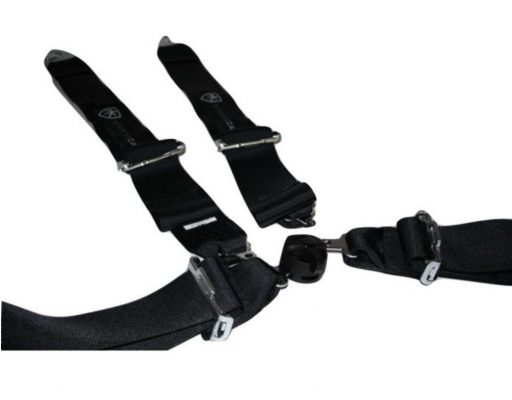
The 3″ harness has a more traditional 4 point harness buckle where there are 4 individual straps that all connect into the one buckle. This harness is also FIA approved. I tried both harnesses when I visited MK. The 3″ harness is much easier to put on and to get undone. It also has a wider strap which gives you more support when strapped in. You can also easily open the buckle single-handedly which makes getting out in an emergency quicker.
Carbon
So I wanted to add a bit of carbon to the build, but at the same time not overdo it. The interior of the car will be carbon-free (for the moment), so I wanted a few bits external.
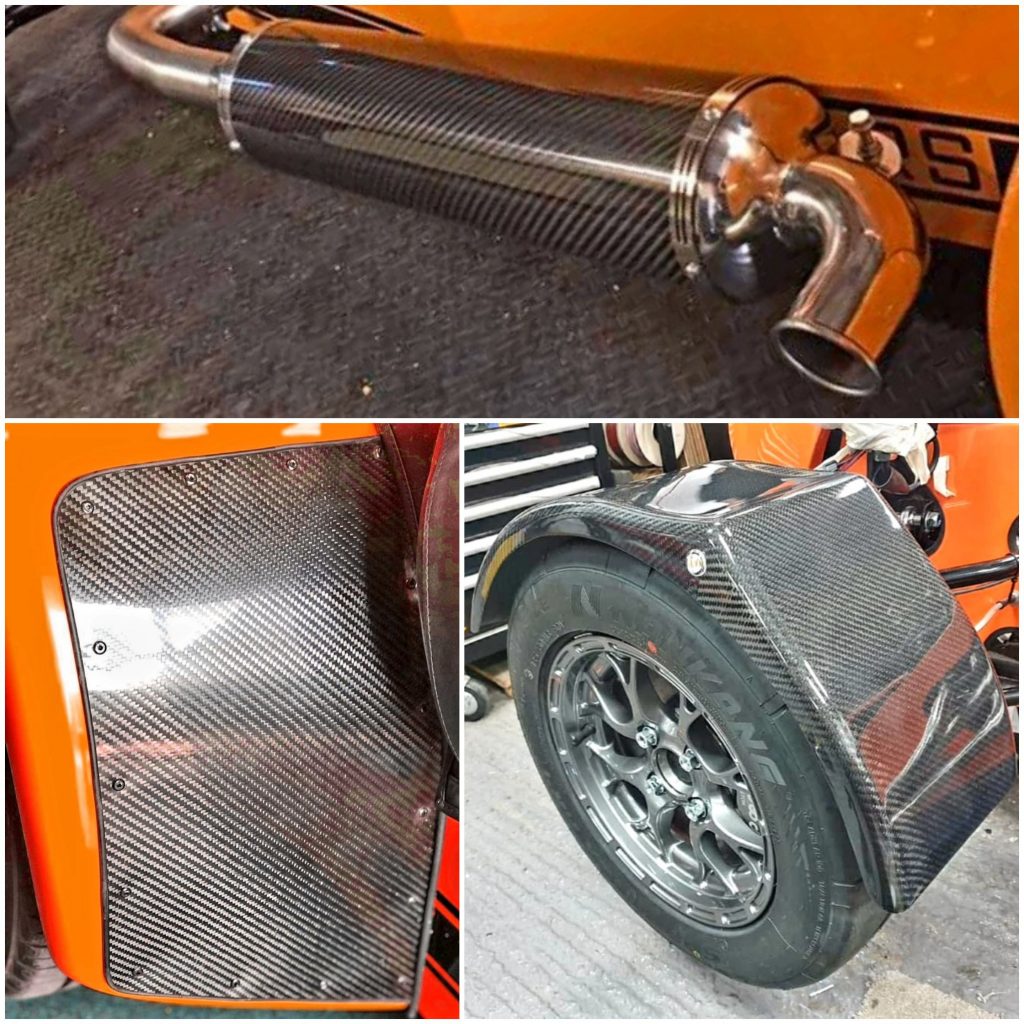
So I’ve gone for body-coloured rear arches but with carbon, stone guards to break up the colour. I’ve also gone for the carbon silencer as I think this looks a lot better when seeing the options up close. It also ties in with the stone guards nicely. Then finally after much deliberation, I went for carbon front cycle wings as well to bring it all together.
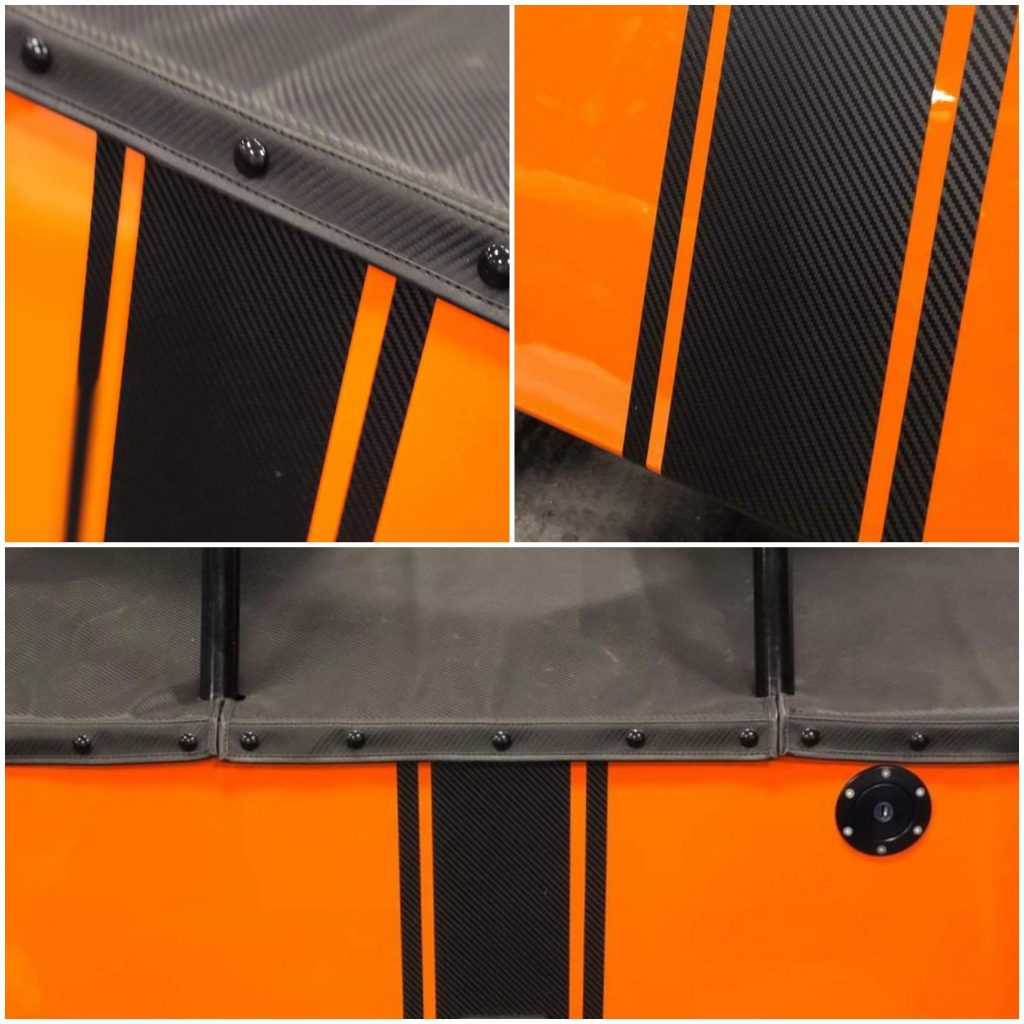
Then to top it all off I’ve also gone for the carbon effect stripe pack and carbon effect boot cover. This is to keep the carbon theme throughout the car.
Pedal Box
One of the areas I wanted to upgrade was the pedal box. The standard ‘value’ pedal box is quite flimsy with no adjustment. I think actually now MK Sportcars have removed this from the standard kit list. Theye have replaced it with the much better billet version below.
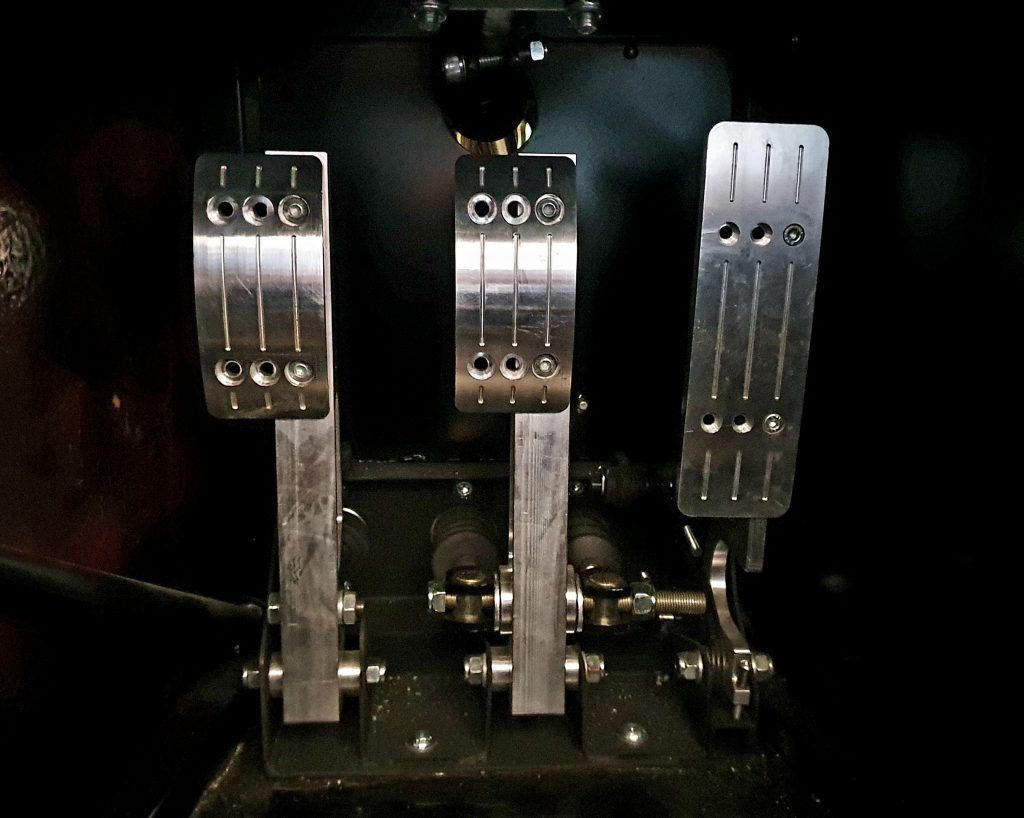
So I have gone for the standard billet pedal box instead which is £200 more than the ‘budget’ offering. In my opinion, it is more than worth it. Considering this is one of the key elements of your control of the car I think it is best to get it right! It comes with front/ rear brake bias control and adjustable pedal spacing (3 positions on the pedal to move each left and right).
To go with this I have also gone for individual brake fluid reservoir pots. This is instead of the standard twin fluid reservoir below.
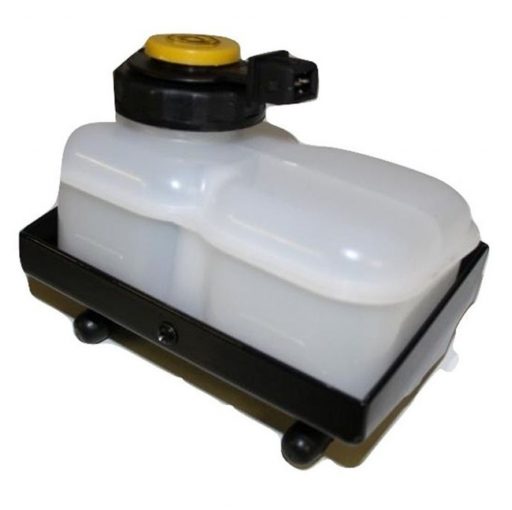
The individual pots give a much better seal than the standard twin fluid reservoir. So, much better if I ever want to take the car on the track for stopping leaks. I am planning on mounting the pots up higher next to the coolant header tank. This is instead of on the master cylinders and using a braided hose to join to the master cylinder. This will provide better access for maintenance.
Radiator
I have also upgraded the radiator to the standard aluminium 55mm core version. This makes it easier later on to get bosses welded on to add an intercooler if I go for turbo.
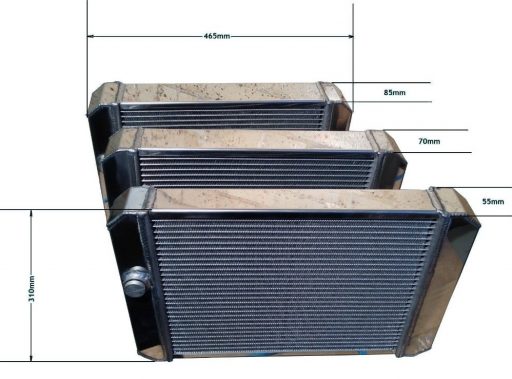
So again I’ve tried to future proof my build so I don’t waste buying the wrong radiator now. It also provides leak-free much-improved cooling over the budget offering. I have also complemented this with the larger 120w fan which is also suitable for turbo upgrade later on.
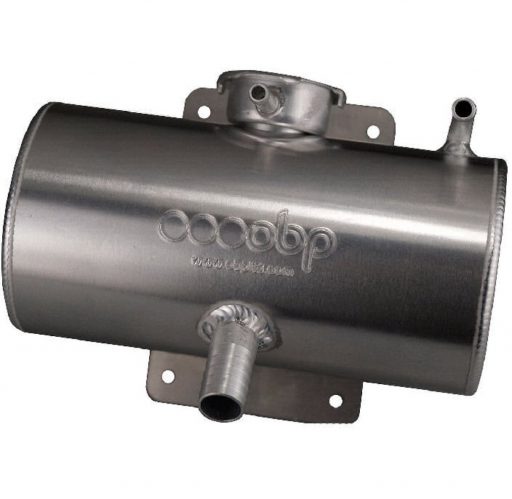
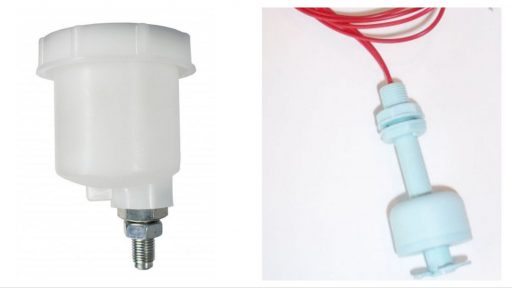
I have also gone for the OBP aluminium header tank instead of the standard plastic one. This provides better sealing and general aesthetics.
Lights
I have gone for the standard halogen Caterham 7 front lights. The LED versions are great, but they won’t pass IVA. So, it is pretty standard to go for the standard lights despite their actual performance being pretty poor.
For the rear, I have upgraded to the LED rear light pack. This has become quite standard in a lot of the builds. I think they look very neat and exactly the style I was after.

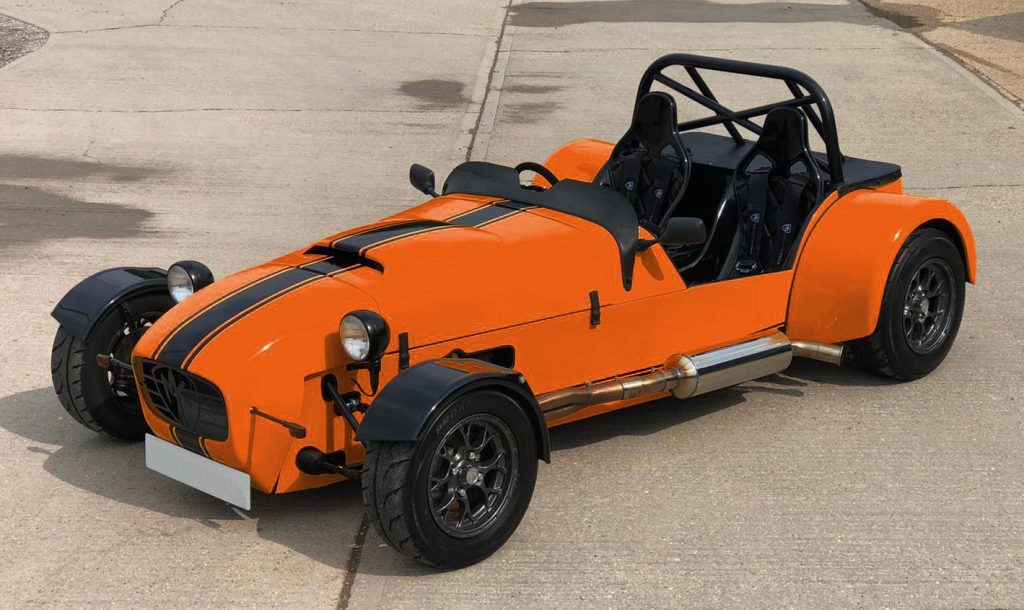
Overall Impression
Here is an overall impression of the style I’m going for with the build of my MK Indy RX-5. It has a recurring theme of orange and black throughout. I will initially go for no screen to get it through IVA then add a full windscreen later on for comfort.
Summary of Build Costs and Hours
Here is a summary of the costs and person hours (total number of hours for every person that has helped) for the build so far. This should hopefully help others with the planning of their builds, by providing cost and time actually incurred for this build. A more detailed breakdown of all the costs and hours worked on the build to date can be viewed here.
| Car Build Costs This Post | |
|---|---|
| MK Sportscars Deposit for the Kit | £500 |
| Totals | This Post | To Date | All Posts |
|---|---|---|---|
| Person Hours Worked | 0 hrs | 161 hrs | 363 hrs |
| Car Build | £500 | £725 | £12,342 |
| Tools / Consumables | £0 | £237 | £459 |
| Total Cost | £500 | £962 | £12,801 |
Great article. Really like your spec. If you are collecting your kit let me know, via MK Owners FB group, and I’ll take you out in my K20 MK. You saw it in the very early stages of build when you all visted MK last year.
Simon
Thanks for the offer Simon, your build is looking great, love the colour scheme coming together nicely. It must be close to being finished now! That K20 is going to be great fun!